Yamaha RX Z9 MCXSP10 Manual
Yamaha RX Z9 - AV Receiver Manual
 |
UPC - 027108918204
View all Yamaha RX Z9 manuals
Add to My Manuals
Save this manual to your list of manuals |
Yamaha RX Z9 manual content summary:
- Yamaha RX Z9 | MCXSP10 Manual - Page 1
ZONE 2 SOURCE/REMOTE DTV/LD DVD CABLE MD/TAPE SAT CD-R VCR 1 CD VCR 2 DVR VIDEO AUX TUNER PHONO INPUT MODE MULTI CH INPUT STRAIGHT DSP PROGRAM MULTI JOG EFFECT SILENT OPTIMIZER MIC VIDEO AUX BALANCE TONE CONTROL PHONES S VIDEO VIDEO L AUDIO R OPTICAL VOLUME OWNER'S MANUAL - Yamaha RX Z9 | MCXSP10 Manual - Page 2
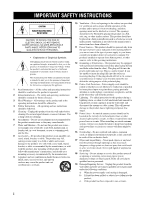
product and in the operating instructions should be adhered to. 4 Follow Instructions - All operating and use instructions should be followed. 5 Cleaning spill liquid of any kind on the product. 18 Servicing - Do not attempt to service this product yourself as opening or removing covers may expose - Yamaha RX Z9 | MCXSP10 Manual - Page 3
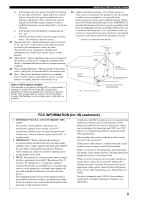
THIS UNIT! This product, when installed as indicated in the instructions contained in this manual, meets FCC requirements. Modifications not expressly approved by Yamaha may void your authority, granted by the FCC, to use the product. 2 IMPORTANT : When connecting this product to accessories and - Yamaha RX Z9 | MCXSP10 Manual - Page 4
qualified YAMAHA service personnel when any service is needed. The cabinet should never be opened for any reasons. 15 When not planning to use this unit for long periods of time (i.e. vacation), disconnect the AC power plug from the wall outlet. 16 Be sure to read the "TROUBLESHOOTING" section - Yamaha RX Z9 | MCXSP10 Manual - Page 5
OSD mode 60 Using the sleep timer 60 Using the test tone 61 SYSTEM OPTIONS 62 Changing parameter settings 64 Input Select 65 Manual setup: Sound 68 Manual setup: Basic 71 Manual setup: Video 78 Manual setup: Option 82 Memory Guard 85 REMOTE CONTROL FEATURES 87 Control area 87 Setting - Yamaha RX Z9 | MCXSP10 Manual - Page 6
YPAO: YAMAHA Parametric Room Acoustic Optimizer for automatic speaker setup using either the buttons on the main unit or on the remote control. In cases where the button names differ between the main unit and remote control, the button name on the remote control is given in parentheses. • This manual - Yamaha RX Z9 | MCXSP10 Manual - Page 7
Supplied accessories Please check that you received all of the following parts. Remote control MACRO TRANSMIT RE-NAME CLEAR MUTE STRAIGHT VOLUME DISC EFFECT ON SCREEN SLEEP TEST A SPEAKERS B PUSH Batteries (3) (AA, LR6) GUI Remote control SYSTEM POWER STANDBY ENTER TOP EXIT + VOL - Yamaha RX Z9 | MCXSP10 Manual - Page 8
remote control decreases, the indicator does not flash or its light becomes dim. • Do not use old batteries together with new ones. • Do not use battery compartment thoroughly before installing new batteries. ■ Remote control ■ GUI remote control RESET button 2 1 3 1 Open the battery compartment - Yamaha RX Z9 | MCXSP10 Manual - Page 9
want to listen to or watch. 3 PURE DIRECT 2CH/MULTI CH Turns on or off the 2-channel/multi-channel PURE DIRECT mode (see page 45). 4 Remote control sensor Receives signals from the remote controls. 5 Front panel display Shows information about the operational status of this unit. 6 INPUT MODE Sets - Yamaha RX Z9 | MCXSP10 Manual - Page 10
channels (see page 40). C VOLUME Controls the output level of all audio channels. This does not affect the REC OUT level. D SPEAKERS A/B Turns on or off the set of front speakers set to the SOURCE/REMOTE position, the input on) and manual ("AUTO" indicator you want to use the controls behind the - Yamaha RX Z9 | MCXSP10 Manual - Page 11
TEST A SPEAKERS B PUSH O P Q R S t 1 Infrared window Outputs infrared control signals. Aim this window at the component you want to operate. 2 RE-NAME Used this remote control. 0 INPUT MODE Sets the priority for the type of input signal (AUTO, i.LINK, DTS, DIGITAL, D.D.RF, ANALOG) received when - Yamaha RX Z9 | MCXSP10 Manual - Page 12
the set of front speakers connected to the A and/or B terminals on the rear panel each time the corresponding button is pressed. T Cover Slide down to use the concealed buttons for various setup and parameter operations. GUI remote control This section describes the controls and functions of the - Yamaha RX Z9 | MCXSP10 Manual - Page 13
INTRODUCTION Using the remote controls STANDBY /ON PURE DIRECT 2CH/8CH INPUT SELECTOR SPEAKERS A B REC OUT/ZONE 2 SOURCE/REMOTE DTV/LD DVD CABLE MD/TAPE SAT CD-R VCR 1 CD VCR 2 DVR VIDEO AUX TUNER PHONO INPUT MODE MULTI CH INPUT TUNING MODE MEMORY STRAIGHT - Yamaha RX Z9 | MCXSP10 Manual - Page 14
CONTROLS AND FUNCTIONS auto setup procedure and when the auto setup speaker settings are used without any modifications. G TUNED indicator Lights up when this unit is tuned into a station. H STEREO indicator Lights up when this unit is receiving - Yamaha RX Z9 | MCXSP10 Manual - Page 15
when the sleep timer is on. N Multi-information display Shows the current sound field program name and other information when adjusting or changing settings. O Input channel indicators Indicates the channel component of the current digital input signal. CONTROLS AND FUNCTIONS English 11 - Yamaha RX Z9 | MCXSP10 Manual - Page 16
2 Speaker terminals See page 15 for connection information. 3 AC INLET Use this inlet to plug in the supplied power cable (see page 29). 4 AC OUTLET(S) Use to details. E REMOTE IN/OUT jacks See page 100 for details. F CONTROL OUT jacks These are control expansion terminals for commercial use. G - Yamaha RX Z9 | MCXSP10 Manual - Page 17
, they should be positioned at the same width as the front speakers. Subwoofer The use of a subwoofer, such as the YAMAHA Active Servo Processing Subwoofer System, is effective not only for reinforcing bass frequencies from any or all channels, but also for high fidelity reproduction of the LFE - Yamaha RX Z9 | MCXSP10 Manual - Page 18
left channel (L), right channel (R), "+" (red) and "-" (black) properly. If the connections are faulty, no sound can be heard from the speakers, and if the polarity of the speaker connections is incorrect, the sound will be unnatural and lack bass. CAUTION • If you intend to use 6-ohm speakers, be - Yamaha RX Z9 | MCXSP10 Manual - Page 19
Presence right speaker 10 Center speaker Front right speaker (A) 5 3 Front left speaker (A) Presence left speaker SPEAKER SETUP Left Right subwoofer subwoofer system system 4 11 2 1 Front speakers (B) + R - PRESENCE /ZONE 2 SURROUND BACK SURROUND CENTER SPEAKERS FRONT B + R - Yamaha RX Z9 | MCXSP10 Manual - Page 20
of the FRONT A or B terminals. Note The Canada model cannot output to two separate speaker systems simultaneously. Bi-wired connection The unit also allows you to make bi-wired connections to one speaker system. Use two pairs of speaker cables for each speaker (one pair for the woofer and one pair - Yamaha RX Z9 | MCXSP10 Manual - Page 21
can be connected with i.LINK equipped components using 4-pin, S400 i.LINK cables. This connection enables you to send and receive digital audio at high speed and with difference (PB, PR) to provide the best quality in picture reproduction. Notes • When signals are input simultaneously through the - Yamaha RX Z9 | MCXSP10 Manual - Page 22
Connecting video components ■ Connections for DVD playback AC I + + R R Video Video in monitor - - PRESENCE /ZONE 2 SURROUND BACK SURROUND CENTER SPEAKERS L (SINGLE) CENTER R PHONO SURROUND BACK GND SURROUND SUBWOOFER FRONT PURE DIRECT MULTI CH INPUT 2CH IN COMPONENT VIDEO - Yamaha RX Z9 | MCXSP10 Manual - Page 23
. Be sure to match the left and right outputs to the left and right input jacks for the front and surround channels. For multi-channel input (SINGLE) CENTER SURROUND BACK SURROUND SUBWOOFER FRONT MULTI CH INPUT R L Surround out Center out Universal disc R player/External L Front out - Yamaha RX Z9 | MCXSP10 Manual - Page 24
CONNECTIONS ■ Connections for digital TV broadcasts or LD playback + R - PRESENCE /ZONE 2 SURROUND BACK SURROUND CENTER SPEAKERS L (SINGLE) CENTER FRONT B + R - FRONT A AC IN AUDIO AC OUTLETS R PHONO SURROUND BACK GND SURROUND SUBWOOFER FRONT PURE DIRECT MULTI CH INPUT 2CH IN - Yamaha RX Z9 | MCXSP10 Manual - Page 25
PREPARATION ■ Connections for cable TV broadcasts CONNECTIONS + R - PRESENCE /ZONE 2 SURROUND BACK SURROUND CENTER SPEAKERS L (SINGLE) CENTER FRONT B + R - FRONT A AC IN AUDIO AC OUTLETS R PHONO SURROUND BACK GND SURROUND SUBWOOFER FRONT PURE DIRECT MULTI CH INPUT 2CH IN - Yamaha RX Z9 | MCXSP10 Manual - Page 26
CONNECTIONS ■ Connections for satellite broadcasts + R - PRESENCE /ZONE 2 SURROUND BACK SURROUND CENTER SPEAKERS L (SINGLE) CENTER FRONT B + R - FRONT A AC IN AUDIO AC OUTLETS R PHONO SURROUND BACK GND SURROUND SUBWOOFER FRONT PURE DIRECT MULTI CH INPUT 2CH IN COMPONENT VIDEO Y - Yamaha RX Z9 | MCXSP10 Manual - Page 27
CONNECTIONS + R - PRESENCE /ZONE 2 SURROUND BACK SURROUND CENTER SPEAKERS L (SINGLE) CENTER FRONT B + R - FRONT A out VCR Video in Audio in ■ Connections to VIDEO AUX jacks (on the front panel) Use these jacks to connect any video source, such as a game console or video camera, to - Yamaha RX Z9 | MCXSP10 Manual - Page 28
CONNECTIONS ■ Connections for DVD recorder playback and recording D SURROUND CENTER CENTER SPEAKERS FRONT B + R - FRONT A AC IN AUDIO AC OUTLETS + L - FRONT A UBWOOFER FRONT PURE DIRECT MULTI CH INPUT 2CH IN COMPONENT VIDEO IN(PLAY) OUT(REC) IN(PLAY) - Yamaha RX Z9 | MCXSP10 Manual - Page 29
C Optical out O + R - PRESENCE /ZONE 2 SURROUND BACK SURROUND CENTER SPEAKERS L (SINGLE) CENTER FRONT B + R - FRONT A AC IN AUDIO cartridge. If you have a turntable with a low-output MC cartridge, use an in-line boosting transformer or MC-head amplifier when connecting to these jacks - Yamaha RX Z9 | MCXSP10 Manual - Page 30
for audio playback and recording MD/tape Optical in Audio out Audio in LR LR O + R - PRESENCE /ZONE 2 SURROUND BACK SURROUND CENTER SPEAKERS L (SINGLE) CENTER FRONT B + R - FRONT A AC IN AUDIO R PHONO SURROUND BACK GND SURROUND SUBWOOFER FRONT PURE DIRECT MULTI CH INPUT 2CH IN - Yamaha RX Z9 | MCXSP10 Manual - Page 31
on the subwoofer. It is also possible to adjust the volume level using this unit's remote control (see page 76). • Some signals may not be output from the SUBWOOFER jack depending on the Speaker Set (see page 74) and LFE Level (see page 70) settings. CONNECTIONS ■ Connecting external preamplifiers - Yamaha RX Z9 | MCXSP10 Manual - Page 32
an indoor one. If you experience poor reception quality, an outdoor antenna may improve the quality. Consult the nearest authorized YAMAHA dealer or service center about outdoor antennas. ■ FREQUENCY STEP switch (General model only) Because the interstation frequency spacing differs in different - Yamaha RX Z9 | MCXSP10 Manual - Page 33
of other power cords may result in fire or electrical shock. ■ AC OUTLET(S) (SWITCHED) U.K. and Australia models 1 OUTLET Korea model None Other models 2 OUTLETS Use the outlet(s) to connect the power cords from your other components to this unit. Power to the AC OUTLET(S) is turned on and off - Yamaha RX Z9 | MCXSP10 Manual - Page 34
2CH/8CH INPUT SELECTOR SPEAKERS A B REC OUT/ZONE 2 SOURCE/REMOTE DTV/LD DVD CABLE MD CONTROL PHONES S VIDEO VIDEO L AUDIO R OPTICAL VOLUME ASPAImp.ASet MinimumA8ohms 2 Press SPEAKERS A or SPEAKERS B to select the impedance of your speakers. You can select either 6 ohms or 8 ohms - Yamaha RX Z9 | MCXSP10 Manual - Page 35
) remote control provides a simple and convenient way to control this unit while viewing a GUI display on your video monitor. You can use the following steps to: • Configure i.LINK connections • Select and configure sound field programs • Select and configure input sources • Manually configure - Yamaha RX Z9 | MCXSP10 Manual - Page 36
to exit. ENTER TOP EXIT Note All GUI remote control operations featured in this manual can also be performed using the main remote control. When using the main remote control to perform these operations, make sure that 10KEY/AMP on the remote controller is set to AMP. PURE DIRECT TITLE MULTI - Yamaha RX Z9 | MCXSP10 Manual - Page 37
and create a cohesive sound field. This is particularly important if you use different brands or sizes of speakers for some channels or have a room with unique sonic characteristics. YPAO equalizing calibration incorporates three parameters (Frequency, Level and Q factor) for each of the 10 bands - Yamaha RX Z9 | MCXSP10 Manual - Page 38
to select Setup Menu, then press h. ENTER TOP EXIT GUI remote control 4 Press k/n repeatedly to select Wiring, Distance, Size, Equalizing or and perform no adjustments. y When using THX speakers, select Skip and make sure that Small or Small x2 is selected in Speaker Set (page 74) and that - Yamaha RX Z9 | MCXSP10 Manual - Page 39
the desired setting, press l to move back to Setup Menu. AUTO SETUP 7 Press n to select Start, then press ENTER. Loud test tones are output from each speaker and "Measuring" appears during the auto setup procedure. • To pause the auto setup procedure, press one of the cursor buttons (k/n/l / h) or - Yamaha RX Z9 | MCXSP10 Manual - Page 40
messages, see "Troubleshooting for the auto setup using the Manual Setup menu. If you Manual Setup menu, navigate to the Information screen in the Auto Setup menu, press k/n repeatedly to select the parameter you want to adjust, then press ENTER. Notes • If you change speakers, speaker - Yamaha RX Z9 | MCXSP10 Manual - Page 41
the surround back right channel signal is detected. Background noise is too loud. Surround back speaker(s) is (are) connected, though surround L/R speakers are not. The optimizer microphone was unplugged during the auto setup procedure. The optimizer microphone does not detect test tones. The auto - Yamaha RX Z9 | MCXSP10 Manual - Page 42
complete to inform you of possible problems. We recommend that you check speaker closer to the listening position. The difference in volume level between the speakers is excessive. (No level correction is made.) • Readjust the speaker installation. • Check the speaker connections. • Use speakers - Yamaha RX Z9 | MCXSP10 Manual - Page 43
2 Turn on the video monitor connected to this unit. 3 Press SPEAKERS A or B to select the speakers you want to use. Each press turns the respective speakers on and off. SPEAKERS A B or A SPEAKERS B Front panel Remote control y When bi-wiring, select both A and B. Front panel or VOLUME - Yamaha RX Z9 | MCXSP10 Manual - Page 44
control. "MUTE" blinks in the front panel display. MUTE To resume the audio output, press MUTE again (or press VOLUME +/-). "MUTE" disappears from the display. y • You can adjust the muting level (see page 71). • You can also perform this operation using the GUI remote control (see page 31). 40 - Yamaha RX Z9 | MCXSP10 Manual - Page 45
Remote control PLAYBACK Selecting sound field programs ■ Front panel operation STANDBY /ON PURE DIRECT 2CH/8CH INPUT SELECTOR SPEAKERS A B REC OUT/ZONE 2 SOURCE/REMOTE beautiful scenery from the video source on the video monitor. Use the input selector buttons to select a video source, then - Yamaha RX Z9 | MCXSP10 Manual - Page 46
you connected a surround back speaker, use this feature to enjoy 6.1/7.1-channel playback for multi-channel sources using the Dolby Pro Logic IIx, Dolby Digital Surround EX or DTS ES decoders. Press EX/ES on the remote control to switch between 5.1- and 6.1/7.1- channel playback. Set 10KEY/AMP to - Yamaha RX Z9 | MCXSP10 Manual - Page 47
as they are). PLAYBACK ■ Enjoying 2-channel software Signals input from 2-channel sources can also be played back on multiple channels using the Dolby Pro Logic, Dolby Pro Logic II, Dolby Pro Logic IIx, or DTS Neo:6 decoders. Press q/DTS on the remote control to switch between Surround Standard or - Yamaha RX Z9 | MCXSP10 Manual - Page 48
the front left and right speakers only. Multi-channel sources are decoded straight into the appropriate channels without any additional effect processing. STRAIGHT EFFECT Front panel STRAIGHT or EFFECT Remote control ■ Downmixing to 2 channels You can enjoy 2-channel stereo playback even from - Yamaha RX Z9 | MCXSP10 Manual - Page 49
. y You can also perform this operation using the GUI remote control (see page 31). Notes • To avoid unexpected noise, do not play DTS-encoded CDs in this mode. • No sound is played back when the input mode is set to DTS or D.D.RF. • When multi-channel signals (Dolby Digital and DTS) are input - Yamaha RX Z9 | MCXSP10 Manual - Page 50
this unit selects when the power is turned on (see page 83). • If MULTI CH IN is selected, you cannot change the input source using INPUT SELECTOR. Press MULTI CH IN on the remote control or MULTI CH INPUT on the front panel to remove the selection. • You can also perform this operation - Yamaha RX Z9 | MCXSP10 Manual - Page 51
frequency, "Unknown" appears. Channel Number of source channels in the input signal. For example, a multi-channel sound track with 3 front channels, 2 surround channels and LFE, is displayed - -" appears. y You can also perform this operation using the GUI remote control (see page 31). English 47 - Yamaha RX Z9 | MCXSP10 Manual - Page 52
2CH/8CH INPUT SELECTOR SPEAKERS A B REC OUT/ZONE 2 SOURCE/REMOTE DTV/LD DVD CABLE CONTROL PHONES S VIDEO VIDEO L AUDIO R OPTICAL VOLUME 1 Rotate INPUT SELECTOR (or press TUNER on the remote control of the received station is shown on the front panel display. ■ Manual tuning If - Yamaha RX Z9 | MCXSP10 Manual - Page 53
stations You can use the automatic preset DIRECT 2CH/8CH INPUT SELECTOR SPEAKERS A B REC OUT/ZONE 2 SOURCE/REMOTE DTV/LD DVD CABLE MD • If the number of the received stations does not reach E8, manually in the monaural mode, and store it by following the procedure in "Manually presetting - Yamaha RX Z9 | MCXSP10 Manual - Page 54
MULTI JOG STANDBY /ON PURE DIRECT 2CH/8CH INPUT SELECTOR SPEAKERS A B REC OUT/ZONE 2 SOURCE/REMOTE DTV/LD DVD CABLE MD/TAPE SAT CD-R VCR TONE CONTROL SILENT MIC VIDEO AUX PHONES S VIDEO VIDEO L AUDIO R OPTICAL VOLUME 1 Tune into a station. See page 48 for tuning instructions. - Yamaha RX Z9 | MCXSP10 Manual - Page 55
PUSH SLEEP TEST A SPEAKERS B *2 *1 2 STANDBY /ON PURE DIRECT 2CH/8CH INPUT SELECTOR SPEAKERS A B REC OUT/ZONE 2 SOURCE/REMOTE DTV/LD DVD TUNING VIDEO AUX BALANCE TONE CONTROL PHONES S VIDEO VIDEO L AUDIO R OPTICAL VOLUME *1 These buttons can be used to directly select the - Yamaha RX Z9 | MCXSP10 Manual - Page 56
again. The stations stored at the two preset assignments are exchanged. PRESET /TUNING STANDBY /ON PURE DIRECT 2CH/8CH INPUT SELECTOR SPEAKERS A B REC OUT/ZONE 2 SOURCE/REMOTE DTV/LD DVD CABLE MD/TAPE SAT CD-R VCR 1 CD VCR 2 DVR VIDEO AUX TUNER PHONO INPUT MODE TUNING MODE MULTI - Yamaha RX Z9 | MCXSP10 Manual - Page 57
the operation instructions for these components. . STANDBY /ON PURE DIRECT 2CH/8CH INPUT SELECTOR SPEAKERS A B REC OUT/ZONE 2 SOURCE/REMOTE DTV/LD a video source that uses scrambled or encoded signals to prevent it from being dubbed, the picture itself may be disturbed due to those signals - Yamaha RX Z9 | MCXSP10 Manual - Page 58
the DTS bitstream will result in noise being recorded. Therefore, if you want to use this unit to record sources that have DTS signals recorded on them, the following considerations DTS format, follow its operation instructions to make a setting so that the analog signal is output from the player. 54 - Yamaha RX Z9 | MCXSP10 Manual - Page 59
playback from almost any sound source (stereo or multi-channel). This unit is also equipped with a YAMAHA digital sound field processing (DSP) chip containing several sound field programs which you can use to enhance your playback experience. Most of these sound field programs are precise digital - Yamaha RX Z9 | MCXSP10 Manual - Page 60
SOUND FIELD PROGRAM DESCRIPTIONS Program Features Sources THX: Ultra2 Cinema THX processing for non EX/ES encoded 5.1 channel sources. This program outputs sound from the surround back L/R speakers using ASA (advanced speaker array) processing. This mode is only available when you have set up a - Yamaha RX Z9 | MCXSP10 Manual - Page 61
jacks. MltIn+PLIIxMusic SUR. STANDARD: DSD Indicates that DSD signals are being input via i.LINK. SUR. STANDARD: Multi PCM Indicates that multi-channel PCM signals are being input via i.LINK. SUR. STANDARD: Pro Logic Standard processing for Dolby Surround sources. The ENHANCED version of this - Yamaha RX Z9 | MCXSP10 Manual - Page 62
software. Sources Dolby Pro Logic IIx processing for music software. DTS processing for music software. 2-CH Use to output sources without any processing. Use to output sources from all speakers. This provides a larger sound field and is ideal for background music at parties, etc. HiFi DSP - Yamaha RX Z9 | MCXSP10 Manual - Page 63
music sources. This program outputs sound from the surround back L/R speakers using ASA (advanced speaker array) processing. This mode is only available when you have set up a 7.1 speaker system (i.e. two surround back speakers), and the input signal has surround left and surround right contents - Yamaha RX Z9 | MCXSP10 Manual - Page 64
Sleep 30min. Sleep 60min. ON SCREEN SLEEP TEST A SPEAKERS B PUSH MULTI CH V-AUX DVR HiFi DSP will not be recorded. Using the sleep timer Use this feature to automatically set this setting can also be canceled by pressing STANDBY on the remote controls (or STANDBY/ON on the front panel) to set - Yamaha RX Z9 | MCXSP10 Manual - Page 65
ADVANCED OPERATIONS Using the test tone You can use the test tone feature to manually balance your speaker levels. Please note that this operation will override the level adjustments made in the auto setup procedure (page 33) and "Speaker Level" (page 76). Use the test tone to set speaker levels so - Yamaha RX Z9 | MCXSP10 Manual - Page 66
the number of audio channels input through the MULTI CH INPUT jacks Page 65 66 66 66 67 67 67 ■ Manual Setup (Manual setup) Use to manually adjust speaker and system settings. Sound (Sound) Use to manually adjust the sound parameters. Item Cinema EQ Graphic EQ Tone Control LFE Level Dynamic Range - Yamaha RX Z9 | MCXSP10 Manual - Page 67
Use to manually adjust the video parameters. Item Features Processor Picture Mode Resolution Turns on/off the digital video processor. Selects and adjusts the video picture mode suitable for the video picture Setup (Auto setup) Use to specify which speaker parameters auto setup will adjust, - Yamaha RX Z9 | MCXSP10 Manual - Page 68
select the parameter you want to adjust. 4 2-4 ENTER 2 TOP 5 EXIT y You can also perform this operation using the remote control (see page 31). 1 Press TOP on the GUI remote control. 80Hz (THX) 2 Press k/n repeatedly to select a menu, then press h to enter the selected menu. 4 Press ENTER - Yamaha RX Z9 | MCXSP10 Manual - Page 69
this happens, edit the parameter value again. SYSTEM OPTIONS Input Select Use this feature to reassign digital input/outputs, select the input signal, of the signal input to each jack. 1 Press TOP on the GUI remote control. 2 Select Input Select, then press h. 3 Select the desired input (CD, - Yamaha RX Z9 | MCXSP10 Manual - Page 70
effectively connect more components. Once the jacks are reassigned, you can select the corresponding component using INPUT SELECTOR on the front panel or the input selector buttons on the remote control. Input Select > input source (DVD, etc.) > Assign > Example 1: To assign the COAXIAL 1 (DTV/LD - Yamaha RX Z9 | MCXSP10 Manual - Page 71
is selected or this unit is set to standby mode. • Select 2ch if you want to input stereo audio signals using only the FRONT L/R jacks. • Select 5.1ch if you want to input 5.1-channel audio signals through the FRONT L/R, CENTER, SURROUND L/R and SUBWOOFER jacks. • Select 7.1ch if you want to input - Yamaha RX Z9 | MCXSP10 Manual - Page 72
this menu to adjust the sound parameters. 1 Press TOP on the GUI remote control. 2 Select Manual Setup, then press h. ■ Cinema EQ (Cinema equalizer) Use this feature to adjust PEQ and high frequency levels for any speaker. Manual Setup > Sound > Cinema EQ Choices: Off, On, PEQ*, HIGH* * When PEQ or - Yamaha RX Z9 | MCXSP10 Manual - Page 73
EQ Defeat SYSTEM OPTIONS ■ Tone Control (Tone control) Use to adjust the amount of bass and treble output to your speakers and headphones. Manual Setup > Sound > Tone Control > Control (Tone control) Choices: Defeat, Speaker, Headphone • Select Auto Setup PEQ to use the equalizer adjusted in auto - Yamaha RX Z9 | MCXSP10 Manual - Page 74
The LFE channel carries lowfrequency special effects which are only added to certain scenes. This setting is effective only when this unit decodes Dolby Digital or DTS signals. To access these parameters, select: Manual Setup > Sound > LFE Level > Choices: -20 to 0 (dB) Speaker (Speaker) Select to - Yamaha RX Z9 | MCXSP10 Manual - Page 75
-20dB SYSTEM OPTIONS Manual setup: Basic Use this menu to set up basic system parameters. 1 Press TOP on the GUI remote control. 2 Select Manual Setup, then press . You can use the basic menu to make further adjustments, but we recommend running auto setup first. • You can reset these parameters by - Yamaha RX Z9 | MCXSP10 Manual - Page 76
the THX Ultra2-compatible subwoofer. Choices: No*, Yes SB Speaker Dist. (Surround back speaker distance) Use this feature to optimize the surround sound field when you have to place the surround back speakers apart. Choices: U.S.A. and Canada models: under 1ft, 1 - 4ft, over 4ft Other models: under - Yamaha RX Z9 | MCXSP10 Manual - Page 77
) Use to manually adjust any setting for your subwoofer. Manual Setup > Basic > Subwoofer Set > Config. (Subwoofer configuration) Use this right subwoofer speakers together using L&R Reverse, and if the sound is still not satisfactory, try adjusting the phase for these speakers individually. Choices - Yamaha RX Z9 | MCXSP10 Manual - Page 78
Speaker Set (Speaker set) Use to manually adjust any speaker setting. Manual Setup > Basic > Speaker Set > Note Set any THX speakers to Small. Front (Front speakers the subwoofer and front channels, and all other lowfrequency signals are directed in accordance with other speaker settings. • Select - Yamaha RX Z9 | MCXSP10 Manual - Page 79
and the rest of the frequency signals are directed to the surround back left speaker. • Select Small x2 if you have two small surround back speakers. The low-frequency signals of the surround back channels are directed to the speakers selected with "Bass Out". • Select Large x2 if you have two large - Yamaha RX Z9 | MCXSP10 Manual - Page 80
(Speaker level) Use these settings to manually balance the speaker levels between the front left speakers and each speaker selected in Speaker Set (see page 74). Manual Setup > Basic > Speaker Level • Select None if you do not have presence speakers. This unit directs all presence channel signals - Yamaha RX Z9 | MCXSP10 Manual - Page 81
Speaker Distance (Speaker distance) Use this feature to manually input the distance of each speaker and adjust the delay applied to the respective channel. Ideally, each speaker Manual Setup > Basic > Speaker Distance > Unit (Unit) Choices: meters (m), feet (ft) Initial setting: U.S.A. and Canada - Yamaha RX Z9 | MCXSP10 Manual - Page 82
the remote control for 5 seconds or longer to initialize the Video parameters. Initial settings: • TV format (TV format): - U.S.A., Canada, the GUI remote control. 2 Select Manual Setup, then press h. ■ Processor (Processor) Use this feature to turn on/off the digital video processors. Manual Setup - Yamaha RX Z9 | MCXSP10 Manual - Page 83
picture mode and adjust each mode to suit the video picture. Manual Setup > Video > Picture Mode > Choices: Cinema, Standard, Dynamic SYSTEM OPTIONS ■ Resolution (Resolution) Use +24), Contrast (-24 to +24), Saturation (-24 to +24), Reset 1) Press k/n to select the item you want to adjust, then - Yamaha RX Z9 | MCXSP10 Manual - Page 84
to select the aspect ratio for the output image converted using the video processing circuit. Manual Setup > Video > Aspect Choices: Through, Auto, 16 the left and right sides of the input video signal before outputting it to the TV. Use to watch 4:3 software on a 16:9 TV. • 16:9 Zoom: Cuts off the - Yamaha RX Z9 | MCXSP10 Manual - Page 85
> Video > Cross Color Choices: Not Suppress, Suppress ■ TV Format (TV format) Use this feature to select the video format for your TV. Manual Setup > Video > TV Format Choices: PAL, NTSC Initial setting: U.S.A., Canada, Korea and General models: NTSC Europe, U.K., Australia and China: PAL ADVANCED - Yamaha RX Z9 | MCXSP10 Manual - Page 86
SYSTEM OPTIONS ■ S Video (S Video) Use this feature to match the video output to the input on setup: Option This menu adjusts the optional system settings. 1 Press TOP on the GUI remote control. 2 Select Manual Setup, then press h. 3 Select Option then press h. • Select S when connecting this unit - Yamaha RX Z9 | MCXSP10 Manual - Page 87
INPUT jacks when you turn on this unit. Manual Setup > Option > Input Mode • Select All to initialize settings for all sound field program parameters. • Select 1-11 to initialize individual sound field programs. Use the numeric keys on the remote control to select the sound field program you want - Yamaha RX Z9 | MCXSP10 Manual - Page 88
do not want to display the background, select None. Choices: None, 1(RX-Z9), 2(Horn), 3(Piano), 4(Gray) Note When Processor is set to Off in the Manual Setup menu, no background is displayed even if no image is input. Position (Position) Use to adjust the vertical and horizontal position of the GUI - Yamaha RX Z9 | MCXSP10 Manual - Page 89
use this unit's internal amplifier if you connect your Zone 2 speakers directly to this unit's PRESENCE/ZONE 2 speaker terminals. • Select None if you do not want to use using VOL +/- on the remote control. Zone2 Tuner Sel. (Zone 2 tuner select) (U.S.A., Canada and Australia models only) Use this - Yamaha RX Z9 | MCXSP10 Manual - Page 90
can select the Picture Mode (Cinema, Standard or Dynamic), but cannot adjust the settings of each mode. • Select Free to enable changes to the manual setup parameters. . Note In general, front panel and remote control operations are not affected by "Guard" functions. However, you cannot do the - Yamaha RX Z9 | MCXSP10 Manual - Page 91
+100 TV INPUT TV VOL CH TV MUTE MUTE STRAIGHT VOLUME DISC EFFECT ON SCREEN SLEEP TEST A SPEAKERS B PUSH ■ Controlling other components The shaded areas below can be used to control other components. Each button has a different function depending on the selected component. Select the - Yamaha RX Z9 | MCXSP10 Manual - Page 92
features). ZONE To operate this unit (with ZONE 2 features). DSP To operate YAMAHA DSP amplifiers that cannot be operated with the YPC code. NO To operate the amplifiers of other manufacturers using this unit's remote control. 3 Press k/n to select the name of your component's manufacturer. You will - Yamaha RX Z9 | MCXSP10 Manual - Page 93
manufacturer codes for commercially available AV components (including YAMAHA AV components). If operation is not possible with any of the manufacturer codes, program the new remote control function with the Learn feature (see below) or use the remote control supplied with the component. • If - Yamaha RX Z9 | MCXSP10 Manual - Page 94
You can change the name that appears in the display window on the remote control if you want to use a different name to the one that is factory preset. This is useful when you have set the input selector to control another component. 1 Press an input selector button to select the source component - Yamaha RX Z9 | MCXSP10 Manual - Page 95
on the component. For details, refer to the operation instructions for the connected component.) *2 Playback can be started for any YAMAHA remote control-compatible MD recorder, CD player, CD recorder, DVD player, or LD player. When using macros to operate other components, you will need to program - Yamaha RX Z9 | MCXSP10 Manual - Page 96
the macro is operating until the macro operation is complete. ■ Programming macro operations You can program your own macros and use the macro feature to transmit several remote control commands in sequence at the press of a button. Be sure to set up manufacturer codes or perform learning operations - Yamaha RX Z9 | MCXSP10 Manual - Page 97
component (source) names and setup manufacturer codes. 1 Press CLEAR by using a ballpoint pen or similar object. CLEAR y Complete each of the component (source) names. Clears all remote functions and returns the remote to the factory settings. REMOTE CONTROL FEATURES 3 Press and hold CLEAR again - Yamaha RX Z9 | MCXSP10 Manual - Page 98
REMOTE CONTROL FEATURES Clearing individual functions ■ Clearing a learned function You can clear the learning mode is automatically canceled. In this case, press LEARN again. 3 Press and hold CLEAR using a ballpoint pen or similar object, then press the button you want to clear for about 3 seconds - Yamaha RX Z9 | MCXSP10 Manual - Page 99
and automatically switch the remote control to the appropriate control mode for that component. y • To control a component without changing this unit's input mode, use SOURCE SELECT k/n to STRAIGHT VOLUME DISC EFFECT PLAY PAUSE Numeric buttons CH +/- (channel) ADVANCED OPERATION English 95 - Yamaha RX Z9 | MCXSP10 Manual - Page 100
REMOTE CONTROL FEATURES ■ Operating a digital TV (DTV/LD area) or cable/satellite TV VOL CH TV MUTE MUTE STRAIGHT VOLUME DISC EFFECT Numeric buttons Recall (CABLE and SAT only) CH +/- (channel) *1 SEARCH, REC, STOP, PAUSE and PLAY operate your VCR without switching the input to VCR 1 if the - Yamaha RX Z9 | MCXSP10 Manual - Page 101
PRESET HALL 2 3 CHURCH 4 MUSIC ENTERTAIN 7 8 /DTS +10 NIGHT +100 TV INPUT TV VOL CH TV MUTE MUTE STRAIGHT VOLUME DISC EFFECT REMOTE CONTROL FEATURES Skip search PLAY PAUSE Numeric buttons Clear DISC -/+ (disc skip) ■ Operating a CD recorder (CD-R area) or MD recorder (MD/TAPE area - Yamaha RX Z9 | MCXSP10 Manual - Page 102
REMOTE CONTROL FEATURES ■ Operating a tape deck (MD/TAPE area) You need to set the manufacturer code for your tape deck following the setting procedure described on page - Yamaha RX Z9 | MCXSP10 Manual - Page 103
area that can be programmed with remote control functions independently from any input source. Notes • You cannot set a manufacturer code for this area. See page 89 to program buttons operated within this component control area. • The OPTN area cannot be used when ZONE is selected in the amplifier - Yamaha RX Z9 | MCXSP10 Manual - Page 104
and speakers for the second room. • A video monitor for the second room. y REMOTE • Since there are a number of ways you can connect and use this OUT IN OUT IN CONTROL OUT unit in a multi-room installation, we recommend that you consult your nearest authorized YAMAHA dealer or service - Yamaha RX Z9 | MCXSP10 Manual - Page 105
ON in ZONE2 AMP. ZONE 2 + R - PRESENCE /ZONE 2 + L - PRESENCE /ZONE 2 This unit Second room Remote controlling Zone 2 The supplied remote control can be used to control Zone 2. You can even select the input source and control components located in the main room directly from the second room - Yamaha RX Z9 | MCXSP10 Manual - Page 106
PHONO jacks cannot be sent to Zone 2. 4 You can control this unit from Zone 2 using the input selector, STANDBY, SYSTEM POWER, MUTE and VOLUME speakers). Thus, the following considerations and adjustments need to be made when playing DTS encoded discs. For LDs or DVDs encoded with DTS Only 2 channel - Yamaha RX Z9 | MCXSP10 Manual - Page 107
USING i.LINK This unit is fitted with two i.LINK (AUDIO) connectors. By connecting components that support i.LINK (AUDIO) connections, in addition to digital transmission of 2-ch linear PCM signals and audio signals that have been compressed in multi-channel format, you can also send and receive - Yamaha RX Z9 | MCXSP10 Manual - Page 108
if no operation is performed within 10 seconds. • You can change the input assignment using the i.LINK Select menu (see page 106). STANDBY /ON PURE DIRECT 2CH/MULTI CH INPUT SELECTOR SPEAKERS A B REC OUT/ZONE 2 SOURCE/REMOTE DTV/LD DVD CABLE MD/TAPE SAT CD-R VCR 1 CD VCR 2 DVR VIDEO - Yamaha RX Z9 | MCXSP10 Manual - Page 109
to the operating instructions supplied with the Using the Auto Play function If your i.LINK component supports automatic playback operations, you can use used when this unit is connected to an i.LINK component. SYSTEM POWER STANDBY ENTER 2-4 1 TOP EXIT 5 1 Press TOP on the GUI remote control - Yamaha RX Z9 | MCXSP10 Manual - Page 110
): Displays depending on whether your i.LINK component supports audio signal playback. - Assign: Displays the name Z9 → Player, Z9 ← Player, Z9 ↔ Player, Z9 × Player • Select Z9 → Player if you want playback to start automatically on the i.LINK component selected using INPUT SELECTOR. • Select Z9 - Yamaha RX Z9 | MCXSP10 Manual - Page 111
of the i.LINK components so that this unit and the i.LINK (AUDIO) component are directly connected may resolve this problem. Check that all i.LINK components are connected properly using an IEEE1394 cable. Disconnect the IEEE1394 cable, then reconnect it in either a daisy chain or tree configuration - Yamaha RX Z9 | MCXSP10 Manual - Page 112
at will is exactly what YAMAHA has done with the digital sound field processor. ■ Sound field parameters (Stereo/Surround) Use to select and adjust sound walls in the hall. Adjusts the height of the front and center channel sounds. Adjusts the apparent size of the acoustic environment. Adjusts the - Yamaha RX Z9 | MCXSP10 Manual - Page 113
the surround speakers for wraparound effect. Adjusts the center image from all three front speakers to varying channel in 9-channel stereo mode. Adjusts the volume level of presence right channel in 9-channel stereo mode. Selects the decoder used to decode 2-channel sources into multi-channel using - Yamaha RX Z9 | MCXSP10 Manual - Page 114
are not always found in every program. 1 Press TOP on the GUI remote. 2 Select Stereo/Surround, then press h. ■ Init. Delay (Initial , set to a small value. For a large room, set to a large value. Control range: 1 - 99 msec Source sound Early reflections Level Level INIT. DLY Time Sound source - Yamaha RX Z9 | MCXSP10 Manual - Page 115
the early reflection decay rate, and thus the "liveness" of the room. Control range: 0 - 10 Dead Source sound Live SOUND FIELD OPTIONS ■ Rev height of the front and center channel sounds by assigning some of the front and center channel elements to the presence speakers. The larger the parameter, - Yamaha RX Z9 | MCXSP10 Manual - Page 116
■ SB Init.Delay (Surround back initial delay) This parameter adjusts the delay between direct sound and the first reflection in the surround back sound field. Control range: 1 - 49 msec ■ SB Room Size (Surround back room size) This parameter adjusts the apparent size of the surround back sound field - Yamaha RX Z9 | MCXSP10 Manual - Page 117
the center image towards the front left and right speakers. Control range: 0 (center channel sound is output only from the center speaker) to 7 (center channel sound is output only from the front left and right speakers), initial setting is 3. ■ Dimension (Dimension) This parameter gradually adjusts - Yamaha RX Z9 | MCXSP10 Manual - Page 118
THX Cinema. Choices: Pro Logic / Pro Logic II / Pro Logic IIx / Neo:6 For Surround Enhanced Function: Selects the decoder used to playback 2- channel sources using Surround Enhanced. Choices: Pro Logic / Pro Logic II / Neo:6 / Pro Logic IIx For Surround Standard Function: Selects the - Yamaha RX Z9 | MCXSP10 Manual - Page 119
contact your nearest authorized YAMAHA dealer or service center. ■ General Problem This unit fails to received from a source component e.g.: a CD-ROM. Remedy Connect the power cord firmly. Set the impedance to match your speakers. Make sure all speaker wire connections on this unit and all speakers - Yamaha RX Z9 | MCXSP10 Manual - Page 120
TROUBLESHOOTING Problem The sound suddenly goes off. The speaker on one side only can be heard. No sound from the effect speakers. No sound from the center speaker. No sound from the surround speakers. No sound from the surround back speakers. No sound from the subwoofer. Cause Remedy Refer to - Yamaha RX Z9 | MCXSP10 Manual - Page 121
TROUBLESHOOTING Problem Cause Remedy Refer to page Dolby Digital or DTS The connected component is not set to Make an appropriate setting following the operation - sources cannot be output Dolby Digital or DTS digital instructions speaker cables have short-circuited. Make sure all speaker - Yamaha RX Z9 | MCXSP10 Manual - Page 122
TROUBLESHOOTING Problem Cause There is noise interference from digital or highfrequency equipment, or this unit. This unit is too close to digital or highfrequency equipment. The picture is disturbed. The video source uses scrambled or encoded signals to prevent dubbing. This unit suddenly - Yamaha RX Z9 | MCXSP10 Manual - Page 123
■ Remote control TROUBLESHOOTING Problem The remote control does not work or function properly. The remote control does not "learn" new functions. Cause Remedy The remote control is being used at the wrong distance or angle. The remote control will function within a maximum range of 6 m (20 ft - Yamaha RX Z9 | MCXSP10 Manual - Page 124
YAMAHA Parametric Room Acoustic Optimizer (YPAO) technology to optimize the frequency characteristics of its parametric equalizer to match your listening environment. YPAO uses has 10 equalizer bands for each channel (plus 5 subwoofer bands). The use of multiple equalizer bands enables more precise - Yamaha RX Z9 | MCXSP10 Manual - Page 125
has a total of 5.1 channels (LFE is counted as 0.1 channel). By using 2-channel stereo for the surround speakers, more accurate moving sound master, and 96/24 5.1-channel sound with full-quality fullmotion video for music programs and motion picture soundtracks on DVD-video. ADDITIONAL INFORMATION - Yamaha RX Z9 | MCXSP10 Manual - Page 126
sound field programs can be enjoyed on headphones. ■ Virtual CINEMA DSP YAMAHA has developed a Virtual CINEMA DSP algorithm that allows you to enjoy DSP sound field surround effects even without any surround speakers by using virtual surround speakers. It is even possible to enjoy Virtual CINEMA DSP - Yamaha RX Z9 | MCXSP10 Manual - Page 127
speakers so that the surround information is all around you. In a home theatre, you use only two speakers channel. This expands the listening position and creates - with only two speakers - the same spacious surround experience as in a movie theatre. ■ A.S.A. (Advanced Speaker you can manually select - Yamaha RX Z9 | MCXSP10 Manual - Page 128
multi-channel program, whether movie soundtracks or music over the widest possible seating area. In addition, all Ultra2 controllers and receivers incorporate video switching capable of handling all widebandwidth sources, including HDTV and progressive scan DVD, without degrading the picture. ■ THX - Yamaha RX Z9 | MCXSP10 Manual - Page 129
■ Block diagram \ DIGITAL COAX/RF COAX x3 RFDemodulator OPT RX x8 OPT TX OPT TX OPT TX COAX REC OUT ZONE2 CENTER SURROUND L/R :BALANCE SIGNAL SEL SURROUND BACK L/R SUB WOOFER L/R VOLUME YAC520 SPEAKER CONFIG. HEAD PHONES FRONT L/R MAIN IN CENTER SURROUND L/R PRE OUT SURROUND BACK - Yamaha RX Z9 | MCXSP10 Manual - Page 130
D/A DVD etc SEL DVD etc +5V +5V +5V +5V S-VIDEO For VIDEO/DIGITAL FL DRIVER COMPONENT D-TARMINAL [J] For POWER AMP TOROIDAL TRANSFORMER -5V -5V POWER CONTROL(Pure Direct) +B +12V -B +12V FL For AUDIO 126 -12V -12V - Yamaha RX Z9 | MCXSP10 Manual - Page 131
L/R 150 µV or less • Channel Separation (1 kHz/10 kHz) CD (5.1 kΩ terminated) to Front L/R 70 dB/60 dB • Tone Control (Front, Center) BASS Boost/Cut Component 5 Hz to 100 MHz, -3 dB FM SECTION • Tuning Range [U.S.A. and Canada models 87.5 to 107.9 MHz [Australia model 87.50 to 108.00 MHz • - Yamaha RX Z9 | MCXSP10 Manual - Page 132
on chlorine free (ECF) paper with soy ink. © 2003 YAMAHA ELECTRONICS CORPORATION, USA 6660 ORANGETHORPE AVE., BUENA PARK, CALIF. 90620, U.S.A. YAMAHA CANADA MUSIC LTD. 135 MILNER AVE., SCARBOROUGH, ONTARIO M1S 3R1, CANADA YAMAHA ELECTRONIK EUROPA G.m.b.H. SIEMENSSTR. 22-34, 25462 RELLINGEN BEI
-
 1
1 -
 2
2 -
 3
3 -
 4
4 -
 5
5 -
 6
6 -
 7
7 -
8
-
9
-
10
-
11
-
12
-
13
-
14
-
15
-
16
-
17
-
18
-
19
-
20
-
21
-
22
-
23
-
24
-
25
-
26
-
27
-
28
-
29
-
30
-
31
-
32
-
33
-
34
-
35
-
36
-
37
-
38
-
39
-
40
-
41
-
42
-
43
-
44
-
45
-
46
-
47
-
48
-
49
-
50
-
51
-
52
-
53
-
54
-
55
-
56
-
57
-
58
-
59
-
60
-
61
-
62
-
63
-
64
-
65
-
66
-
67
-
68
-
69
-
70
-
71
-
72
-
73
-
74
-
75
-
76
-
77
-
78
-
79
-
80
-
81
-
82
-
83
-
84
-
85
-
86
-
87
-
88
-
89
-
90
-
91
-
92
-
93
-
94
-
95
-
96
-
97
-
98
-
99
-
100
-
101
-
102
-
103
-
104
-
105
-
106
-
107
-
108
-
109
-
110
-
111
-
112
-
113
-
114
-
115
-
116
-
117
-
118
-
119
-
120
-
121
-
122
-
123
-
124
-
125
-
126
-
127
-
128
-
129
-
130
-
131
-
132
 |
 |
U
STANDBY
/ON
PURE DIRECT
2CH/MULTI CH
SPEAKERS
VIDEO AUX
REC OUT/ZONE 2
VOLUME
INPUT SELECTOR
MULTI JOG
SILENT
OPTIMIZER
MIC
AV Receiver
OWNER’S MANUAL