Yamaha YSP800S Owner's Manual - Page 16
Using a metal wall bracket, Using a stand, Using a rack
 |
UPC - 027108923543
View all Yamaha YSP800S manuals
Add to My Manuals
Save this manual to your list of manuals |
Page 16 highlights
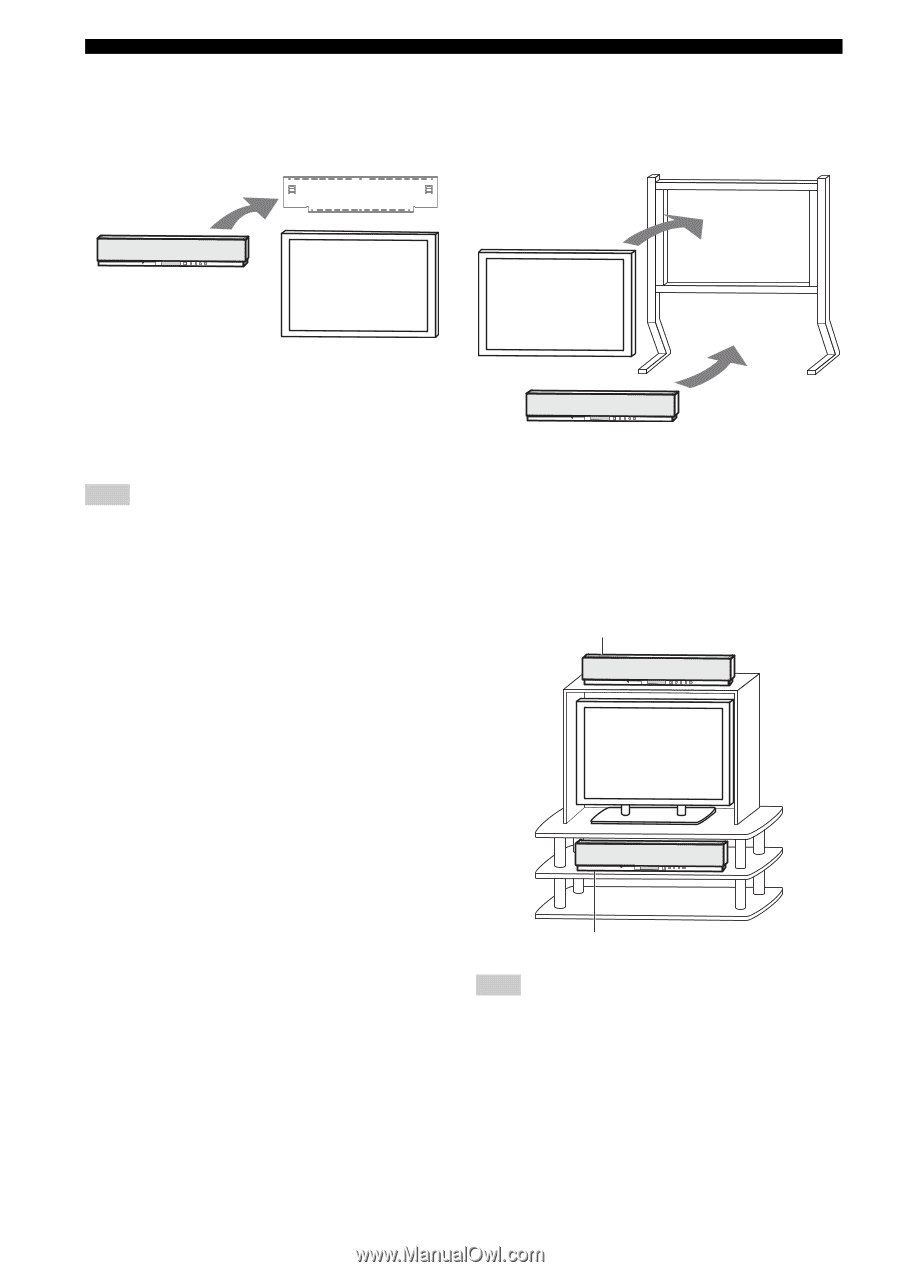
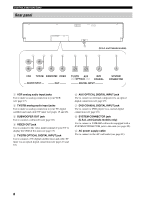
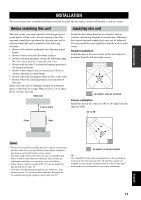
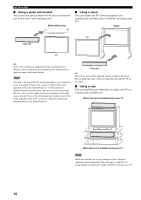
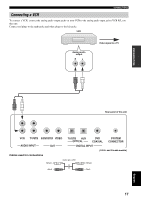
INSTALLATION ■ Using a metal wall bracket You can use the optional metal wall bracket to mount this unit on the wall in your listening room. Metal wall bracket ■ Using a stand You can mount your TV on the stand placed on a commercially available rack to install this unit under your TV. Stand TV This unit TV y Refer to the instructions supplied with the metal bracket for details on how to attach the metal bracket to the wall or how to attach this unit to the metal bracket. Note This unit is the model that the metal apparatuses are not attached to the rear panel. If there is the section of "Detach the metal apparatuses from the Sound Projector" in the instructions supplied with the metal bracket, skip the section and proceed to the next. Also, use the supplied projector mounting screws (M4, spare) instead if there is the information about using screws of the metal apparatus (M4) in the section of "Attach the small wall mount brackets to the Sound Projector". This unit y Refer to the instructions supplied with the stand for details on how to install the stand or how to mount this unit and the TV on the stand. ■ Using a rack You can install this unit either above or under your TV in a commercially available rack. When this unit is installed above your TV When this unit is installed under your TV Note Make sure that the rack is large enough to allow adequate ventilation space around this unit (see page 11) and that it is strong enough to support the weight of both this unit and your TV. 12
-
 1
1 -
2
-
3
-
4
-
5
-
6
-
7
-
8
-
9
-
10
-
 11
11 -
 12
12 -
 13
13 -
 14
14 -
 15
15 -
 16
16 -
 17
17 -
 18
18 -
 19
19 -
 20
20 -
 21
21 -
22
-
23
-
24
-
25
-
26
-
27
-
28
-
29
-
30
-
31
-
32
-
33
-
34
-
35
-
36
-
37
-
38
-
39
-
40
-
41
-
42
-
43
-
44
-
45
-
46
-
47
-
48
-
49
-
50
-
51
-
52
-
53
-
54
-
55
-
56
-
57
-
58
-
59
-
60
-
61
-
62
-
63
-
64
-
65
-
66
-
67
-
68
-
69
-
70
-
71
-
72
-
73
-
74
-
75
-
76
-
77
-
78
-
79
-
80
-
81
-
82
-
83
-
84
-
85
-
86
-
87
-
88
-
89
-
90
-
91
-
92
-
93
-
94
-
95
-
96
-
97
-
98
-
99
-
100
-
101
 |
 |