Alpine PXA-H800 Owners Manual - Page 36

o<r - owners

Page 36 highlights

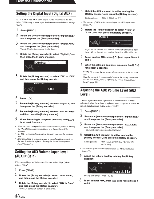
Basic Operation IIE...OTE COMMMOEA RUX-CBDO /..@'A.PI'IE II Rotary encoder • About the Commander display •AUX2 t >ON< ! I •Aux 2 ~ " ""~ t ' l ~ ON - - ~ 1 From the Commander o Please refer to the Owner's Manual ofthe head unit. Turning Power On and Off When you turn on the power for the first time, to protect the speakers, no sound is output until you select the system in "Setting the Speaker System (System Select)" (page 37)/ "Setting the AUX Input System (AUX Input Setup)" (page 39) and set them. First, set the speaker system I input system. You cannot tum power on/off from the PC. When an Ai-NET compatible head unit is connected, the power of the unit is linked with the power of the head unit. 1 Turn the ignition key to the ACC or ON position. The power turns on. 2 Press and hold [SOURCE] for at least 2 seconds to turn off the unit. o Either switch will tum the power on. o When the ignition key is turned to off, the power ofthe unit is also turned off Audio Adjustment 1 Press the [Rotary encoder] repeatedly. Initial System Start-Up If the system stops working properly, tum the ignition switch to off, and then on again. If the system still does not work properly, reset the unit. 1 Press RESET switch with a ballpoint pen or similar pointed object. nl = . o ., t-i*-*-*1 o

  • 1
  • 2
  • 3
  • 4
  • 5
  • 6
  • 7
  • 8
  • 9
  • 10
  • 11
  • 12
  • 13
  • 14
  • 15
  • 16
  • 17
  • 18
  • 19
  • 20
  • 21
  • 22
  • 23
  • 24
  • 25
  • 26
  • 27
  • 28
  • 29
  • 30
  • 31
  • 32
  • 33
  • 34
  • 35
  • 36
  • 37
  • 38
  • 39
  • 40
  • 41
  • 42
  • 43
  • 44
  • 45
  • 46
  • 47
  • 48
  • 49
  • 50
  • 51
  • 52
  • 53
  • 54
  • 55
  • 56
  • 57
  • 58
  • 59
  • 60
  • 61
  • 62
  • 63
  • 64
  • 65
  • 66
  • 67
  • 68
  • 69
  • 70
  • 71
  • 72
  • 73
  • 74
  • 75
  • 76
  • 77
  • 78
  • 79
  • 80
  • 81
  • 82
  • 83
  • 84
  • 85
  • 86
  • 87
  • 88
  • 89
  • 90
  • 91
  • 92
  • 93
  • 94
  • 95
  • 96
  • 97
  • 98

Basic Operation
II
E...O
TE
COMMMO
EA
RUX
-CBDO
/..@'A.PI'IE
Rotary encoder
About
the
Commander
display
<Items
that
have been selected>
•AUX2
II
:"'~
, :
.
.;
>ON<
!
"'t
I
<Items
that
have
not
been selected>
•Aux
2
~
-
~
-
""~
"
ON
1
t
'
l
~
Initial
System
Start-Up
If
the system stops working properly, tum the ignition switch to off, and
then on again.
If
the system still does not work properly, reset the unit.
1
Press RESET switch
with
a
ballpoint
pen
or
similar
pointed
object.
<Right side>
..
.,
t-i*-
*-*
1
o<r:=
=
o
nl
RESET
switch
The system will be reset and restarted.
o
Reset when power
is
off
o
Resetting does
not
erase the settings stored in the system.
Using
with
Ai-NET
Connections
When the unit is connected to the head unit through Ai-NET, some
operations can
be
controlled with the head unit.
The following operations are controlled with the head unit. The
Commander and PC will no longer control these when the head unit is
con
nected.
Turning Power On and Off (page 35)
Switching the Sources (page 36)
• Adjusting S
ubw
oofer/Balan
ce/
Fader
No
lume (page 35, 36)
You can set Defeat (page 36) and Calling
of
the stored settings (Preset
Call) (page 37) with the head unit, Commander,
or
PC.
From
the
Commander
o
Please refer to the Owner's Manual
of
the head unit.
Turning
Power
On
and
Off
When you turn on the power for the first time, to protect the speakers,
no sound is output until you select the system in "Setting the Speaker
System (System Select)" (page 37)/ "Setting the AUX Input System
(AUX Input Setup)" (page 39) and set them. First, set the speaker
system
I
input system.
You
cannot tum power on/off from the PC. When an Ai-NET
compatible head unit is connected, the power
of
the unit is linked with
the power
of
the head unit.
1
Turn
the
ignition
key
to
the ACC
or
ON
position.
The power turns on.
2
Press
and
hold
[SOURCE]
for
at
least 2
seconds
to
turn
off
the
unit.
o
Either switch will
tum
the power on.
o
When the ignition key
is
turn
ed
to off, the
pow
er
of
the unit
is
also
turned
off
Audio
Adjustment
1
Press
the
[Rotary encoder] repeatedly.
Select the adjust
in
g mode.
SUBWOOF
ER
*
1
--t
NAVI LEVEL*
2
--t
MX PLUS SETUP
(LEVEL ADJUSTMENT) *
3
--?
BALANCE
--?
FADER
--t
DEFEAT
--t
VOLUME
--t
SUBWOO
FER
*
1
This is
not
displayed when the subwoofer is
off
*
2
This is
not
displayed when "Mixing Navi Audio Guidance (Navi Mix
Setup
)"
(page 41) is
off
*
3
This is
not
displayed when
MX
Plus is
off
2
Rotate
the
[Rotary encoder].
Sel
ec
t
th
e level you want.
o
Volume c
an
be adjust
ed
by rotating the rotary encoder without
selecting the Volume mode.
o
If
there is no operation within 5 seconds, the adjustment mode is
cancelled.
Adjust the subwoofer output (Initial setting: "00").
Setting contents: 00 to 15
o
When
an
Ai-NET
compatible head unit is connected, the audio
settings are
ad
ju
sted
at
the head unit
and
you cannot set them on the
unit itse
lf
Adjusts the Navi
ga
tion audio guidance volume (Initial setting:
"0
dB").
Setting contents: -10 to +10
dB
35-EN