Alpine PXA-H800 Owners Manual - Page 47
Setting, Equalizer, Graphic
 |
View all Alpine PXA-H800 manuals
Add to My Manuals
Save this manual to your list of manuals |
Page 47 highlights
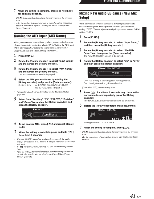
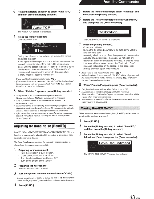
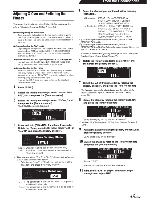
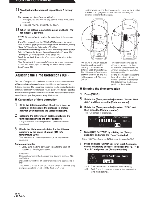
From the Commander 9 Select the level you want by rotating the [Rotary encoder], and press the [Rotary encoder]. Compressed 1 to 3: This corrects information lost in the compression process. This reproduces a well-balanced sound close to the original. By supplementing mid- to high- frequency sound data, the sound is reproduced with more brightness and ambience. Music 1 to 3: Lower register sounds (drums, bass, etc.) and vocals are emphasized for clean and clear output. Cinema: Video dialogue is reproduced more clearly. Action movies are reproduced with more powerful sound. Action: Action movies are reproduced with more powerful sound. Drama/Talk: The dialogue portion of a video is reproduced more clearly. • When "Non Effect" is selected, MX Plus becomes disabled. • Sources to be set vary depending on the system set in "Setting the AUX Input System (AUX Input Setup)" (page 39). 10 To adjust another source, press[~] and repeat Steps 8 through 9. • You can listen with Defeat OFF (adjusted setup values) or with Defeat ON (Initial value) to compare, by following the steps below. 1 Press and hold the [Rotary Encoder] for 2 seconds or longer while in the adjustment mode. 2 Rotate the [Rotary Encoder] to switch on/off Defeat, and listen to compare. 3 To exit, select "OFF" and then press [ ~ ]. 11 When the setting is complete, press and hold [ ~ ] for at least 2 seconds. • If [ ~ 1is pressed during setting, the unit returns to the previous item. • This function is not available when Defeat is set to ON. • After the setting, it is recommended to store the setting contents on the unit. For details, refer to "Storing the Preset Values (Preset Store)" (page 36). Setting the Equalizer Mode (EQ Mode) You can choose either the Graphic EQ or the Parametric EQ for the equalizer mode. You can also tum it off. (Initial setting: "OFF") 1 Press [FUNC.]. 2 Rotate the [Rotary encoder] to select "Sound Field Adj.," and then press the [Rotary encoder]. 3 Rotate the [Rotary encoder] to select "Setup," and then press the [Rotary encoder]. 4 Rotate the [Rotary encoder] to select "EQ Mode," and then press the [Rotary encoder]. 5 Select either "G.EQ," "P.EQ," or "OFF" by rotating the [Rotary encoder], and press the [Rotary encoder]. 46-EN t~t:tf ~ I tfl IIEQ MODE ~ ~ I I ~ - ~~~ ~ ~~ ~ ~ M G "EQ · l G.EO: Graphic EO is used. P.EO: Parametric EO is used. OFF: EO mode is disabled. 6 When the setting is complete, press and hold [ ~] for at least 2 seconds. • If [ ~ 1 is pressed during setting, the unit returns to the previous item. • This function is not available when Defeat is set to ON. • After the setting, it is recommended to store the setting contents on the unit. For details, refer to "Storing the Preset Values (Preset Store)" (page 36). Setting the Graphic EQ The graphic equalizer allows you to modify the sound using 31 bands each for the front (left and right), rear (left and right) and center speakers. An additionallO bands are available for the subwoofer. This allows you to customize the sound to suit your taste. • Set "Setting the Equalizer Mode (EQ Mode)" on page 46 to "G.EQ." 1 Press [FUNC.]. 2 Rotate the [Rotary encoder] to select "Sound Field Adj.," and then press the [Rotary encoder]. 3 Rotate the [Rotary encoder] to select "EQ Adjustment;• and then press the [Rotary encoder]. The G-EO screen is displayed. II G-Er.! FRDt·n ' Band ;]I) f£: m~::Hz Level - J2. 0 dB 4 Press and hold [CHANNEL] for at least 2 seconds. Rotate the [Rotary encoder] to select either "L+R" or "L or R," and press the [Rotary encoder]. Lor R: Channels Right and Left can be set independently. L+R: Both Right and Left channels are set at the same value (The initial setting). • When you switch from "Lor R" to "L+R," choose which adjustment ofthe Rand L channels to be applied. 1 Select either "L~ R" or "R ~ L" by rotating the [Rotary encoder], and press the [Rotary encoder]. ~/;\ '.'? Setting Datal:opy om L~ R: The adjustment of the Left channel is to be applied to both Right and Left channels. R ~ L: The adjustment of the Right channel is to be applied to both Right and Left channels.
-
 1
1 -
2
-
3
-
4
-
5
-
6
-
7
-
8
-
9
-
10
-
11
-
12
-
13
-
14
-
15
-
16
-
17
-
18
-
19
-
20
-
21
-
22
-
23
-
24
-
25
-
26
-
27
-
28
-
29
-
30
-
31
-
32
-
33
-
34
-
35
-
36
-
37
-
38
-
39
-
40
-
41
-
 42
42 -
 43
43 -
 44
44 -
 45
45 -
 46
46 -
 47
47 -
 48
48 -
 49
49 -
 50
50 -
 51
51 -
 52
52 -
53
-
54
-
55
-
56
-
57
-
58
-
59
-
60
-
61
-
62
-
63
-
64
-
65
-
66
-
67
-
68
-
69
-
70
-
71
-
72
-
73
-
74
-
75
-
76
-
77
-
78
-
79
-
80
-
81
-
82
-
83
-
84
-
85
-
86
-
87
-
88
-
89
-
90
-
91
-
92
-
93
-
94
-
95
-
96
-
97
-
98
 |
 |
