Alpine PXA-H800 Owners Manual - Page 50
Iitiil
 |
View all Alpine PXA-H800 manuals
Add to My Manuals
Save this manual to your list of manuals |
Page 50 highlights
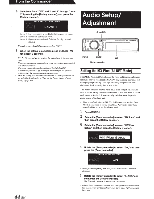
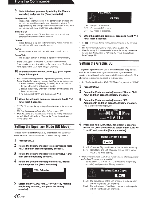
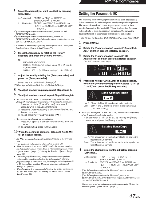
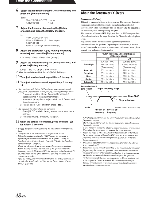
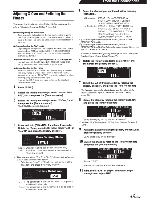
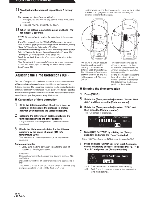
From the Commander Adjusting X-Over and Switching the Phases This section describes how to adjust X-Over. Before working on this, refer to "About the Crossover (X-Over)" (page 48). Note on adjusting the subwoofer · If the subwoofer is installed on the rear deck, setting a gentle LPF slope (for example 6 dB/ oct.) makes the sound localization more to the rear. This can also affect the acoustic localization of the front. Note on adjusting the high range Depending on the speaker, inputting low frequency component signals (about 2 kHz or less) with the HPF adjustment could result in distortion. If distortion occurs, set a steep slope (for example 30 dB/oct.). Adjust so that the mid and high range sounds do not separate. Normally use with the LPF turned off. If the high range is too strong, we recommend adjusting for a gentle slope. Note on adjusting the low range When a subwoofer is connected and you are using a speaker with a low range of under 10 or 12 em (3-15/16" or 4-3/4"), setting the low range HPF to "OFF" can result in distortion when low frequency components are input. If so, set the H.P.F. slope to a value suited for the speaker's frequency response. 1 Press [FUNC.]. 2 Rotate the [Rotary encoder] to select "Sound Field Adj.", and then press the [Rotary encoder]. 3 Rotate the [Rotary encoder] to select "X-Over," and then press the [Rotary encoder]. The X-OVER screen is displayed. 11' >::-0 \ •'ER FRONT HIGH rmm 1ukH, ~ 4 Press and hold [CHANNEL] for at least 2 seconds. Rotate the [Rotary encoder] to select either "L+R" or "L or R," and press the [Rotary encoder]. · Data SE!!tting modE! rm::J Lor R: Channels R and L can be set independently. L+R: Both Rand L channels are set at the same value (The initial setting) . • When you switch from "Lor R " to "L+R," choose which adjustment ofthe R and L channels to be applied. 1 Select either "L ~ R" or "R ~ L" by rotating the [Rotary encoder). and press the [Rotary encoder]. SE!!tting Data l:opy om L~ R: The adjustment of the L channel is to be applied to both R and L c hannels. R~ L: The adjustment of the R channel is to be applied to both R and L channels. 5 Select the channel you want to adjust by pressing [CHANNEL]. L+R selected: FRONT HIGH~FRONT MID~ FRONT LOW~REAR~CENTER~ SUBWOOFER* 1 ~FRONT HIGH Lor R selected : FRONT L HIGH~ FRONT R HIGH~ FRONT L MID~FRONT R MID~ FRONT L LOW~ FRONT R LOW~ REAR L~REAR R~CENTER~ SUBWOOFER*2 ~FRONT L HIGH *1 If the Subwoofer output is set for Monaural, you can set both SUBWOOFER I and 2. ~ If the Subwoofer output is set for Monaural, you can set SUBWOOFER 1 and 2. If the Subwoofer output is setfor Stereo, you can set SUBWOOFER Land R. • Channels to be set vary depending on the system set in "Setting the Speaker System (System Select)" (page 37). 6 Rotate the [Rotary encoder] to select "HPF;' and then press the [Rotary encoder]. II' ::::-0\IER FRONT R HIGH ~ IUkH' ~ 7 Select the cut-off frequency (fc) by rotating the [Rotary encoder], and press the [Rotary encoder]. • The frequency that can be adjusted may vary depending on the channel (speaker). Refer to "About the Crossover (X-Over)" (page 48). 8 Adjust the slope by rotating the [Rotary encoder], and press the [Rotary encoder]. II' ::
-
 1
1 -
2
-
3
-
4
-
5
-
6
-
7
-
8
-
9
-
10
-
11
-
12
-
13
-
14
-
15
-
16
-
17
-
18
-
19
-
20
-
21
-
22
-
23
-
24
-
25
-
26
-
27
-
28
-
29
-
30
-
31
-
32
-
33
-
34
-
35
-
36
-
37
-
38
-
39
-
40
-
41
-
42
-
43
-
44
-
 45
45 -
 46
46 -
 47
47 -
 48
48 -
 49
49 -
 50
50 -
 51
51 -
 52
52 -
 53
53 -
 54
54 -
 55
55 -
56
-
57
-
58
-
59
-
60
-
61
-
62
-
63
-
64
-
65
-
66
-
67
-
68
-
69
-
70
-
71
-
72
-
73
-
74
-
75
-
76
-
77
-
78
-
79
-
80
-
81
-
82
-
83
-
84
-
85
-
86
-
87
-
88
-
89
-
90
-
91
-
92
-
93
-
94
-
95
-
96
-
97
-
98
 |
 |
