Alpine PXA-H800 Owners Manual - Page 55
Multi, Channel, Function, Adjustment, Procedure, Adjusting, Speaker, Volume, level, Output, level
 |
View all Alpine PXA-H800 manuals
Add to My Manuals
Save this manual to your list of manuals |
Page 55 highlights
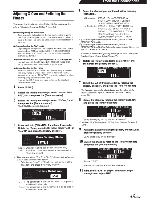
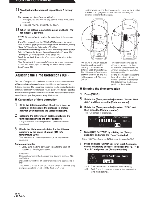
From the Commander Multi Channel Function Adjustment Procedure Make the adjustments described below in order to reproduce Dolby Digital and DTS sound with greater accuracy. Setting the 2-Channel Signal Playback Mode (Mode) (page 52) This sets the 2-channel signal playback mode. • Adjusting the Acoustic Image (81-PHANTOM) (page 55) Adjusting the acoustic image to achieve a sound as if the center speaker were directly in front of the listener. • Setting the Linear PCM (PCM Mode) (page 56) You can choose either 2ch or 3ch for the playback output of a disc recorded on the linear PCM . • Mixing the Low Range Audio of the Center with the Front LJR (Center Bass Split) (page 56) Turning this feature on makes the audio signals emitted from the front UR speakers mixed with the center audio signals (low range). • Mixing the Low Range Audio for the Rear (Rear Mix) (page 55) Achieving smooth sound in the rear seat by mixing the front audio signals with the rear speaker signals. • Achieving Powerful High Volume Sound (Listening Mode) (page 56) Achieving energetic sound with even greater power, like the sound in a movie theater. • Adjusting the DVD Level (DVD Level) (page 57) Adjust the volume signal level in each of the Dolby Digital, Dolby Pro Log ic II, DTC and PCM mod es. • Adjusting the Speaker Volume Level (Output Level) (page 54) Adjust each speaker's volume so they are the same level . • Storing the Preset Values (Preset Store) (page 36) Storing all the setti ngs and adjustments made on the PXAH800 (not only the above settings/adjusts) in the memory. In case of combining the Automatic adjustments, etc. We recommend to make the Automatic adjustments before the Dolby Surround adjustments Adjusting the Speaker Volume level (Output level) The test tones help to make the volume adjustments of the different speakers. When levels are equal, a strong sense of presence can be heard from the different speakers at the listening position. (Initial setting: "±OdB") 1 Press [FUNC.]. 2 Rotate the [Rotary encoder] to select "Multi Ch. Setup," and then press the [Rotary encoder]. 3 Rotate the [Rotary encoder] to select "Output Level," and then press the [Rotary encoder]. OUTPUT LEVEL screen will be displayed and the test tone is produced from the left front speaker. 4 Select the channel by pressing [CHANNEL]. Test tone is output from the selected channel. l"3. ~ IIi E • OUTPUT LE'..,'E L . tl L EJf t + Levet J[] dE: ch .: Left/Center/Right/R-Surround/L-Surround • Channels to be set vary depending on the system set in "Setting the Speaker System (System Select) (page 37)." 5 Adjust the speaker volumes for each channel to make them equal while the test tone is output from each channel. Adjust the level by rotating the [Rotary encoder]. LEVEL: -10 to+ 10 dB (in 1 dB steps) Adjust based on the front speakers. 6 To adjust another channel, repeat Steps 4 and 5. 7 When the setting is complete, press and hold [ ~ ] for at least 2 seconds. • lf[ ~ ] is pressed during setting, the unit returns to the previous item. • Avoid stopping, pausing, switching the disc, cueing,Jast-forwarding or switching the audio channel ofthis unit while making this adjustment. The setting is cancelled if the decode mode is switched • After the setting, it is recommended to store the setting contents on the unit. For details, refer to "Storing the Preset Values (Preset Store)" (page 36). 54-EN
-
 1
1 -
2
-
3
-
4
-
5
-
6
-
7
-
8
-
9
-
10
-
11
-
12
-
13
-
14
-
15
-
16
-
17
-
18
-
19
-
20
-
21
-
22
-
23
-
24
-
25
-
26
-
27
-
28
-
29
-
30
-
31
-
32
-
33
-
34
-
35
-
36
-
37
-
38
-
39
-
40
-
41
-
42
-
43
-
44
-
45
-
46
-
47
-
48
-
49
-
 50
50 -
 51
51 -
 52
52 -
 53
53 -
 54
54 -
 55
55 -
 56
56 -
 57
57 -
 58
58 -
 59
59 -
 60
60 -
61
-
62
-
63
-
64
-
65
-
66
-
67
-
68
-
69
-
70
-
71
-
72
-
73
-
74
-
75
-
76
-
77
-
78
-
79
-
80
-
81
-
82
-
83
-
84
-
85
-
86
-
87
-
88
-
89
-
90
-
91
-
92
-
93
-
94
-
95
-
96
-
97
-
98
 |
 |
