Asus M8 M8000 English - Page 35
Using The Notebook Pc
 |
View all Asus M8 manuals
Add to My Manuals
Save this manual to your list of manuals |
Page 35 highlights
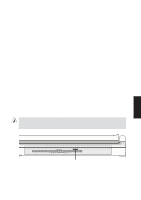
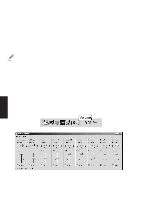
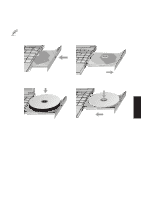
4. Using SECTION 4 USING THE NOTEBOOK PC Introduction This Section describes the basic features and procedures for using your Notebook PC. Topics covered include the floppy drive, CD-ROM drive, pointing device, and other input and output devices. Storage Device Modules Data storage and retrieval are two of the most fundamental tasks you will perform when working with your computer. The Notebook PC is equipped with a modular drive bay to support a 3.5" floppy drive, a second hard disk drive, a CD-ROM drive, or a DVD-ROM drive. The modular design allows specificuse setups to decrease weight and power usage. The modular design also allows easy upgrading and replacements. The following sections will cover instructions for operating each of these drives. Floppy Disk Drive The Notebook PC features a modular 3.5-inch floppy disk drive that accepts standard 1.44MB (or 720KB) floppy diskettes. The eject button is placed on the top edge of the floppy disk drive for easy access, unlike desktop PCs with the eject button on the bottom of the floppy disk drive. The floppy activity can be monitored through the shared activity LED in front of the touchpad. WARNING! Because the eject button protrudes out when a floppy diskette is inserted, you must remove the floppy diskette during transport to prevent breakage of the eject button. Floppy Eject 35
-
 1
1 -
2
-
3
-
4
-
5
-
6
-
7
-
8
-
9
-
10
-
11
-
12
-
13
-
14
-
15
-
16
-
17
-
18
-
19
-
20
-
21
-
22
-
23
-
24
-
25
-
26
-
27
-
28
-
29
-
 30
30 -
 31
31 -
 32
32 -
 33
33 -
 34
34 -
 35
35 -
 36
36 -
 37
37 -
 38
38 -
 39
39 -
 40
40 -
41
-
42
-
43
-
44
-
45
-
46
-
47
-
48
-
49
-
50
-
51
-
52
-
53
-
54
-
55
-
56
-
57
-
58
-
59
-
60
-
61
-
62
-
63
-
64
-
65
-
66
-
67
-
68
-
69
-
70
-
71
-
72
-
73
-
74
-
75
-
76
-
77
-
78
-
79
-
80
-
81
-
82
-
83
-
84
-
85
-
86
-
87
-
88
-
89
-
90
-
91
-
92
-
93
-
94
-
95
-
96
-
97
-
98
-
99
-
100
-
101
-
102
 |
 |
