Brother International Innov-ís 40 Users Manual - English - Page 42
Positioning the fabric
 |
View all Brother International Innov-ís 40 manuals
Add to My Manuals
Save this manual to your list of manuals |
Page 42 highlights
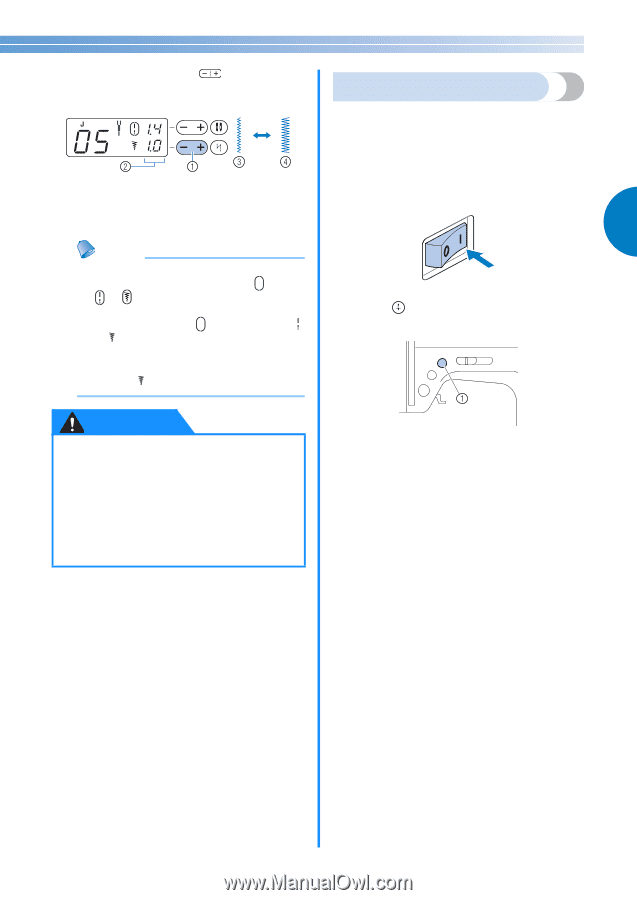
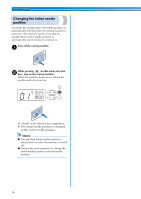
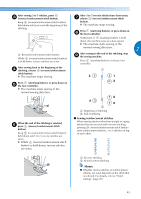
Press "+" or "-" side of (stitch width c key) to adjust the stitch width. - + Positioning the fabric Be sure that the fabric pieces are sewn in the correct order and that the right and wrong sides of the fabric are aligned correctly. a Stitch width key b Stitch width c Narrow d Wide Turn on the sewing machine. a The straight stitch (left needle position) is automatically selected. 2 Memo ● When the stitch length or stitch width is changed from the default setting, around or disappears from the LCD. When the stitch length or stitch width is reset back to the default setting, reappears around or in the LCD. ● If the stitch width of the selected stitch cannot be adjusted, "--" appears to the right of in the LCD. Press (needle position button) once or b twice to raise the needle. CAUTION ● After adjusting the stitch width, slowly turn the handwheel toward you and check that the needle does not touch the presser foot. If the needle hits the presser foot, the needle may bend or break. ● If the stitches become bunched together, increase the stitch length. Continuing to sew with the stitches bunched together may result in the needle bending or breaking. a Needle position button Place the fabric under the presser foot. c • If the seam allowance is positioned on the right side, sewing in a straight line is easier and the extra fabric does not get in the way. 41
-
 1
1 -
2
-
3
-
4
-
5
-
6
-
7
-
8
-
9
-
10
-
11
-
12
-
13
-
14
-
15
-
16
-
17
-
18
-
19
-
20
-
21
-
22
-
23
-
24
-
25
-
26
-
27
-
28
-
29
-
30
-
31
-
32
-
33
-
34
-
35
-
36
-
 37
37 -
 38
38 -
 39
39 -
 40
40 -
 41
41 -
 42
42 -
 43
43 -
 44
44 -
 45
45 -
 46
46 -
 47
47 -
48
-
49
-
50
-
51
-
52
-
53
-
54
-
55
-
56
-
57
-
58
-
59
-
60
-
61
-
62
-
63
-
64
-
65
-
66
-
67
-
68
-
69
-
70
-
71
-
72
-
73
-
74
-
75
-
76
-
77
-
78
-
79
-
80
-
81
-
82
-
83
-
84
-
85
-
86
-
87
-
88
-
89
-
90
-
91
-
92
-
93
-
94
-
95
-
96
-
97
-
98
-
99
-
100
-
101
-
102
 |
 |