Brother International Innov-ís 40 Users Manual - English - Page 47
Cutting the thread, Automatically sewing reverse, reinforcement stitches
 |
View all Brother International Innov-ís 40 manuals
Add to My Manuals
Save this manual to your list of manuals |
Page 47 highlights
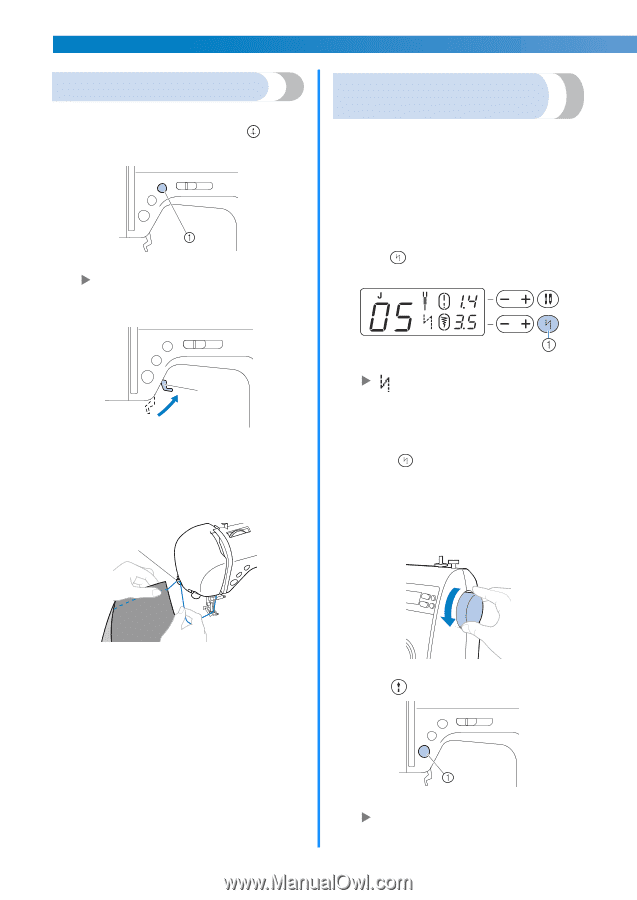
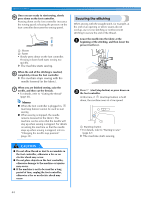
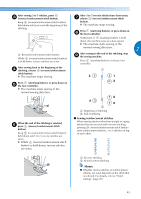
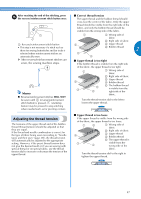
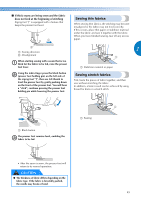
SEWING BASICS Cutting the thread When you wish to finish the stitching and the a sewing machine is stopped, press (needle position button) once to raise the needle. a Needle position button X The needle is raised. Raise the presser foot lever. b Automatically sewing reverse/ reinforcement stitches The sewing machine can be set to automatically sew reverse or reinforcement stitches at the beginning and end of the stitching. With straight stitches and zigzag stitches, reverse stitches, not reinforcement stitches, are automatically sewn. Select a stitch. a • For details, refer to "Selecting a stitch" (page 40). Press (automatic reverse/reinforcement b stitch key). a a Presser foot lever Pull the fabric to the left side of the machine, c and then pass the threads through the thread cutter to cut them. a a Automatic reverse/reinforcement stitch key X appears in the LCD. • This step is not necessary if a stitch such as those for sewing buttonholes and bar tacks is selected where reinforcement stitches are automatically sewn. • Press (automatic reverse/reinforcement stitch key) again to cancel automatic reverse/ reinforcement stitching. Position the fabric under the presser foot, and c turn the handwheel toward you to insert the needle into the fabric. a Thread cutter 46 Press d (start/stop button) once. a Start/stop button X After reverse/reinforcement stitches are sewn, the machine starts sewing.
-
 1
1 -
2
-
3
-
4
-
5
-
6
-
7
-
8
-
9
-
10
-
11
-
12
-
13
-
14
-
15
-
16
-
17
-
18
-
19
-
20
-
21
-
22
-
23
-
24
-
25
-
26
-
27
-
28
-
29
-
30
-
31
-
32
-
33
-
34
-
35
-
36
-
37
-
38
-
39
-
40
-
41
-
 42
42 -
 43
43 -
 44
44 -
 45
45 -
 46
46 -
 47
47 -
 48
48 -
 49
49 -
 50
50 -
 51
51 -
 52
52 -
53
-
54
-
55
-
56
-
57
-
58
-
59
-
60
-
61
-
62
-
63
-
64
-
65
-
66
-
67
-
68
-
69
-
70
-
71
-
72
-
73
-
74
-
75
-
76
-
77
-
78
-
79
-
80
-
81
-
82
-
83
-
84
-
85
-
86
-
87
-
88
-
89
-
90
-
91
-
92
-
93
-
94
-
95
-
96
-
97
-
98
-
99
-
100
-
101
-
102
 |
 |