Brother International MFC-9340CDW Quick Setup Guide - English - Page 25
Wireless Network, Windows, Macintosh
 |
View all Brother International MFC-9340CDW manuals
Add to My Manuals
Save this manual to your list of manuals |
Page 25 highlights
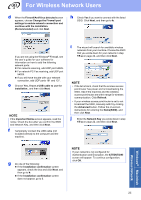
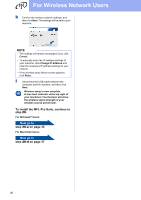
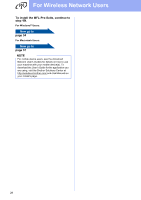
For Wireless Network Users d When the Firewall/AntiVirus detected screen appears, choose Change the Firewall port settings to enable network connection and continue with the installation. (Recommended) and click Next. h Check Yes if you want to connect with the listed SSID. Click Next, and then go to k. If you are not using the Windows® Firewall, see the user's guide for your software for information on how to add the following network ports: For network scanning, add UDP port 54925. For network PC-Fax receiving, add UDP port 54926. If you still have trouble with your network connection, add UDP ports 161 and 137. e Choose Yes, I have a USB cable to use for installation., and then click Next. NOTE If the Important Notice screen appears, read the notice. Check the box after you confirm the SSID and Network Key, and then click Next. f Temporarily connect the USB cable (not included) directly to the computer and the machine. i The wizard will search for available wireless networks from your machine. Choose the SSID that you wrote down for your network in step 17-a on page 22, and then click Next. NOTE • If the list is blank, check that the wireless access point/router has power and is broadcasting the SSID. See if the machine and the wireless access point/router are within range for wireless communication. Click Refresh. • If your wireless access point/router is set to not broadcast the SSID, manually add it by clicking the Advanced button. Follow the on-screen instructions for entering the Name(SSID), and then click Next. j Enter the Network Key you wrote down in step 17-a on page 22, and then click Next. g Do one of the following: If the Installation confirmation screen appears, check the box and click Next, and then go to h. If the Installation confirmation screen does not appear, go to i. NOTE If your network is not configured for Authentication and Encryption, the ATTENTION! screen will appear. To continue configuration, click OK. 25 Windows® Macintosh Wireless Network
-
 1
1 -
2
-
3
-
4
-
5
-
6
-
7
-
8
-
9
-
10
-
11
-
12
-
13
-
14
-
15
-
16
-
17
-
18
-
19
-
 20
20 -
 21
21 -
 22
22 -
 23
23 -
 24
24 -
 25
25 -
 26
26 -
 27
27 -
 28
28 -
 29
29 -
 30
30 -
31
-
32
-
33
-
34
-
35
-
36
-
37
-
38
-
39
-
40
-
41
-
42
 |
 |
