Brother International MFC-9340CDW Quick Setup Guide - English - Page 8
Set the date and time, Set your Station ID
 |
View all Brother International MFC-9340CDW manuals
Add to My Manuals
Save this manual to your list of manuals |
Page 8 highlights
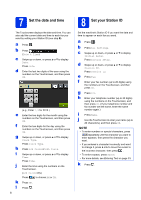
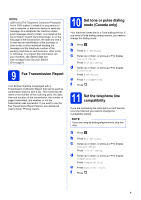
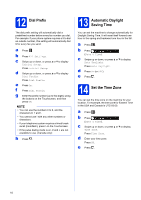
7 Set the date and time The Touchscreen displays the date and time. You can also add the current date and time to each fax you send by setting your Station ID (see step 8). a Press . b Press (Date & Time). c Swipe up or down, or press a or b to display Date. Press Date. d Enter the last two digits of the year using the numbers on the Touchscreen, and then press OK. (e.g., Enter 1, 3 for 2013.) e Enter the two digits for the month using the numbers on the Touchscreen, and then press OK. f Enter the two digits for the day using the numbers on the Touchscreen, and then press OK. g Swipe up or down, or press a or b to display Clock Type. Press Clock Type. h Press 12h Clock or 24h Clock. i Swipe up or down, or press a or b to display Time. Press Time. j Enter the time using the numbers on the Touchscreen. (12h Clock only) Press to choose AM or PM. k Press OK. l Press . 8 8 Set your Station ID Set the machine's Station ID if you want the date and time to appear on each fax you send. a Press . b Press All Settings. c Swipe up or down, or press a or b to display Initial Setup. Press Initial Setup. d Swipe up or down, or press a or b to display Station ID. Press Station ID. e Press Fax. f Enter your fax number (up to 20 digits) using the numbers on the Touchscreen, and then press OK. g Press Tel. h Enter your telephone number (up to 20 digits) using the numbers on the Touchscreen, and then press OK. (If your telephone number and fax number are the same, enter the same number again.) i Press Name. j Use the Touchscreen to enter your name (up to 20 characters), and then press OK. NOTE • To enter numbers or special characters, press repeatedly until the character you want to enter appears, then press the character you want. • If you entered a character incorrectly and want to change it, press d or c to move the cursor to the incorrect character, then press . • To enter a space, press Space. • For more details, see Entering Text on page 33. k Press .
-
 1
1 -
2
-
 3
3 -
 4
4 -
 5
5 -
 6
6 -
 7
7 -
 8
8 -
 9
9 -
 10
10 -
 11
11 -
 12
12 -
 13
13 -
14
-
15
-
16
-
17
-
18
-
19
-
20
-
21
-
22
-
23
-
24
-
25
-
26
-
27
-
28
-
29
-
30
-
31
-
32
-
33
-
34
-
35
-
36
-
37
-
38
-
39
-
40
-
41
-
42
 |
 |
