Brother International MFC-9840CDW Software Users Manual - English - Page 173
For MFC-9440CN, Resolution, File Format Options
 |
UPC - 012502618744
View all Brother International MFC-9840CDW manuals
Add to My Manuals
Save this manual to your list of manuals |
Page 173 highlights
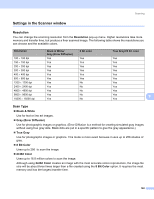
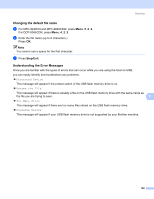
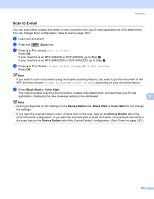
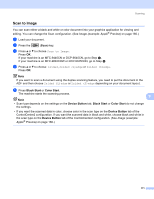
Scanning • Duplex scan is supported by the MFC-9840CDW and DCP-9045CDN only. • Duplex scan is available from the ADF only. • Duplex scan is not available for legal size paper. Scan to USB (Not available for DCP-9040CN) 9 You can scan black and white and color documents directly to a USB Flash Memory Drive. Black and white documents will be stored in the PDF (*.PDF) or TIFF file formats (*.TIF). Color documents may be stored in PDF (*.PDF) or JPEG (*.JPG) file formats. The default File names are based on the current date. You can change the color, quality and file name. Resolution File Format Options Color 150 dpi Color 300 dpi Color 600 dpi B&W 200 dpi B&W 200x100 dpi JPEG / PDF JPEG / PDF JPEG / PDF TIFF / PDF TIFF / PDF For MFC-9440CN a Put a USB flash memory drive into your machine. b Load your document in the ADF or on the Scanner glass. c Press the (Scan) key. d Press a or b to choose Scan to USB. Press OK. e Choose one of the options below. „ To change the setting, choose 2. Change Setting. Press OK and go to f „ To start scanning with the settings you set in the Function Menu (Menu, 5, 2), choose 1. Start Scan. Press OK and go to i. f Press a or b to choose the quality you want. Press OK. g Press a or b to choose the file type you want. Press OK. Note • If you choose color in the resolution setting, you cannot choose TIFF. • If you choose black and white in the resolution setting, you cannot choose JPEG. 9 9 166
-
 1
1 -
2
-
3
-
4
-
5
-
6
-
7
-
8
-
9
-
10
-
11
-
12
-
13
-
14
-
15
-
16
-
17
-
18
-
19
-
20
-
21
-
22
-
23
-
24
-
25
-
26
-
27
-
28
-
29
-
30
-
31
-
32
-
33
-
34
-
35
-
36
-
37
-
38
-
39
-
40
-
41
-
42
-
43
-
44
-
45
-
46
-
47
-
48
-
49
-
50
-
51
-
52
-
53
-
54
-
55
-
56
-
57
-
58
-
59
-
60
-
61
-
62
-
63
-
64
-
65
-
66
-
67
-
68
-
69
-
70
-
71
-
72
-
73
-
74
-
75
-
76
-
77
-
78
-
79
-
80
-
81
-
82
-
83
-
84
-
85
-
86
-
87
-
88
-
89
-
90
-
91
-
92
-
93
-
94
-
95
-
96
-
97
-
98
-
99
-
100
-
101
-
102
-
103
-
104
-
105
-
106
-
107
-
108
-
109
-
110
-
111
-
112
-
113
-
114
-
115
-
116
-
117
-
118
-
119
-
120
-
121
-
122
-
123
-
124
-
125
-
126
-
127
-
128
-
129
-
130
-
131
-
132
-
133
-
134
-
135
-
136
-
137
-
138
-
139
-
140
-
141
-
142
-
143
-
144
-
145
-
146
-
147
-
148
-
149
-
150
-
151
-
152
-
153
-
154
-
155
-
156
-
157
-
158
-
159
-
160
-
161
-
162
-
163
-
164
-
165
-
166
-
167
-
 168
168 -
 169
169 -
 170
170 -
 171
171 -
 172
172 -
 173
173 -
 174
174 -
 175
175 -
 176
176 -
 177
177 -
 178
178 -
179
-
180
-
181
-
182
-
183
-
184
-
185
-
186
-
187
-
188
-
189
-
190
-
191
-
192
-
193
-
194
-
195
-
196
-
197
-
198
-
199
-
200
-
201
-
202
-
203
-
204
-
205
-
206
-
207
-
208
-
209
-
210
-
211
-
212
-
213
-
214
-
215
-
216
-
217
 |
 |