Brother International PE-DESIGN 11 Startup : Reference Guide
Brother International PE-DESIGN 11 Manual
 |
View all Brother International PE-DESIGN 11 manuals
Add to My Manuals
Save this manual to your list of manuals |
Brother International PE-DESIGN 11 manual content summary:
- Brother International PE-DESIGN 11 | Startup : Reference Guide - Page 1
PERSONAL EMBROIDERY & SEWING DIGITIZING SOFTWARE Startup : Reference Guide First, read the description on installing the software in this document. Be sure to read this document before using the software. We recommend that you keep this document nearby for future reference. - Brother International PE-DESIGN 11 | Startup : Reference Guide - Page 2
- Brother International PE-DESIGN 11 | Startup : Reference Guide - Page 3
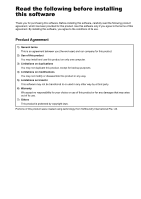
product, except for backup purposes. 4) Limitations on modifications You may not modify or disassemble this product in any way. 5) Limitations on transfer This software may not be transferred to or used in any other way by a third party. 6) Warranty We accept no responsibility for your choice or use - Brother International PE-DESIGN 11 | Startup : Reference Guide - Page 4
704-1700 declares, that the products Product Name: Model Numbers: Brother PE-DESIGN Software Key PE-DESIGN 11 complies with Part 15 of the FCC Rules. Operation is , if not installed and used in accordance with the instructions, may cause harmful interference to radio communications. However, - Brother International PE-DESIGN 11 | Startup : Reference Guide - Page 5
on the "PE-DESIGN Software Key". • Do not drop or hit the "PE-DESIGN Software Key". For repairs or adjustments In the event that a malfunction occurs or adjustment is required, please consult your nearest service center. Notice Neither this Reference Guide nor the Instruction Manual explains how to - Brother International PE-DESIGN 11 | Startup : Reference Guide - Page 6
- Brother International PE-DESIGN 11 | Startup : Reference Guide - Page 7
- Brother International PE-DESIGN 11 | Startup : Reference Guide - Page 8
page 28 page 39 page 33 - Brother International PE-DESIGN 11 | Startup : Reference Guide - Page 9
page 58 page 53 page 48 page 41 × 3 × 3 page 66 - Brother International PE-DESIGN 11 | Startup : Reference Guide - Page 10
Table of Contents How To Use the Manuals 3 Reference Guide (Printed book/PDF format) ... 3 Instruction Manual 3 Getting Started 5 Introduction 5 Package contents (Full Version Only).......... 5 Precautions for using the "PE-DESIGN Software Key 5 Installation 6 Please Read Before Installation - Brother International PE-DESIGN 11 | Startup : Reference Guide - Page 11
Navigating This Guide for Best Results Installation steps Follow this initial steps to install the software. Getting Started For people who want to learn basic application operations I am... .... a PE-DESIGN beginner. .... interested in reviewing basic operations. For people who want to - Brother International PE-DESIGN 11 | Startup : Reference Guide - Page 12
is available, which can also be accessed from a mobile device. http://s.brother/cmpaa/ Viewing from the [Start] screen (for Windows 10 users) Click . Click [PE-DESIGN 11] and then select [Online Instruction Manual]. b • For Windows 8.1 users: Position the mouse pointer in the [Start] screen to - Brother International PE-DESIGN 11 | Startup : Reference Guide - Page 13
[Instruction Manual] or [Reference Guide] under the title [PE-DESIGN 11]. - For Windows 7 users: Click and then [All Programs]. Click [PE-DESIGN 11] and click [PDF] and then select [Instruction Manual] or [Reference Guide]. • Adobe® Reader® is required for viewing and printing the PDF version of - Brother International PE-DESIGN 11 | Startup : Reference Guide - Page 14
Package contents (Full Version Only) Check that the following items are included. If anything is missing or damaged, contact your authorized dealer or Brother Customer Service. PE-DESIGN Software Key Containing the software * Design is subject to change. Reference Guide (this manual) Positioning - Brother International PE-DESIGN 11 | Startup : Reference Guide - Page 15
privileges, refer to the Windows manual. • The installation procedure is described PE-DESIGN Software Key" and for transferring embroidery data to an embroidery machine) Mouse Graphic printer that is supported by your system (if you wish to print your images) Required for updating PE-DESIGN - Brother International PE-DESIGN 11 | Startup : Reference Guide - Page 16
rightclick . The [Run] dialog box appears. 2) Type in the full path to the installer, and then click [OK] to start up the installer. For example: E:\PE-DESIGN 11\setup.exe (where "E:" is the drive name used for "PE-DESIGN Software Key") • For Windows 7 users: Click , then [All Programs]. Select - Brother International PE-DESIGN 11 | Startup : Reference Guide - Page 17
. The [AutoPlay] dialog box continues to be displayed. 3 Click [Open folder to view files]. The [File Explorer] window appears. 4 Open the [PE-DESIGN 11] folder, and then double-click the [setup.exe] file. The [User Account Control] dialog box appears. 5 Click [Yes]. After a short while - Brother International PE-DESIGN 11 | Startup : Reference Guide - Page 18
agreement] box if you agree to the terms, and then click [Next]. A dialog box appears, allowing you to select the folder where the software will be installed. 9 Check the installation location, and then click [Install] to install the application. When the installation is completed, the following - Brother International PE-DESIGN 11 | Startup : Reference Guide - Page 19
[Finish] to complete the installation of the software. b • If a message appears, indicating that the computer be restarted, it is necessary to restart the computer. • If the [Open Online Instruction Manual] box is checked, the Online Instruction Manual will open after installation is complete. 10 - Brother International PE-DESIGN 11 | Startup : Reference Guide - Page 20
Installation Uninstalling the Software 1 Click , and then click . 2 Click [Apps]. 3 In the [Apps & features] window, select [PE-DESIGN 11] and click [Uninstall]. The message [This app and its related info will be uninstalled.] will be displayed. 11 - Brother International PE-DESIGN 11 | Startup : Reference Guide - Page 21
uninstallation procedure is described for Windows 10. • For Windows 8.1, right-click [PE-DESIGN 11 (Layout & Editing)] in the [Apps] screen, and click [Uninstall] in the taskbar at the bottom of the screen. Select this software in the [Programs and Features] window, and then click [Uninstall]. • For - Brother International PE-DESIGN 11 | Startup : Reference Guide - Page 22
for software updates. Contact technical support if the problems are not addressed. Please check the company web site (www.brother.com) to find the technical support in your area. a Before contacting web site: 1) Have your Windows operating system updated to the most current version. 2) Find - Brother International PE-DESIGN 11 | Startup : Reference Guide - Page 23
for Updates]. The software is checked to determine whether or not it is the latest version. 2 If the message shown on the left appears, click [OK]. The latest version of the software is being used. 3 If the message shown on the left appears, click [Yes] to start downloading the latest version of - Brother International PE-DESIGN 11 | Startup : Reference Guide - Page 24
the Desired Embroidery Pattern Key Features of Successful Embroidery Design In order to complete your embroidery project, it is necessary to become proficient in performing operations using the following key features. PE-DESIGN is loaded with tools and functions to assist you in these "key" steps - Brother International PE-DESIGN 11 | Startup : Reference Guide - Page 25
Key Features of Successful Embroidery Design I want ... Adding colors to simulate color schemes. page 23 to change color combination. page 35 I want ... Enhancing with sewing attributes to change the sew types - Brother International PE-DESIGN 11 | Startup : Reference Guide - Page 26
at the basic sequence using each key feature of embroidery design in order to create an embroidery project. Starting Applications PE-DESIGN provides five applications helpful with embroidery design. First, let's start up [Layout & Editing], which assists you in all "key" processes for creating an - Brother International PE-DESIGN 11 | Startup : Reference Guide - Page 27
up Layout & Editing 1 Plug the "PE-DESIGN Software Key" into the computer. Close the [AutoPlay] dialog box that appears. 2 Click . A list of applications appears. 3 Click [PE-DESIGN 11 (Layout & Editing)], which appears under the title [PE-DESIGN 11]. [Layout & Editing] starts up, and - Brother International PE-DESIGN 11 | Startup : Reference Guide - Page 28
-in patterns and text to be used Practical Exercise b Using preset settings Manages embroidery data 1 Click [Set Hoop Size and Fabric] in the startup wizard window. [Design Settings] dialog appears. 2 Click the [Design Page] tab, and then specify the display settings. For this example, set the - Brother International PE-DESIGN 11 | Startup : Reference Guide - Page 29
sewing order Check the actual sewing order of each embroidered part of the pattern. Checking embroidery data View an embroidering simulation of the created/edited pattern. Practical Exercise c Displaying the Patterns] in the [Import] group, and then click [from Design Library] in the menu. 20 - Brother International PE-DESIGN 11 | Startup : Reference Guide - Page 30
the [Image] tab. Following instructions Convert the image with Stitch wizard By using the image-importing wizards available from the [Image] tab, your photos can be easily converted into embroidery data. Using path tools Using the Text and Shapes tools Enhance your designs by using input tools to - Brother International PE-DESIGN 11 | Startup : Reference Guide - Page 31
dragging them. The more advanced functions to customize the arrangement are also available in the application. Turning Your Ideas Into Embroidery Resizing pattern Moving pattern Rotating pattern Practical Exercise e Arranging outline shapes 1 Drag the pointer to draw a selection frame around - Brother International PE-DESIGN 11 | Startup : Reference Guide - Page 32
each pattern part as desired. In order to beautifully finish an embroidery design, the color scheme of the pattern must be considered. Changing 23 1 Click the [Home] tab, and then select . 2 Hold down the key and click each of the two floral patterns. 3 Click the [Color] tab, and then click - Brother International PE-DESIGN 11 | Startup : Reference Guide - Page 33
type to the outlines and regions for changing the appearance of the pattern. Turning Your Ideas Into Embroidery Practical Exercise g Changing the sew type 1 Hold down the key and click the two floral patterns. 2 Select the [Shapes] tab. 3 Select [Concentric Circle Stitch] from the [Region - Brother International PE-DESIGN 11 | Startup : Reference Guide - Page 34
Practical Exercise h Changing the sewing order How the pattern will be sewn by the embroidery machine can be reproduced. Check the movement of stitching. Viewing stitching in simulator 1 Hold down the key and click the duplicate leaf pattern (frame 5 and 6) in the [Sewing Order] pane. 2 Drag - Brother International PE-DESIGN 11 | Startup : Reference Guide - Page 35
the Pattern Sewing the Pattern After checking the embroidery data you have designed, transfer it to the embroidery machine to sew. Select the method appropriate for the operating environment of your embroidery machine. Transferring to embroidery machine The data transfer method can be selected - Brother International PE-DESIGN 11 | Startup : Reference Guide - Page 36
Exiting the Application Saving/Opening/Printing pattern data file 1 Click in the upper-left corner of the window. The [File] menu appears. 2 Select the desired command from the menu. A list of the most recently used files, starting from the top, appears under [Most Recently Used Files]. Exiting - Brother International PE-DESIGN 11 | Startup : Reference Guide - Page 37
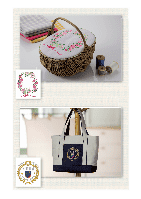
This section will take a project introduced in the beginning of this guide as an example to describe the functions, tools and operations for creating a well-designed embroidery pattern. Learn practical skills and expand your range of ideas. Practical Application a Floral wreath - Arranging stitch - Brother International PE-DESIGN 11 | Startup : Reference Guide - Page 38
Library] from the [From] selector, then [Floral2] from the [Category] selector. 2 Select [33100110.pes] from the list of patterns displayed in the pane, and then drag it into the [Design Page]. 3 While holding down the key, drag the red dot at the top of the a pattern to the right to - Brother International PE-DESIGN 11 | Startup : Reference Guide - Page 39
Application a Floral wreath - Arranging stitch patterns - 1 As in "Step 1", import pattern [33103503a.pes] from the [Floral2] category in the [Import] pane. \ b 2 After selecting the pattern, the right. 3 Rotate the original pattern 60° counterclockwise (b). Creating Various Embroidery Designs 30 - Brother International PE-DESIGN 11 | Startup : Reference Guide - Page 40
Practical Application a Floral wreath - Arranging stitch patterns - Step 3 Flipping a pattern 1 After selecting the duplicate pattern, click [Arrange] in the [Edit] group, select [Flip Horizontally] under [Flip]. The [Flip] command can also be selected from the menu that appears after right- - Brother International PE-DESIGN 11 | Startup : Reference Guide - Page 41
patterns to create a circle as shown in the figure (left), using the [Duplicate], [Rotate] and other [Arrange] commands. b c a' 2 Select [no77_2.pes] in the [Lace & Ribbon] category of the [Import] pane, and then drag it below the flower patterns. Creating Various Embroidery Designs 32 - Brother International PE-DESIGN 11 | Startup : Reference Guide - Page 42
the shape of the character, and the sewing direction is different for each block. This allows the patterns to appear more like three-dimensional and manual embroidery. Their shape consist of a line (outline) and a region (inside area), each of which can be set to a different sew type and color. 33 - Brother International PE-DESIGN 11 | Startup : Reference Guide - Page 43
Select [TN_001.pes] (Serif 01), and then drag it into the [Design Page]. key. 5 After selecting the text "10", click the [Text] ribbon tab. 6 Click the down arrow to the right of the [Text Size] selector in the [Font] group, and then select "30.0" from the list. Creating Various Embroidery Designs - Brother International PE-DESIGN 11 | Startup : Reference Guide - Page 44
Practical Application b Team Jersey numbers - Combining text - Step 2 Changing text color and sew type 1 Click the [Text Outline Sew Type] selector in the [Sew] group, and then click [Zigzag Stitch] in the list. 2 Click the [Color] tab, select the [Line] check circle, and then click [To list mode] - Brother International PE-DESIGN 11 | Startup : Reference Guide - Page 45
Practical Application b Team Jersey numbers - Combining text - 3 Select [ULTRAMARINE] from the list. 4 Select the [Region] check circle in the [Color] pane, and then select [RED] in the color palette. 36 Creating Various Embroidery Designs - Brother International PE-DESIGN 11 | Startup : Reference Guide - Page 46
[Transformed] from the [Category] selector. 2 Select [TT_001.pes] (arched text), and then drag it into the [Design Page]. 3 Click the [Text Attributes] tab. 4 After with the [Select] tool, hold down the key and drag a black dot in a corner of the pattern to enlarge the pattern to the desired - Brother International PE-DESIGN 11 | Startup : Reference Guide - Page 47
patterns "TEAM" and "10" to be selected. 2 Click the [Home] tab. 3 Click [Arrange] in the [Edit] group, and then click [Center] under [Horizontal]. Creating Various Embroidery Designs 38 - Brother International PE-DESIGN 11 | Startup : Reference Guide - Page 48
photos and using design templates can be started from the startup wizard that appears after the application is started, and wizards for creating appliqués and patches can be started from the [Home] tab in the main window of [Layout & Editing]. By following the application instructions to enter the - Brother International PE-DESIGN 11 | Startup : Reference Guide - Page 49
then click [Edit Text]. The text "SUMS" is highlighted and can be edited. Creating Various Embroidery Designs Step 3 Outputting the design data 2 Use the keyboard to type "N.U.H.S", and then press the key. The text "since 1831" in the second row is highlighted and can be edited. 3 Use - Brother International PE-DESIGN 11 | Startup : Reference Guide - Page 50
, or adding characters and other patterns. In this example, we will use your favorite photo, etc., to create an original embroidery pattern, which can directly be used with your embroidery machine. Step 1 Selecting an area of photo and tuning color of photo 1 On the [Image] tab, click [Open] in the - Brother International PE-DESIGN 11 | Startup : Reference Guide - Page 51
Practical Application d Photo embroidery - Creating an embroidery pattern from a photo - 2 Select [shh_gesture.jpg] that is located at Documents (My documents)\PE-DESIGN 11\Sample\ Layout & Editing\Photo Stitch, and then click [Open]. The selected photo appears in the [Design Page]. 3 Click [Photo - Brother International PE-DESIGN 11 | Startup : Reference Guide - Page 52
mask, click [OK]. To adjust the image mask, use the tools at the top of the dialog box, and then click [OK]. Step 2 Adjusting the embroidery hoop size and pattern size 1 Click [Next]. The [Check Mask Shape/Modify Image] dialog box appears. The area outside of the image mask appears as - Brother International PE-DESIGN 11 | Startup : Reference Guide - Page 53
x 360 mm] under [Page Size], and then click [OK]. Select an embroidery hoop size that fits the size of the created pattern. The [Check Mask Shape/Modify Image] dialog box appears again, and a [Design Page] with the new embroidery hoop size appears. 4 Click [Fit to page]. The size of the image - Brother International PE-DESIGN 11 | Startup : Reference Guide - Page 54
pattern from a photo Step 3 Adjusting the color and brightness 1 Click [Next]. A preview of the image converted to an embroidery pattern appears. 2 Select the thread chart to be used from the [Thread Chart] selector. Adjust the parameters in the windows as desired. After adjusting the - Brother International PE-DESIGN 11 | Startup : Reference Guide - Page 55
Photo embroidery - Creating an embroidery pattern from a photo - 4 Select one of the automatically adjusted patterns that appeared (1), and then click [OK] (2). a b 5 Check the adjusted color tones, and then click [Finish]. The embroidery pattern is created. 46 Creating Various Embroidery Designs - Brother International PE-DESIGN 11 | Startup : Reference Guide - Page 56
Practical Application d Photo embroidery - Creating an embroidery pattern from a photo - Step 4 Adding text 1 On the [ Text Size] selector. 3 Click below the image in the [Design Page], type "2000.01.01", and then press the key. 4 Specify the following settings for the text. Region sew - Brother International PE-DESIGN 11 | Startup : Reference Guide - Page 57
]. Step 1 Importing an outline shape 1 In the [Import] pane, select [Outline Shapes] from the [From] selector, then [Events] from the [Category] selector. 2 Select pattern [OL_heart01.pes], and then drag it into the [Design Page]. Creating Various Embroidery Designs 48 - Brother International PE-DESIGN 11 | Startup : Reference Guide - Page 58
shape pattern - Step 2 Applying patterned stitches to a shape 1 Click any open space on the screen to unselect all items. 2 While holding down the key, click the line (frame 2) and region (frame 1) of the largest heart pattern arranged in the [Sewing Order] pane. 3 Click at the top of the - Brother International PE-DESIGN 11 | Startup : Reference Guide - Page 59
Applying programmable stitches to a shape 1 Select the second-largest heart pattern (frames 3 and 4) in the [Sewing Order] pane. Creating Various Embroidery Designs 2 Set a color and sew type for each shape as follows. Line sew type Candlewicking Stitch Line color CORN FLOWER BLUE Region sew - Brother International PE-DESIGN 11 | Startup : Reference Guide - Page 60
3.0 mm Spacing 1.0 mm Start/End Type Feed ■ Region sew Under sewing Density Direction Running Stitch Path Pull compensation , Medium 4.5 line/mm Manual straight line, 135 degrees 0.0 mm Programmable fill Click , select the desired pattern in the [Browse] dialog box, and then click [OK]. For - Brother International PE-DESIGN 11 | Startup : Reference Guide - Page 61
- Step 4 Applying motif stitches to a shape 1 Select the smallest heart pattern (frames 5 and 6) in the [Sewing Order] pane. Creating Various Embroidery Designs 2 Click the [Shapes] tab. Line sew type Stem Stitch Line color PURPLE Region sew type Motif Stitch 3 Click the [Sewing Attributes - Brother International PE-DESIGN 11 | Startup : Reference Guide - Page 62
vector images (SVG files) Step 2 Displaying hidden objects Step 3 Decorating the outer heart shape Step 4 Applying gradation Creating embroidery patterns using images An embroidery pattern can be created from an image, such as photo or illustration. Use the [Import from Vector Image] command for - Brother International PE-DESIGN 11 | Startup : Reference Guide - Page 63
image - 3 Select the file to be imported, and then click [Open]. For this example, we will import [svg_heart.svg]. The image appears in the [Design Page] as a shape pattern. Step 2 Displaying hidden objects 1 Click in the toolbar at the top of the [Sewing Order] pane, and then click [Hide - Brother International PE-DESIGN 11 | Startup : Reference Guide - Page 64
4.5 mm 4.5 mm 0.0 mm 0.0 mm 5.0 mm Feed ■ Region sew Under sewing Density Direction Running Stitch Path Pull compensation , Medium 4.8 line/mm Manual straight line, 45 degrees 0.0 mm Programmable fill Pattern Pattern height Pattern width Direction Offset pat13 6.0 mm 6.0 mm 0 degree row, 0 % 55 - Brother International PE-DESIGN 11 | Startup : Reference Guide - Page 65
] pane and drag it to draw a selection frame around all the inner patterns, and then click top of the pane. at the Creating Various Embroidery Designs 2 Specify a color and sew type for each shape as follows. Region sew type Fill Stitch Region color LIGHT BLUE 3 Select the [Gradation] check - Brother International PE-DESIGN 11 | Startup : Reference Guide - Page 66
Practical Application f Bird of peace - Applying gradation to a vector image - 5 Select the color to be used in the two-color gradation, and then click [OK]. For this example, select [WHITE]. 6 Specify the following settings using the right side of the [Gradation Pattern Setting] dialog box. - Brother International PE-DESIGN 11 | Startup : Reference Guide - Page 67
setting for the pattern shape. Step 1 Splitting patterns 1 Click at the bottom-right of the screen to switch to the [Stitch View] mode. Creating Various Embroidery Designs 58 - Brother International PE-DESIGN 11 | Startup : Reference Guide - Page 68
Import] pane, select [Outline Shapes] from the [From] selector, then [Emblems] from the [Category] selector. 4 Select pattern [OL_fleur_de_lys01.pes], and then drag it into the [Design Page]. If necessary, enlarge or reduce the pattern to an easy-to-edit size. a 59 5 Select the pattern using the - Brother International PE-DESIGN 11 | Startup : Reference Guide - Page 69
can be split off by enclosing it in a polygon. 10 Click in the [Design Page] to create a polygon that encloses the area of the pattern to be the pattern enlarged, the area to be split off can be selected more accurately. 11 Double-click on the final vertex (f) of a polygon to confirm the displayed - Brother International PE-DESIGN 11 | Startup : Reference Guide - Page 70
to split off the center section. c j d i e h f g e d 13 After selecting the lower section from the five pattern parts, repeat steps 8 through 11 to split off the center section. f g c b a Step 2 Setting a sewing direction 1 Click [Select] in the [Select] group, and then click (Select - Brother International PE-DESIGN 11 | Startup : Reference Guide - Page 71
in shape editing mode, and the points forming the shape as well as the sewing direction line (arrow) appear. 3 Click the [Sewing Attributes] tab. Select [Manual straight line] under [Direction], and then type "90" in the input box to set the sewing angle. 4 Using , select the upper-right section of - Brother International PE-DESIGN 11 | Startup : Reference Guide - Page 72
Practical Application g Symbol - Specifying the sewing direction for each separate shape - 6 Drag each point on the direction line (red curve) to specify your desired curve of sewing for the right side of the pattern part. 7 Repeat steps 4 through 6 to specify the sewing directions for the upperleft - Brother International PE-DESIGN 11 | Startup : Reference Guide - Page 73
- Specifying the sewing direction for each separate shape - b a 11 Click below the end (red square) of the first arrow (1), the two clicked points. 12 Repeat steps 8 through 11 to specify the sewing directions for the lower-left section of the pattern. Creating Various Embroidery Designs 64 - Brother International PE-DESIGN 11 | Startup : Reference Guide - Page 74
check the stitching or by previewing the stitching with the [Stitch Simulator]. Step 4 Grouping pattern parts 1 Select , and then drag the pointer in the [Design Page] to draw a selection frame around the entire pattern. 2 Click [Group] in the [Edit] group, and then click [Group] in the menu. By - Brother International PE-DESIGN 11 | Startup : Reference Guide - Page 75
within the design (in other words, one overlapping region is removed from the other). Step 1 Arranging shapes to create an outline 1 In the [Import] pane, select [Outline Shapes] from the [From] selector, then [Basic Shapes] from the [Category] selector. Creating Various Embroidery Designs 66 - Brother International PE-DESIGN 11 | Startup : Reference Guide - Page 76
shapes - b a 2 Select pattern [BS_shapes02.pes], and then drag it into the [Design Page]. You can also select shapes by clicking [Shapes] in the [Tools] group on the [Home] tab. 3 Adjust the shape as shown to draw the camera body. a While holding down the key, drag the handle at the center - Brother International PE-DESIGN 11 | Startup : Reference Guide - Page 77
design - Creating an original design by combining shapes - 6 Use to select the point at the center of the top edge, and then, while holding down the key .pes] into the [Design Page] twice. 9 Adjust the size, shape and arrangement of the pattern. Creating Various Embroidery Designs 68 - Brother International PE-DESIGN 11 | Startup : Reference Guide - Page 78
Practical Application h Icon design - Creating an original design by combining shapes - Step 2 Merging overlapping shapes 1 Drag the pointer to draw a selection frame around all shapes to select them. 2 Specify the following settings for - Brother International PE-DESIGN 11 | Startup : Reference Guide - Page 79
by combining shapes - All shapes are merged together into one. Creating Various Embroidery Designs Step 3 Preventing overlapping stitching of overlapping shapes 1 Import [BS_shapes01.pes] from the [Import] pane, and then adjust its size and position, as shown. 2 Specify the following settings - Brother International PE-DESIGN 11 | Startup : Reference Guide - Page 80
Practical Application h Icon design - Creating an original design by combining shapes - 3 In the [Sewing Attributes] pane, set [Manual straight line] under [Direction] will be sewn). This is called hole sewing. 6 Add [BS_shapes01.pes] to the center of the white circle, and then specify the following - Brother International PE-DESIGN 11 | Startup : Reference Guide - Page 81
Line color BLACK Region color WHITE Direction Manual straight line, 0 degree 11 Repeat steps 7 and 8 to select the innermost circle and the black circle immediately outside of it. 12 Apply hole sewing to the two selected circles as described in step 5. Creating Various Embroidery Designs 72 - Brother International PE-DESIGN 11 | Startup : Reference Guide - Page 82
- Brother International PE-DESIGN 11 | Startup : Reference Guide - Page 83
- Brother International PE-DESIGN 11 | Startup : Reference Guide - Page 84
Please visit us at http://s.brother/cppab/ where you can get product support and answers to frequently asked questions (FAQs). English XH2702-001
-
 1
1 -
 2
2 -
 3
3 -
 4
4 -
 5
5 -
 6
6 -
 7
7 -
8
-
9
-
10
-
11
-
12
-
13
-
14
-
15
-
16
-
17
-
18
-
19
-
20
-
21
-
22
-
23
-
24
-
25
-
26
-
27
-
28
-
29
-
30
-
31
-
32
-
33
-
34
-
35
-
36
-
37
-
38
-
39
-
40
-
41
-
42
-
43
-
44
-
45
-
46
-
47
-
48
-
49
-
50
-
51
-
52
-
53
-
54
-
55
-
56
-
57
-
58
-
59
-
60
-
61
-
62
-
63
-
64
-
65
-
66
-
67
-
68
-
69
-
70
-
71
-
72
-
73
-
74
-
75
-
76
-
77
-
78
-
79
-
80
-
81
-
82
-
83
-
84
 |
 |

Startup : Reference Guide
PERSONAL EMBROIDERY & SEWING DIGITIZING SOFTWARE
First, read the description on installing the software in this document.
Be sure to read this document before using the software.
We recommend that you keep this document nearby for future reference.