Canon 1629B001 XH G1 XH A1 Instruction Manual
Canon 1629B001 - XH G1 Camcorder Manual
 |
UPC - 013803071771
View all Canon 1629B001 manuals
Add to My Manuals
Save this manual to your list of manuals |
Canon 1629B001 manual content summary:
- Canon 1629B001 | XH G1 XH A1 Instruction Manual - Page 1
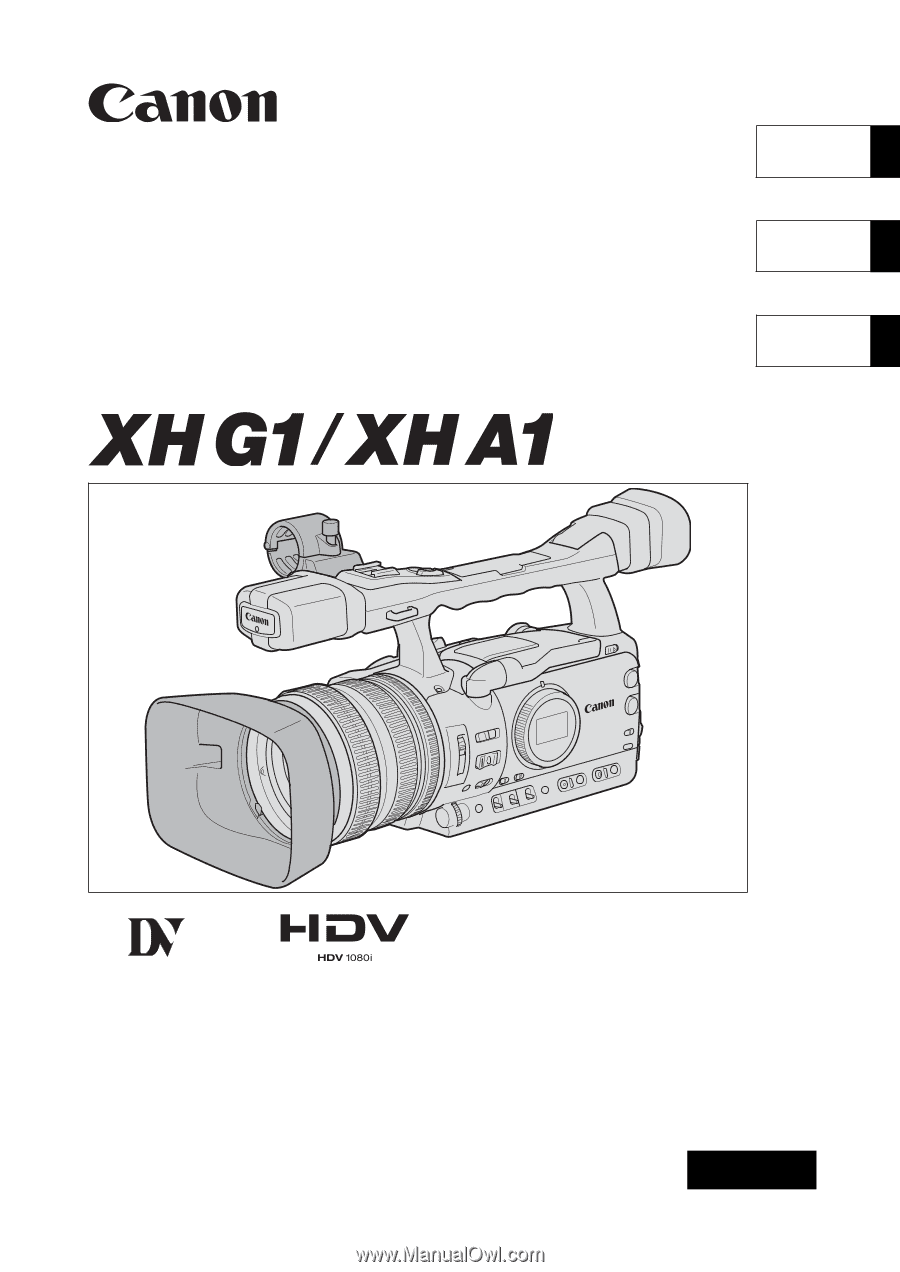
PUB. DIM-776 HD VIDEO CAMERA RECORDER Instruction Manual English CAMÉSCOPE ET LECTEUR VIDÉO HD Manuel d'instruction Français VIDEOCÁMARA Y GRABADORA HD Manual de Instrucciones Español Mini Digital Video Cassette A NTSC - Canon 1629B001 | XH G1 XH A1 Instruction Manual - Page 2
owners and be contrary to copyright laws. Digital Video Camcorder, XH G1 A/XH A1 A manual. If such changes or modifications should be made, you could be required to stop operation of the equipment. Canon U.S.A. Inc. One Canon servicing) instructions in the literature accompanying the product. 2 - Canon 1629B001 | XH G1 XH A1 Instruction Manual - Page 3
Canon HD Video Camera Recorder XH G1 A/XH A1 A and all its accessories. 1. Read Instructions - All the safety and operating instructions should be read before the product is operated. 2. Retain Instructions - The safety and operating instructions instructions in this manual. and supporting structure - Canon 1629B001 | XH G1 XH A1 Instruction Manual - Page 4
if you follow the operating instructions. Adjust only those controls that are covered by the operation instructions. Improper adjustment of other of power supply is required, please return it to the responsible nearest Canon Service Center and please replace it with the same type number CA-920. - Canon 1629B001 | XH G1 XH A1 Instruction Manual - Page 5
Canon XH G1/XH A1. Please read this manual carefully before you use E the camcorder and retain it for future reference. Should your camcorder fail to operate correctly, refer to the Troubleshooting table ( 152). Conventions Used in this Manual manual are simulated pictures taken with a still camera - Canon 1629B001 | XH G1 XH A1 Instruction Manual - Page 6
About the HD/HDV and SD/DV Specifications Throughout the manual we will distinguish between the video signal standards used by the camera section, and the recording standards used by the recorder section. The video signal can be set to HD (high definition) or SD (standard definition) specifications. - Canon 1629B001 | XH G1 XH A1 Instruction Manual - Page 7
Instructions...2 E Important Safety Instructions...3 About this Manual...5 Checking the Supplied Accessories ...9 Components Guide Keys ...70 Recording Color Bars/Audio Reference Signal 73 Using the Digital Video Control...74 Other Camcorder Functions/Settings ...75 Customization Using the - Canon 1629B001 | XH G1 XH A1 Instruction Manual - Page 8
(Analog Line-In, HDV/DV In 106 Converting Analog Signals into Digital Signals (Analog-Digital Converter 108 Connecting to a Computer (IEEE1394) ...109 Using a Memory List of Messages...145 Maintenance/Others ...146 Troubleshooting...152 System Diagram ...154 Optional Accessories...155 Specifications ...158 - Canon 1629B001 | XH G1 XH A1 Instruction Manual - Page 9
Checking the Supplied Accessories CA-920 Compact Power Adapter DC-920 DC Coupler BP-950G Battery Pack SDC-16M SD Memory WL-D5000 Wireless Card Controller E Two AA (R6) Batteries Lens Hood Lens Cap SS-1100 Shoulder Strap STV-290N Stereo Video Cable DTC-1000 Component Video Cable - Canon 1629B001 | XH G1 XH A1 Instruction Manual - Page 10
Components Guide XH G1/XH A1 Left side view POWER dial External control mode VCR/PLAY mode Power off Auto Shutter-Priority Aperture-Priority Manual Spotlight Night Easy Recording Recording programs DISP. (display) button ( 29) PEAKING button ( 37) MAGN. (magnification) button ( 37) (record - Canon 1629B001 | XH G1 XH A1 Instruction Manual - Page 11
Right side view E Introduction Grip zoom lever ( 33) PHOTO button ( 112) Zoom speed adjustment dial ( 33) ZOOM SPEED switch ( 33) / (card/tape) switch ( 112) VIDEO2 terminal ( 99) TIME CODE switch* ( 44) LOCK switch ( 28) MIC (external microphone) terminal ( 47) * only. XLR MIC ATT. - Canon 1629B001 | XH G1 XH A1 Instruction Manual - Page 12
Front view Backview External microphone holder ( 48) Tally lamp ( 89) External sensor for the Instant AF ( 35) Grip belt ( 20) Attachment sockets for the optional TA-100 Tripod Adapter ( 155) Remote sensor ( 22, 105) Tripod socket* Viewfinder ( 18) Dioptric adjustment lever ( 18) OPEN (open the - Canon 1629B001 | XH G1 XH A1 Instruction Manual - Page 13
Top view E Introduction (pause) button ( 95) / DRIVE MODE button ( 115) (stop) button ( 95) / (metering mode) button ( 117) (rewind) button ( 95) / - button ( 120) (play) button ( 95) / SLIDESHOW button ( 120) (fast forward) button ( 95) / + button ( 120) REC (record) button ( 106) Start/stop - Canon 1629B001 | XH G1 XH A1 Instruction Manual - Page 14
WL-D5000 Wireless Controller PHOTO button ( 112) START/STOP button ( 27) MENU button ( 25) TV SCREEN button ( 90) SLIDESHOW button ( 120) DATA CODE button ( 104) INDEX WRITE button ( 71) AUDIO MONITOR button ( 100) END SEARCH button ( 32) SEARCH SELECT button ( 102, 103) REC PAUSE button ( 106) REW - Canon 1629B001 | XH G1 XH A1 Instruction Manual - Page 15
Preparing Preparations the Power Supply Charging the Battery Pack E Disconnect the DC coupler from the power adapter before charging. Remove the terminal cover of the battery pack. 1. Connect the power cord to the adapter. 2. Plug the power cord into a power outlet. 3. Attach the battery pack - Canon 1629B001 | XH G1 XH A1 Instruction Manual - Page 16
Using a Household Power Outlet 1. Turn the dial to OFF. 2. Attach the DC coupler to the camcorder. Open the battery compartment cover and slide the DC coupler all the way into the compartment and press gently until it clicks. 3. Connect the power cord to the power adapter. 4. Plug the power cord - Canon 1629B001 | XH G1 XH A1 Instruction Manual - Page 17
Charging, Recording and Playback Times The following times are approximate and vary according to the charging, recording and playback conditions. Battery Pack E BP-930 BP-945 BP-950G BP-970G Charging Time with the CA-920 Compact Power Adapter 145 min. 220 min. 235 min. 320 min. HDV Recording - Canon 1629B001 | XH G1 XH A1 Instruction Manual - Page 18
Preparing the Camcorder Dioptric Adjustment Turn on the camcorder and adjust the dioptric adjustment lever. Prevent direct sunlight from getting in the viewfinder. The viewfinder LCD may become damaged due to concentration of the light by the lens. Pay special attention when mounting the camcorder - Canon 1629B001 | XH G1 XH A1 Instruction Manual - Page 19
Using the LCD Display E Preparations 1. Slide the OPEN switch in the direction of the arrow to unlock the LCD panel. 2. Pull out the LCD panel. 3. Rotate the LCD panel and adjust it to the desired position. You can change the LCD panel to black & white display ( 20). By default, the viewfinder - Canon 1629B001 | XH G1 XH A1 Instruction Manual - Page 20
Using the Viewfinder and the LCD Panel Simultaneously By default, the viewfinder display is turned off while you use the LCD panel. Follow the procedure below to use both of them simultaneously. MENU ( 25) DISPLAY SETUP/ CVF+LCD ON•••OFF 1. Press the MENU button. 2. Turn the SELECT/SET dial to - Canon 1629B001 | XH G1 XH A1 Instruction Manual - Page 21
Attaching the Lens Hood Attach the lens hood to protect the lens and shade it from stray light. 1. Place the lens hood on the front of the lens so that the window for the external Instant AF sensor faces down and turn it 90 degrees clockwise. • Be careful not to deform the lens hood. • Make sure - Canon 1629B001 | XH G1 XH A1 Instruction Manual - Page 22
Using the Wireless Controller When you press the buttons on the wireless controller, point it at the camcorder's remote sensor. Inserting the Batteries The wireless controller operates with two AA (R6) batteries. 1. Open the battery cover. 2. Insert the batteries following the + and - markings. 3. - Canon 1629B001 | XH G1 XH A1 Instruction Manual - Page 23
Loading/Removing a Cassette Use only videocassettes marked with the logo. For recording in HDV we recommend you use videocassettes compatible with the HDV standard. E 1. Slide the OPEN/EJECT switch to open the cassette compartment cover. The cassette compartment opens automatically. 2. Load/ - Canon 1629B001 | XH G1 XH A1 Instruction Manual - Page 24
different from those of regular SD cards and you will not be able to use memory cards of over 2 GB with devices that do not support SDHC. However, SDHC devices (including this camcorder) are backward compatible and you can use regular SD cards with them. 24 - Canon 1629B001 | XH G1 XH A1 Instruction Manual - Page 25
Changing Settings with the MENU Button Many of the camcorder's functions can be changed from the on-screen menu. E SELECT/SET dial MENU button Selecting Menus and Settings 1. Press the MENU button to open the menu. 2. Turn the SELECT/SET dial to select a submenu and press the dial. 3. Turn the - Canon 1629B001 | XH G1 XH A1 Instruction Manual - Page 26
while Recording You can display the date and time in the lower left corner of the screen. MENU ( 25) DISPLAY SETUP/ GUIDE INFO•••OFF Open the menu and select [DISPLAY SETUP/ ]. Select [GUIDE INFO], set it to [D/T DISPLAY] and close the menu. If you do not use the camcorder for a period of - Canon 1629B001 | XH G1 XH A1 Instruction Manual - Page 27
Recording Recording Before You Begin Recording Make a test recording first to check if the camcorder operates correctly. If necessary, clean the video heads E ( 147). The default recording standard is HDV. About the audio recording, refer to the relevant chapter ( 47). Recording 1. Remove the - Canon 1629B001 | XH G1 XH A1 Instruction Manual - Page 28
section is powered normally while the recorder section is shut off. When you press the assigned custom key, you can make adjustments to the camera section as long as necessary without worrying about the power save function's 5-minute timer. To return to record pause mode, press the custom key to - Canon 1629B001 | XH G1 XH A1 Instruction Manual - Page 29
, skin detail, Speedlite flash charge indicator, warning, date/time (or custom key assignments)* Center, level and grid markers, safety zone guides, date/time* No display * If [GUIDE INFO] is set to [D/T DISPLAY], the date and time will be displayed; if it is set to [CUSTOM KEYS], the functions - Canon 1629B001 | XH G1 XH A1 Instruction Manual - Page 30
. MARK.], [LEVEL MARK.] or [GRID] and close the menu. Displaying the Aspect Ratio Guides Use the aspect ratio guides as an indication to accurately frame subjects. You can select to display the aspect guides for 4:3, 13:9, 14:9, 1.66:1, 1.75:1, 1.85:1 or 2.35:1 (Cinemascope). MENU ( 25) DISPLAY - Canon 1629B001 | XH G1 XH A1 Instruction Manual - Page 31
DV standard or to use the camcorder as a standard-definition (SD) camera. Select the aspect ratio as desired. To play back recordings made with a 16:9 aspect ratio change the settings of the TV as necessary (refer to the instruction manual of the connected TV). To play back widescreen recordings on - Canon 1629B001 | XH G1 XH A1 Instruction Manual - Page 32
Locating the End of the Last Scene You can use this function to locate the end of the last recorded scene. END SEARCH button Press the END SEARCH button. • appears. • The camcorder rewinds/fast forwards the tape, plays back the last few seconds of the recording and stops the tape. • Pressing the - Canon 1629B001 | XH G1 XH A1 Instruction Manual - Page 33
Zooming You can operate the zoom from either the side grip or the carrying handle. You can also use the zoom ring on the lens or the zoom buttons on the wireless controller. With the customized functions ( 83) E you can change the direction of the adjustment when you turn the zoom ring, turn the - Canon 1629B001 | XH G1 XH A1 Instruction Manual - Page 34
Zoom Preset This function enables any given zoom setting to be memorized and to return to that zoom setting instantly. POSITION PRESET switch Presetting the Zoom POSITION PRESET ON/SET switch 1. Set the POSITION PRESET switch to ZOOM. 2. Move the POSITION PRESET ON/SET switch to SET. The preset - Canon 1629B001 | XH G1 XH A1 Instruction Manual - Page 35
response sensitivity ([NORMAL] or [SLOW]). To make it easier to focus manually, you can also make use of the Peaking and Magnifying display functions change the autofocus mode. MENU ( 25) CAMERA SETUP AF MODE ••• INSTANT AF Open the menu and select [CAMERA SETUP]. Select [AF MODE], select a - Canon 1629B001 | XH G1 XH A1 Instruction Manual - Page 36
the adjustment when you turn the focus ring and its response sensitivity ([NORMAL] or [SLOW]). 4. Operate the zoom to reframe the subject. If you focus manually and then leave the camcorder with the power turned on, you may lose the focus on your subject. This possible slight shift in focus is - Canon 1629B001 | XH G1 XH A1 Instruction Manual - Page 37
display as an estimate. : Infinity focus -: Over infinity focus Using the Focus Assist Functions (Peaking and Magnifying) In order to make manual focusing easier, you can use two assist functions: Peaking emphasizes the outlines of the subject creating a clearer contrast, and Magnifying enlarges - Canon 1629B001 | XH G1 XH A1 Instruction Manual - Page 38
SETUP F SPEED PSET• HIGH Open the menu and select [CAMERA SETUP]. Select [F SPEED PSET], select a setting option and close the menu. The selected speed appears next to "MF". Returning to the Preset Focus Setting Move - Canon 1629B001 | XH G1 XH A1 Instruction Manual - Page 39
the picture may appear blurred. Turn the ND filter on/off according to the screen display. E ND FILTER switch When using a recording program other than M Manual and if the AGC switch is set to ON, the following displays appear: Screen display No display "ND" "ND " flashes ND " " flashes ND - Canon 1629B001 | XH G1 XH A1 Instruction Manual - Page 40
24F mode is suited for playback on a TV screen but may require the extension/compression of some frames while editing. 24F (camera) A B C D E F G H 60i aabbbccdddee f f f gghhh (tape/playback) 24F (2:3:3:2) Mode Signals are down-converted to 60i using the 2:3:3:2 pulldown method. This 24F mode - Canon 1629B001 | XH G1 XH A1 Instruction Manual - Page 41
24F MODE SEL•2:3 Open the menu and select [CAMERA SETUP]. Select [24F MODE SEL], select a setting option and close the menu. • [2:3]: "24F" appears in white. • [2:3:3:2]: "24F" appears in orange. If you are using an editing system that does not support the 2:3:3:2 pulldown method, make sure to - Canon 1629B001 | XH G1 XH A1 Instruction Manual - Page 42
Setting the Time Code Selecting the Frame Setting When recording in a mode other than SD at a frame rate of 24F, you can select between a drop frame or non-drop frame time code. MENU ( 25) SIGNAL SETUP TIME CODE FRAME SETTNG•DROP Open the menu and select [SIGNAL SETUP]. Select the [TIME CODE] - Canon 1629B001 | XH G1 XH A1 Instruction Manual - Page 43
In 24F (in SD) mode, the "frames" value of the time code is set in multiples of 5. When you change the frame rate from 60i/30F to 24F, the "frames" value of the time code will automatically become a multiple of 5. When you mix drop frame and non-drop frame time codes (including 24F frame rate - Canon 1629B001 | XH G1 XH A1 Instruction Manual - Page 44
Synchronizing the Camcorder's Time Code You can synchronize this camcorder's time code to an external time code generator. Also you can include in the recording the user bit signal received from the TIME CODE terminal ( 46). The camcorder offers the following synchronization options. Genlock When - Canon 1629B001 | XH G1 XH A1 Instruction Manual - Page 45
- Change the dial to a mode other than . - Change the position of the / (card/tape) switch. - Change the [SIGNAL STD] or [FRAME RATE] setting. If the external time code signal is incorrect or there is no input signal, the internal time code (according to the [TIME CODE]/[COUNT-UP] settings) - Canon 1629B001 | XH G1 XH A1 Instruction Manual - Page 46
can be recorded when recording with the camcorder or from analog devices. The user bit set in the camcorder cannot be recorded when recording from digital devices (DV or HDV). Displaying the User Bit MENU ( 25) DISPLAY SETUP/ UB DISPLAY•OFF Open the menu and select [DISPLAY SETUP/ close the menu - Canon 1629B001 | XH G1 XH A1 Instruction Manual - Page 47
cannot be dubbed using this camcorder. • Audio recorded with this camcorder is "locked" audio except for the audio recorded from an analog input or from a digital input if you select the Unlock mode. SD Selecting the DV Audio Mode MENU ( 25) AUDIO SETUP DV AUDIO•••16bit Open the menu and select - Canon 1629B001 | XH G1 XH A1 Instruction Manual - Page 48
Using an External Microphone XLR MIC ATT. switches Input channel selection switch LINE/MIC switch MIC (external microphone) terminal CH1 input terminal CH2 input terminal switches Connecting to the MIC terminal When you connect an external microphone to the MIC terminal, the built-in - Canon 1629B001 | XH G1 XH A1 Instruction Manual - Page 49
MIC switch is set to MIC. E When connecting a microphone that does not support phantom power, make sure to set the switch to OFF. Otherwise the microphone switch set to A you can change the microphone's sensitivity ( 47). Manual Audio Adjustments 1. Set the AUDIO LEVEL switch to M. 2. Turn the - Canon 1629B001 | XH G1 XH A1 Instruction Manual - Page 50
Embedded Audio Embedded audio refers to the superimposing of the audio signal along with the video signal being output from the HD/SD SDI terminal. MENU ( 25) SIGNAL SETUP SDI OUTPUT••OFF Open the menu and select [SIGNAL SETUP]. Select [SDI OUTPUT], set it to [ON] and close the menu. • The - Canon 1629B001 | XH G1 XH A1 Instruction Manual - Page 51
Stabilizer You can select to activate or turn off the image stabilizer depending on the recording conditions. E MENU ( 25) CAMERA SETUP IMG STAB•••ON Open the menu and select [CAMERA SETUP]. Select [IMG STAB], select a setting option and close the menu. The image stabilizer cannot be turned off - Canon 1629B001 | XH G1 XH A1 Instruction Manual - Page 52
Tv Shutter-Priority, Av Aperture-Priority and M Manual modes you can manually change some settings to match the recording conditions. unadjustable. Auto Like the Easy Recording mode, the camcorder automatically controls camera adjustments allowing you to simply point and film. However, in the - Canon 1629B001 | XH G1 XH A1 Instruction Manual - Page 53
automatically sets a matching shutter speed. This mode allows for the best control of depth of field. E Manual ( 57) This mode offers the creative freedom of a complete range of manual controls. In the Manual mode, you have the option to set the exposure at any combination of shutter speed and - Canon 1629B001 | XH G1 XH A1 Instruction Manual - Page 54
Availability of functions in each recording program Recording programs EXP. LOCK button - Iris ring - -1 SHUTTER dial - -1 AE shift adjustment - (0) GAIN adjustment - (AGC ON) WHITE BALANCE adjustment - (auto) Custom preset adjustments - CUSTOM PRESET SELECT button - CUSTOM - Canon 1629B001 | XH G1 XH A1 Instruction Manual - Page 55
Recording in the Shutter-Priority (Tv) Mode E Recording SHUTTER dial dial 60i/30F 24F 1/4, 1/8, 1/15, 1/30, 1/60, 1/100, 1/250, 1/500, 1/1000, 1/2000, 1/4000, 1/8000, 1/15000, CS (clear scan) 1/3, 1/6, 1/12, 1/24, 1/48, 1/60, 1/100, 1/250, 1/500, 1/1000, 1/2000, 1/4000, 1/8000, 1/15000, CS ( - Canon 1629B001 | XH G1 XH A1 Instruction Manual - Page 56
Recording in the Aperture-Priority (Av) Mode You can select an aperture value in the range F1.6 to F9.5 or CLOSE. dial Iris ring 1. Set the dial to Av. 2. Select the aperture with the Iris ring. With the customized functions ( 83) you can change the direction of the adjustment when you turn the - Canon 1629B001 | XH G1 XH A1 Instruction Manual - Page 57
Recording in the Manual Mode You can set the exposure at any combination of shutter speed and aperture. E Iris ring dial SHUTTER dial Available settings Shutter speed Aperture 1/4, 1/8, 1/15, 1/ - Canon 1629B001 | XH G1 XH A1 Instruction Manual - Page 58
Adjusting the Exposure dial Iris ring SHUTTER dial GAIN switch EXP. LOCK button Exposure Lock 1. Set the dial to , Tv or Av. 2. Press the EXP. LOCK button. • The exposure indicator appears. Use the exposure indicator as an estimate. • The mark above the indicator denotes the automatic - Canon 1629B001 | XH G1 XH A1 Instruction Manual - Page 59
can use the AE Shift control to manually override the automatic exposure system in order to darken or lighten the image. Select from 15 AE levels (+2.0, +1.5, +1.25, +1.0, +0.75, +0.5, +0.25, ±0, -0.25, E -0.5, -0.75, -1.0, -1.25, -1.5, -2.0). MENU ( 25) CAMERA SETUP AE SHIFT•••±0 1. Set the - Canon 1629B001 | XH G1 XH A1 Instruction Manual - Page 60
). AGC switch set to ON: Automatic gain control. AGC switch set to OFF: Manual gain level selection (L, M or H) with the GAIN switch. Available gain levels that can dial to , Tv, Av or M. 2. Open the menu and select [CAMERA SETUP]. Select the [GAIN SETTING] submenu and then one of the GAIN - Canon 1629B001 | XH G1 XH A1 Instruction Manual - Page 61
Selecting the Gain Level 1. Set the dial to , Tv, Av or M. 2. Set the AGC switch to OFF. 3. Set the GAIN switch to the desired gain position. E When you select high gain values, the picture may flicker slightly. The [36dB] setting in particular allows you to film with a higher sensitivity but - Canon 1629B001 | XH G1 XH A1 Instruction Manual - Page 62
Setting the White Balance The camcorder uses an electronic white balance process to calibrate the picture for accurate color display under different lighting conditions. In addition to the fully automated mode, white balance modes include an indoor mode, an outdoor mode, a color temperature setting - Canon 1629B001 | XH G1 XH A1 Instruction Manual - Page 63
4. Press the WHITE BAL. button. The color temperature display will start flashing. 5. Turn the dial to set the desired color temperature. 6. Press the WHITE BAL. button again. E The color temperature display stops flashing and stays on. Setting a Custom White Balance 1. Set the dial to a - Canon 1629B001 | XH G1 XH A1 Instruction Manual - Page 64
Using the Zebra Pattern This camcorder has a zebra pattern feature that shows black and white diagonal stripes over the area that is overexposed. The zebra pattern is only displayed on the screen and will not affect your recordings. The zebra pattern will not be displayed while using the Peaking - Canon 1629B001 | XH G1 XH A1 Instruction Manual - Page 65
SETUP COLOR CORR. ···· ···· A AREA SEL. COLOR PHASE 0 B AREA SEL. CHROMA + AREA + Y LEVEL + 1. Open the menu and select [CAMERA SETUP]. Select the [COLOR CORR.] submenu and then select [A AREA SEL.] or [B AREA SEL.]. 2. Select each setting option, adjust the levels as necessary - Canon 1629B001 | XH G1 XH A1 Instruction Manual - Page 66
Activating the Color Correction MENU ( 25) CAMERA SETUP COLOR CORR. CORRECT OFF 1. Open the menu and select [CAMERA SETUP] and select the [COLOR CORR.] submenu. 2. Select [CORRECT], select a correction mode other than [OFF] to correct only area A, only area B or both and then - Canon 1629B001 | XH G1 XH A1 Instruction Manual - Page 67
areas that will be detected as skin areas. Recording Activating the Skin Detail Function MENU ( 25) CAMERA SETUP SKIN DETAIL EFFECT LEVEL••OFF 1. Open the menu and select [CAMERA SETUP]. Select the [SKIN DETAIL] submenu and then select [EFFECT LEVEL]. 2. Select a setting option and close - Canon 1629B001 | XH G1 XH A1 Instruction Manual - Page 68
in the picture will be detected and the detail level in these areas will be decreased to obtain a softer picture. MENU ( 25) CAMERA SETUP SKY DETAIL••••OFF To activate the sky detail effect: Open the menu and select [CAMERA SETUP]. Select [SKY DETAIL], set it to [SOFT ] and close the menu. 68 - Canon 1629B001 | XH G1 XH A1 Instruction Manual - Page 69
frequency from 60.1 Hz to 203.9 Hz. E dial SHUTTER dial MENU ( 25) CAMERA SETUP CLEAR SCAN•••60.1Hz 1. Set the dial to Tv or M. 2. Turn the to set the shutter speed to "CS". 3. Open the menu and select [CAMERA SETUP]. Select [CLEAR SCAN], adjust the frequency and close the menu. Adjust the - Canon 1629B001 | XH G1 XH A1 Instruction Manual - Page 70
SETUP/ to [CUSTOM KEYS] and close the menu. In a playback mode: Open the menu and select [DISPLAY SETUP/ to [ON] and close the menu. ]. Select [GUIDE INFO], set it ]. Select [CUSTOM KEY], set it 70 - Canon 1629B001 | XH G1 XH A1 Instruction Manual - Page 71
record pause mode, you can turn off the recorder section. Even if [POWER SAVE] is set to [OFF], you can take your time adjusting the camera settings, while the recorder section of the camcorder is powered off so you do not need to worry about the tape or the video heads - Canon 1629B001 | XH G1 XH A1 Instruction Manual - Page 72
[TC HOLD] Time Code Hold You can press the custom key button to freeze the display of the time code. The time code will continue running normally even while the time code display is on hold. Time Code Hold can only be operated with the custom keys. Press the CUSTOM KEY (1 or 2) button. • - Canon 1629B001 | XH G1 XH A1 Instruction Manual - Page 73
Recording Color Bars/Audio Reference Signal You can generate and record color bars signals and a 1 kHz audio reference signal. E With the customized functions ( 83) you can choose between SMPTE* standard-definition color bars ([TYPE 1]) and ARIB** multiformat HDTV color bars ([TYPE 2]) and you can - Canon 1629B001 | XH G1 XH A1 Instruction Manual - Page 74
to control the record and stop functions of an external digital device connected to the camcorder through the HDV/DV terminal. tape in the connected device may be overwritten. When connecting two DV Control-compatible Canon camcorders with a DV cable, make sure to set [DV CONTROL] on the other - Canon 1629B001 | XH G1 XH A1 Instruction Manual - Page 75
distorted, and the time code may not be written correctly. If you play back a tape that has been recorded in LP mode with another digital device on this camcorder, or vice versa, the picture and sound may become distorted. Changing the Display Language The language used in the camcorder displays - Canon 1629B001 | XH G1 XH A1 Instruction Manual - Page 76
Customization Using the Custom Preset You can define preset levels for 23 recording specifications used when recording on tape (17 when recording still images on the memory card). Up to 9 custom preset files can be saved on the camcorder (custom preset files 7 - 9 are predefined files) and up to 20 - Canon 1629B001 | XH G1 XH A1 Instruction Manual - Page 77
[PED] Master Pedestal Adjust the master pedestal level in the range -9 to +9. E [SET] Setup Level Adjust the setup level in the range -9 to +9. • Depending on the value set for the master pedestal [PED], the setup level may not be able to take a negative value. In that case, adjusting the setup - Canon 1629B001 | XH G1 XH A1 Instruction Manual - Page 78
[CPH] Color Phase Adjust the color phase in the range -9 to +9. [RGN] R Gain Adjust the red level in the range -50 to +50. [GGN] G Gain Adjust the green level in the range -50 to +50. [BGN] B Gain Adjust the blue level in the range -50 to +50. [RGM] R-G Matrix Adjust the level in the range -50 to + - Canon 1629B001 | XH G1 XH A1 Instruction Manual - Page 79
Enter the custom preset editing screen Save the custom preset file to the memory card Load a custom preset file from the memory card File name of the currently selected custom preset file E Overview of the contents of the custom preset file Back to the [CUSTOMIZE] submenu Select the custom preset - Canon 1629B001 | XH G1 XH A1 Instruction Manual - Page 80
Renaming a Custom Preset File Follow steps 1-3 as described in Changing the Custom Preset Settings ( 79) to open the custom preset editing screen and select the custom preset file you want to rename. 1. From the bottom bar, select [ RENAME]. The first character of the custom preset file name will - Canon 1629B001 | XH G1 XH A1 Instruction Manual - Page 81
is activated. Copying a Custom Preset File to the Memory Card 1. Open the menu, select [CUSTOMIZE] and then select the [CUSTOM PRESET] submenu. 2. Select [ CAMERA CARD] from the column on the left. 3. From the bottom bar, select [ SELECT CP] and then select the name of the custom preset file - Canon 1629B001 | XH G1 XH A1 Instruction Manual - Page 82
load. Use the + / - buttons to move between the still images. 2. Open the menu, select [CUSTOMIZE] and then select [META DATA CP]. 3. Select [ CARD CAMERA] from the column on the left. 4. From the bottom bar, select [ SELECT POSITION] and select the preset number under which you want to store - Canon 1629B001 | XH G1 XH A1 Instruction Manual - Page 83
Using the Customized Functions You can customize to your personal preferences many aspects of the operation of the camcorder, most of them governing how the camcorder operates in E mode. You can adjust up to 3 different custom function files and save them on the camcorder or to a memory card. By - Canon 1629B001 | XH G1 XH A1 Instruction Manual - Page 84
Resetting a Custom Function File 1. Open the menu, select [CUSTOMIZE] and then select the [CUSTOM FUNCTION] submenu. 2. From the column on the left select the custom function file you want to reset. 3. From the bottom bar select [ RESET]. 4. Select [OK], press the SELECT/SET dial and close the menu. - Canon 1629B001 | XH G1 XH A1 Instruction Manual - Page 85
Availability of custom functions in each recording program/playback mode Custom Function 00 SHCKLSS WB/GN WHITE BALANCE - (OFF) GAIN - (OFF) 01 AE RESPONSE - (MID) 02 HIGH-SPEED ZOOM - (OFF) 03 FOCUS RING CTRL 04 BUTTONS OPER. MAGN. - WB SET - EXP.LOCK - PUSH AF 05 RINGS - Canon 1629B001 | XH G1 XH A1 Instruction Manual - Page 86
Availability of custom functions in each recording program/playback mode Custom Function 00 SHCKLSS WB/GN WHITE BALANCE - (OFF) GAIN - (OFF) 01 AE RESPONSE - (MID) 02 HIGH-SPEED ZOOM - (ON) 03 FOCUS RING CTRL 04 BUTTONS OPER. MAGN. - WB SET - EXP.LOCK - - - - PUSH AF 05 - Canon 1629B001 | XH G1 XH A1 Instruction Manual - Page 87
02 [HIGH-SPEED ZOOM] High-speed Zoom In mode, makes the zoom operation at the constant zoom speeds 14 - 16 even faster (in mode the default is [ON] and cannot be changed). • When set to [ON], if you operate the zoom ring very quickly the zoom response may lag slightly. E • At the fastest zoom - Canon 1629B001 | XH G1 XH A1 Instruction Manual - Page 88
00 01 02 03 04 05 06 07 Level/Center/Grid markers 100% 40% 100% 40% 100% 40% 100% 40% Aspect ratio guides 100% 40% 100% 40% Safety zone guides 100% 40% 10 [F.AST BW-MOD] Focus Assist Function B&W Display Mode Changes the display mode to black & white while the focus assist - Canon 1629B001 | XH G1 XH A1 Instruction Manual - Page 89
14 [1kHz TONE] 1 kHz Reference Audio Signal Selects the strength of the audio signal. Setting Options: 00 - OFF, 01 - -12dB, 02 - -20dB. 15 [WIRELESS REMOTE] Wireless Remote Controller E Selects the remote sensor mode that the camcorder will accept. When set to [OFF ] the camcorder will not - Canon 1629B001 | XH G1 XH A1 Instruction Manual - Page 90
Customizing the On-Screen Displays Hiding/Showing the Displays on the TV Screen When you connect a TV for recording, you can select to hide the camcorder displays on the TV screen. For playback, you can show the camcorder displays on the TV screen. To activate the on-screen displays at the level - Canon 1629B001 | XH G1 XH A1 Instruction Manual - Page 91
default value for all items is the option assigned to 00. 00 [REC PROGRAMS] Recording Mode Icon Setting Options: 00 - OFF, 01 - ON. Customization 01 [CAMERA DATA1] Camera Data (1/2) Setting Options Aperture value 00 OFF 01 ON 02 OFF 03 ON Shutter speed value OFF ON 02 - Canon 1629B001 | XH G1 XH A1 Instruction Manual - Page 92
06 [IMAGE EFFECTS] Image Effects Setting Options 00 01 02 03 04 05 06 07 Skin detail OFF ON OFF ON OFF ON OFF ON Sky detail OFF ON OFF ON Color correction OFF ON 07 [F.ASSIST FUNC.] Focus Assist Functions Setting Options 00 01 02 03 Peaking OFF ON OFF ON Magnifying OFF ON 08 [CUSTOMIZE] - Canon 1629B001 | XH G1 XH A1 Instruction Manual - Page 93
15 [LIGHT METERING] Light Metering-Related Displays Setting Options SPOT AE point Light metering mode icon 00 OFF OFF 01 ON E 02 OFF ON 03 ON 16 [CARD] Still Images-Related Icons Setting Options 00 01 02 03 Drive mode icon OFF ON OFF ON Flash display OFF ON 17 [CARD REMAINDER] - Canon 1629B001 | XH G1 XH A1 Instruction Manual - Page 94
Location of the Custom Displays / 03 02 09 11 12 12 00 13 01 20 02 21 12 06 04 19 14 18 08 08 14 06 02 05 07 07 18 14 10 03 02 15 16 14 14 00 17 01 20 02 21 06 19 04 05 08 08 06 02 07 07 16 15 94 - Canon 1629B001 | XH G1 XH A1 Instruction Manual - Page 95
Playing Playback Back a Tape If the playback picture is distorted, clean the video heads using a Canon Video Head Cleaning Cassette or a commercially available digital video head-cleaning cassette ( 147). E Select a playback standard according to the tape you wish to play back. REC SEARCH +/- - Canon 1629B001 | XH G1 XH A1 Instruction Manual - Page 96
(Frame Advance) Plays back frame-by-frame. Repeatedly press the button on the wireless controller during playback pause. Hold the button pressed down to enter the continuous frame advance playback. (Slow Forward) Plays back at about 1/3 normal speed. Press the SLOW button on the wireless - Canon 1629B001 | XH G1 XH A1 Instruction Manual - Page 97
Connecting to a Monitor/TV The different recording modes and the corresponding output terminals are given in the table below: E HD/SD SDI COMPONENT HDV/DV Video Terminal OUT Terminal Terminal Terminals HD [LETTERBOX] 1920x1080 D3 (1440x1080) MPEG TS set to [OFF] [LETTERBOX] SD SDI set - Canon 1629B001 | XH G1 XH A1 Instruction Manual - Page 98
the HDV/DV Terminal CV-150F/CV-250F DV Cable (optional) Open the terminal cover 4-pin 6-pin • When connecting the camcorder to a monitor TV that supports DV, you may need to carry out a procedure on the TV to recognize the camera. Refer to the instruction manual of the TV or monitor. 98 - Canon 1629B001 | XH G1 XH A1 Instruction Manual - Page 99
Terminal If connecting to a TV, set the input selector to VIDEO. If connecting to a VCR, set the input selector to LINE. Refer also to the instruction manual of the TV or VCR. Open the terminal cover To use the A/V terminal, set the video output selection switch to A/V1. To use the BNC - Canon 1629B001 | XH G1 XH A1 Instruction Manual - Page 100
SD Audio Output Selecting the Audio MENU ( 25) AUDIO SETUP SEL AUDIO CH•CH 1/3 / CH 2/4 Open the menu and select [AUDIO SETUP]. Select [SEL AUDIO CH], select a setting option and close the menu. Selecting the Audio Monitor MENU ( 25) AUDIO SETUP AUD.M.SET•••CH 1/2 Open the menu and select - Canon 1629B001 | XH G1 XH A1 Instruction Manual - Page 101
Returning to a Pre-marked Position If you wish to return to a particular scene later, mark the point with the zero set memory, and the tape will stop at that point when you rewind/fast forward the tape. E This function is operated with the wireless controller. REW button ZERO SET MEMORY - Canon 1629B001 | XH G1 XH A1 Instruction Manual - Page 102
Index Search With the index search you can locate any point you have marked beforehand with an index signal ( 71). This function is operated with the wireless controller. SEARCH SELECT button / buttons 1. Press the SEARCH SELECT button to display "INDEX SEARCH". appears. 2. Press the or button to - Canon 1629B001 | XH G1 XH A1 Instruction Manual - Page 103
Date Search You can locate the change of the date/time zone with the date search function. This function is operated with the wireless controller. E SEARCH SELECT button / buttons 1. Press the SEARCH SELECT button to display "DATE SEARCH". appears. 2. Press the or button to begin searching. • - Canon 1629B001 | XH G1 XH A1 Instruction Manual - Page 104
Displaying the Data Code The camcorder maintains a data code containing the recording date and time and other camera data such as shutter speed, gain and exposure (f-stop). MENU button DATA CODE button WL-D5000 SELECT/SET dial MENU button Selecting the Data Code - Canon 1629B001 | XH G1 XH A1 Instruction Manual - Page 105
Changing the Remote Sensor Mode Two remote sensor modes and an off setting are available to prevent interference from other Canon wireless controllers being used nearby. E To change the remote sensor mode of the camcorder Change the [WIRELESS REMOTE] setting of the custom function file ( 89). - Canon 1629B001 | XH G1 XH A1 Instruction Manual - Page 106
wish to record appears. Recording starts. 8. Press the button to stop recording. 9. Connected device: Stop playback. HDV/DV In When recording from an external digital device you can select the time code to be used for the recording made with this camcorder. Select [COPY] to keep the original time - Canon 1629B001 | XH G1 XH A1 Instruction Manual - Page 107
Copyright Signal Certain software tapes are copyright protected. If you attempt to play back such tape, "COPYRIGHT PROTECTED PLAYBACK IS RESTRICTED" appears and you will not be able to view the contents of the tape. If you attempt to record from such tape via the DV terminal, "COPYRIGHT PROTECTED - Canon 1629B001 | XH G1 XH A1 Instruction Manual - Page 108
copyright protection signals or anomalous signals such as ghost signals). For normal use, set [AV DV] to [OFF]. If it is set to [ON], digital signals cannot be input via the camcorder's HDV/DV terminal. Depending on the software and the specifications of your computer, you may not be able - Canon 1629B001 | XH G1 XH A1 Instruction Manual - Page 109
cable. For the minimum system requirements for video editing, refer to the instruction manual of the video editing software. Windows XP (SP2) users can use the the camcorder, disconnect and reconnect the DV cable. Should the problem persist, disconnect the cable, turn both the camcorder and the - Canon 1629B001 | XH G1 XH A1 Instruction Manual - Page 110
Selecting UsingaMemoryCard the Image Quality/Size Changing the Still Image Quality You can choose from Superfine, Fine and Normal. * * Only when playing back a tape. MENU ( 25) RECORDING SETUP IMG QUALITY••FINE Open the menu and select [RECORDING SETUP]. Select [IMG QUALITY], select a setting - Canon 1629B001 | XH G1 XH A1 Instruction Manual - Page 111
File Numbers Still images are automatically assigned file numbers from 0101 to 9900, and stored in folders containing up to 100 images. Folders are numbered from 101 to 998. E RESET CONTINUOUS The file number will be reset each time a new memory card is inserted. If the memory card already - Canon 1629B001 | XH G1 XH A1 Instruction Manual - Page 112
Recording Still Images on a Memory Card You can record still images directly on the memory card. You can also record still images on the memory card simultaneously while recording video on the tape and capture still images while playing back a tape. PHOTO button PHOTO button CARD access indicator - Canon 1629B001 | XH G1 XH A1 Instruction Manual - Page 113
program) until the focus is adjusted. If the subject is not suitable for autofocus, the camcorder locks the focus. In that case, adjust the E focus manually with the focusing ring. When the Focus-Priority mode is set to [OFF] in the custom function file ( 88): In step 2, turns green, and - Canon 1629B001 | XH G1 XH A1 Instruction Manual - Page 114
Screen Displays during Still Image Recording Metering Method Icon ( 117) Indicates the metering mode currently selected for recording still images. Drive Mode Icon ( 115) Indicates the drive mode currently selected for recording still images. Image Quality and Size Indicates the quality and size - Canon 1629B001 | XH G1 XH A1 Instruction Manual - Page 115
Selecting the Drive Mode Continuous Shooting High-Speed Continuous Captures a quick series of still images while you hold the PHOTO button pressed down. For the number of frames per second, refer to the table E below. AEB The camcorder records a still image in three different exposures (dark, - Canon 1629B001 | XH G1 XH A1 Instruction Manual - Page 116
Auto Exposure Bracketing Press the PHOTO button. Three still images in different exposures are recorded to the memory card. Make sure that there is sufficient space on the memory card. 116 - Canon 1629B001 | XH G1 XH A1 Instruction Manual - Page 117
Selecting the Metering Method EVALUATIVE CENT.WEIGHT.AVERAGE SPOT Appropriate for standard shooting conditions, including backlit scenes. E The camcorder divides images into several zones for light metering. It evaluates the position and brightness of the subject, background, direct light or - Canon 1629B001 | XH G1 XH A1 Instruction Manual - Page 118
instruction manual of the Speedlite flash. Connecting a Speedlite Flash When connecting a Canon Speedlite flash you cannot use the Off-Camera Shoe Cord designed for Canon EOS SLR cameras /550EX/580EX flashes. The camcorder does not support the ST-E2 Wireless Speedlite Flash Transmitter or the - Canon 1629B001 | XH G1 XH A1 Instruction Manual - Page 119
You can select to display a still image for 2, 4, 6, 8 or 10 seconds after it has been recorded. E MENU ( 25) CAMERA SETUP REVIEW 2SEC Open the menu and select [CAMERA SETUP]. Select [REVIEW], select a setting option and close the menu. A still image is displayed as long as you hold the - Canon 1629B001 | XH G1 XH A1 Instruction Manual - Page 120
Playing Back Still Images from a Memory Card dial - button SLIDESHOW button + button / (card/tape) switch 1. Turn the 2. Press the dial to and move the / (card/tape) switch to . + / - button to move between images. Images not recorded with this camcorder, uploaded from a computer, edited on a - Canon 1629B001 | XH G1 XH A1 Instruction Manual - Page 121
image number appears. Displaying the Recording Data You can select whether to display all the recording data stored when the still image was recorded (histogram, camera information, etc.). Repeatedly press the DISP. button to display the recording data. Using a Memory Card 121 - Canon 1629B001 | XH G1 XH A1 Instruction Manual - Page 122
Erasing Images You can erase images one at a time or all at once. Be careful when erasing images. Erased images cannot be recovered. Erasing a still image that had a custom preset file embedded (recorded with the [ON+CP DATA] setting) will erase the image and the embedded custom preset file. - Canon 1629B001 | XH G1 XH A1 Instruction Manual - Page 123
Protecting Images You can protect important images from accidental erasure when displaying a single image or the index screen. E If a memory card is initialized, all still images, even protected ones, will be erased permanently. 1. Select the image you wish to protect. 2. Press the SELECT/SET - Canon 1629B001 | XH G1 XH A1 Instruction Manual - Page 124
canceled halfway through by pressing the SELECT/SET dial. All the image files will be erased and the memory card can be used without any problem. 124 - Canon 1629B001 | XH G1 XH A1 Instruction Manual - Page 125
images for printing and set the number of copies. These print order settings are E compatible with the Digital Print Order Format (DPOF) standards and can be used for printing on DPOF compatible printers. A maximum of 998 still images can be selected. Selecting Still Images for Printing (Print Order - Canon 1629B001 | XH G1 XH A1 Instruction Manual - Page 126
the programmed AE mode or frame rate. / Modes Shutter speed setting in Tv mode Aperture setting in Av mode Aperture, shutter speed setting in Manual mode Custom white balance Exposure lock Aperture, shutter speed setting during exposure lock MENU setting MENU settings TV SCREEN on/off On-screen - Canon 1629B001 | XH G1 XH A1 Instruction Manual - Page 127
Menu Options and Default Settings Default settings are shown in boldface. CAMERA MENU E *Only in Standard Definition (SD). ** only. Submenu SIGNAL SETUP CAMERA SETUP Menu Item Setting Options TIME CODE FRAME DROP, NON-DROP 42 SETTNG COUNT-UP REC-RUN, REC-RUN PS., FREE-RUN1 START VALUE - Canon 1629B001 | XH G1 XH A1 Instruction Manual - Page 128
CAMERA MENU (cont.) Submenu RECORDING SETUP Menu Item DV REC MODE* UB CVF SETUP LCD SETUP SYSTEM SETUP/ CVF+LCD BW CVF+LCD ON LANGUAGE MARKERS ASPECT GUIDE SAFETY ZONE ZEBRA ZEBRA LEVEL TV SCREEN AUDIO LEVEL GUIDE INFO UB DISPLAY CUSTOM KEY 1 CUSTOM KEY 2 D/TIME SET DV CONTROL MAGN.B.LOCK - Canon 1629B001 | XH G1 XH A1 Instruction Manual - Page 129
MENU (cont.) Submenu CUSTOMIZE CUSTOM PRESET Menu Item EDIT Setting Options SELECT CP TUNE RENAME PROTECT RESET Setting Items: GAMMA KNEE BLACK CAMERA CARD CARD CAMERA MASTER PED. SETUP LEVEL SHARPNESS H DTL FREQ DTL HV BALANCE CORING NR1 NR2 COLOR MAT. COLOR GAIN COLOR PHASE R GAIN G GAIN - Canon 1629B001 | XH G1 XH A1 Instruction Manual - Page 130
CAMERA MENU (cont.) Submenu CUSTOMIZE CUSTOM FUNCTION Menu Item C.Fn1, C.Fn2, C.Fn3 Setting Options APPLY THIS SET TUNE SAVE TO CARD READ FROM CARD RESET Setting - Canon 1629B001 | XH G1 XH A1 Instruction Manual - Page 131
MENU (cont.) Submenu CUSTOMIZE CUSTOM DISPLAY Menu Item Setting Options TUNE SAVE TO CARD READ FROM CARD RESET Setting Items: REC PROGRAMS CAMERA DATA1 CAMERA DATA2 ZOOM FOCUS ND IMAGE EFFECTS F.ASSIST FUNC. CUSTOMIZE RECORDING STD DV REC MODE FRAME RATE TAPE TAPE REMAINDER TAPE/CARD LIGHT - Canon 1629B001 | XH G1 XH A1 Instruction Manual - Page 132
VCR/PLAY MENU Submenu Menu Item Setting Options *Only in Standard Definition (SD). ** only. SIGNAL SETUP TIME CODE FRAME DROP, NON-DROP 42 SETTNG COUNT-UP REC-RUN, REC-RUN PS., 42 FREE-RUN1 START VALUE SET, RESET 42 HDV/DV IN REGEN., COPY 106 PLAYBACK STD AUTO, HDV, DV 95 - Canon 1629B001 | XH G1 XH A1 Instruction Manual - Page 133
BRIGHT, NORMAL ON, OFF ON, OFF ON, OFF ON, OFF DEUTSCH, ENGLISH, ESPAÑOL, FRANÇAIS, ITALIANO, POLSKI, , , ON, OFF DATE, TIME, DATE & TIME, CAMERA DATA, CAM. & D/T ON, OFF ON, OFF TIME CODE, TV SCREEN, DATA CODE, AUDIO LEVEL, TC HOLD, CVF+LCD BW, (NONE) TIME CODE, TV SCREEN, DATA - Canon 1629B001 | XH G1 XH A1 Instruction Manual - Page 134
VCR/PLAY MENU (cont.) Submenu CUSTOMIZE CUSTOM FUNCTION Menu Item C.Fn1, C.Fn2, C.Fn3 Setting Options APPLY THIS SET TUNE SAVE TO CARD READ FROM CARD RESET Setting Items: SHCKLSS WB/GN AE RESPONSE HIGH-SPEED ZOOM FOCUS RING CTRL BUTTONS OPER. RINGS DIRECTION DIALS DIRECTION FOCUS PRIORITY SIMULT. - Canon 1629B001 | XH G1 XH A1 Instruction Manual - Page 135
MENU * only. Submenu SIGNAL SETUP CAMERA SETUP RECORDING SETUP AUDIO SETUP Menu Item Setting Options GENLCK ADJUST COMP. OUT -1023 - 1023 480i, 1080i/480i 44 98 E SDI OUTPUT* ON, OFF 97 - Canon 1629B001 | XH G1 XH A1 Instruction Manual - Page 136
CARD CAMERA MENU (cont.) Submenu DISPLAY SETUP/ Menu Item CVF SETUP LCD SETUP SYSTEM SETUP/ CVF+LCD BW CVF+LCD ON LANGUAGE MARKERS ZEBRA ZEBRA LEVEL TV SCREEN GUIDE INFO CUSTOM KEY 1 CUSTOM KEY 2 D/TIME SET MAGN.B.LOCK SHTR D.LOCK RESET ALL Setting Options BRIGHTNESS 18 CONTRAST COLOR - Canon 1629B001 | XH G1 XH A1 Instruction Manual - Page 137
MENU (cont.) Menu Item Setting Options EDIT SELECT CP TUNE RENAME PROTECT RESET Setting Items: KNEE BLACK CAMERA CARD CARD CAMERA SHARPNESS H DTL FREQ DTL HV BALANCE CORING COLOR GAIN COLOR PHASE R GAIN G GAIN B GAIN RG MATRIX RB MATRIX GR MATRIX GB MATRIX BR MATRIX BG - Canon 1629B001 | XH G1 XH A1 Instruction Manual - Page 138
CARD CAMERA MENU (cont.) Submenu CUSTOMIZE CUSTOM FUNCTION Menu Item C.Fn1, C.Fn2, C.Fn3 Setting Options APPLY THIS SET TUNE SAVE TO CARD READ FROM CARD RESET Setting - Canon 1629B001 | XH G1 XH A1 Instruction Manual - Page 139
MENU (cont.) Menu Item Setting Options TUNE SAVE TO CARD READ FROM CARD RESET Setting Items: REC PROGRAMS CAMERA DATA1 CAMERA DATA2 ZOOM FOCUS ND IMAGE EFFECTS F.ASSIST FUNC. CUSTOMIZE RECORDING STD DV REC MODE FRAME RATE TAPE TAPE REMAINDER TAPE/CARD LIGHT METERING CARD CARD - Canon 1629B001 | XH G1 XH A1 Instruction Manual - Page 140
CARD VCR/PLAY MENU * Submenu Menu Item Setting Options SIGNAL SETUP COMP. OUT 480i, 1080i/480i SDI OUTPUT* ON, OFF SDI SPEC.* AUTO, SD LOCKED CARD OPERATIONS PRINT ORD. ALL NO, YES ERASE ERASE ALL IMAGES NO, YES INITIALIZE CANCEL, INITIALIZE, COMPL.INIT. After pressing the SET button - Canon 1629B001 | XH G1 XH A1 Instruction Manual - Page 141
CARD VCR/PLAY MENU (cont.) Submenu Menu Item Setting Options CUSTOMIZE META DATA CP IMPORT 76 E CARD CAMERA SELECT POSITION EXECUTE CUSTOM C.Fn1, C.Fn2, APPLY THIS SET 84 FUNCTION C.Fn3 TUNE 83 SAVE TO CARD 84 READ FROM CARD 84 RESET 84 Setting - Canon 1629B001 | XH G1 XH A1 Instruction Manual - Page 142
55, 57) Aperture* ( 56, 57) Exposure lock ( 58)/ AE shift ( 59) Sky detail ( 68)/ White balance ( 62) Skin detail ( 67)/Custom preset ( 76) Manual focus ( 36) Custom function ( 83)/Color correction ( 65)/ Peaking ( 37) Custom keys ( 70)/ Date and time ( 26) Gain ( 60) Recording standard ( 31) Frame - Canon 1629B001 | XH G1 XH A1 Instruction Manual - Page 143
Screen Displays during Playback E Additional Information Date search ( 103)/ Index search ( 102)/ End search ( 32) Audio output ( 100) Audio monitor ( 100) Custom keys ( 70) Data code ( 104) Recording standard ( 31) Frame rate ( 40) Tape operation ( 95) REC PAUSE STOP EJECT PLAY : Fast forward : - Canon 1629B001 | XH G1 XH A1 Instruction Manual - Page 144
Side panel Time code setting Time code synchronization setting Video output signal from the HD/SD SDI Terminal Time code Tape has reached the end Remaining battery charge Genlock Audio level indicator 144 - Canon 1629B001 | XH G1 XH A1 Instruction Manual - Page 145
CHECK THE HDV/DV INPUT DV cable is not connected, or the connected digital device is turned off. 106 CONDENSATION HAS BEEN Condensation has been detected in is the camcorder is set. - IS RESTRICTED INPUT SIGNAL NOT SUPPORTED You attempted to input a video signal incompatible with the camcorder - Canon 1629B001 | XH G1 XH A1 Instruction Manual - Page 146
. Be careful of heat generated by lighting equipment. Do not disassemble the camcorder. If the camcorder does not function properly, consult qualified service personnel. Handle the camcorder with care. Do not subject the camcorder to shocks or vibration as this may cause damage. Avoid sudden - Canon 1629B001 | XH G1 XH A1 Instruction Manual - Page 147
the best picture quality, we recommend cleaning the video heads frequently with the Canon DVM-CL Digital Video Head Cleaning Cassette or a commercially available dry cleaning cassette. Tapes already heads it may indicate a malfunction. Consult a Canon Service Center. 147 Additional Information - Canon 1629B001 | XH G1 XH A1 Instruction Manual - Page 148
Condensation Moving the camcorder rapidly between hot and cold temperatures may cause condensation (water droplets) to form on its internal surfaces. Stop using the camcorder if condensation is detected. Continued use may damage the camcorder. Condensation may form in the following cases: When the - Canon 1629B001 | XH G1 XH A1 Instruction Manual - Page 149
Battery Pack Handling Precautions DANGER! Treat the battery pack with care. E • Keep it away from fire (or it might explode). • Do not expose the battery pack to temperature higher than 60 ºC (140 ºF). Do not leave it near a heater or inside a car in hot weather. • Do not try to disassemble - Canon 1629B001 | XH G1 XH A1 Instruction Manual - Page 150
about 10 times of loading/unloading. The memory function is not supported by the camcorder. Protecting Tapes from Accidental Erasure To protect your or lost due to memory card defects or exposure to static electricity. Canon Inc. makes no warranties for corrupted or lost data. Do not use - Canon 1629B001 | XH G1 XH A1 Instruction Manual - Page 151
country with power supply between 100 and 240 V AC, 50/60 Hz. Consult the Canon Service Center for information E on plug adapters for overseas use. Playback on a TV Screen You and the Grenadines, Surinam, Taiwan, Trinidad and Tobago, USA, Venezuela, Virgin Islands. Additional Information 151 - Canon 1629B001 | XH G1 XH A1 Instruction Manual - Page 152
Troubleshooting If you have a problem with your camcorder, refer to this checklist. Consult your dealer or a Canon Service Center if the problem persists. Power Source Problem not focus. Autofocus does not work on that Focus manually. 36 subject. Viewfinder is not adjusted. Adjust the - Canon 1629B001 | XH G1 XH A1 Instruction Manual - Page 153
level. M, and recording level is set too low. Microphone attenuator is turned on. Set the MIC ATT. switch or the 49 switch to OFF. Playback Problem Cause Solution Pressing the playback button does Camcorder is turned off, or is not set Set the camcorder to 95 not start playback. to mode - Canon 1629B001 | XH G1 XH A1 Instruction Manual - Page 154
System Diagram (Availability differs from area to area) ZR-1000 Zoom Remote Controller ZR-2000 Zoom Remote Controller Speedlite Flash 420EX, 430EX, 550EX, 580EX Battery Video Light VL-10Li ll FS-72U Filter Set SS-1100 Shoulder Strap SBR-1000 Shooting Brace WL-D5000 Wireless Controller MiniDV - Canon 1629B001 | XH G1 XH A1 Instruction Manual - Page 155
product and/or accidents such as fire, etc., caused by the malfunction of non-genuine Canon accessories (e.g., a leakage and/or explosion of a battery pack). Please note that this the SBR-1000 for additional support of the video camera with the neck strap will significantly lighten the load of the - Canon 1629B001 | XH G1 XH A1 Instruction Manual - Page 156
Charging time varies according to the charging condition. ZR-2000 Zoom Remote Controller When the ZR-2000 is connected to the LANC terminal of a Canon camcorder, it is possible to control functions such as the start and stop of recording, the zoom and the focus functions while reviewing the picture - Canon 1629B001 | XH G1 XH A1 Instruction Manual - Page 157
Provided accessories: Optional accessories: CA-920 Compact Power Adapter 8029A002AA BP-970G Battery Pack 0972B002AA DC-920 DC Coupler BP-950G Battery Pack 8033A001AA 0971B002AA CB-920 Car Battery Adapter CH-910 Dual Battery Charger/Holder 8034A002AA 3036A002AA E SS-1100 Shoulder Strap - Canon 1629B001 | XH G1 XH A1 Instruction Manual - Page 158
digital component recording HDV High Definition Video 1080i DV Consumer digital mode, Manual mode, for Camera File supports Exif 2.2 (also called "Exif Print"). Exif Print is a standard for enhancing the communication between camcorders and printers. By connecting to an Exif Print-compliant printer - Canon 1629B001 | XH G1 XH A1 Instruction Manual - Page 159
dBV 47 kohm load/3 kohms or less, unbalanced E MIC: ∅ 3.5 stereo mini jack (unbalanced), ATT: 20 dB -64 dBV (Auto mode)/600 ohms Max: -76 dBV (Manual mode, max. volume) A/V1: ∅ 3.5 mm mini jack (audio and video) -10 dBV /47 kohms XLR: XLR jack (pin1: shield, pin2: hot, pin3: cold), ATT: 20 - Canon 1629B001 | XH G1 XH A1 Instruction Manual - Page 160
shift 59 AEB - Auto exposure bracketing 116 Analog/digital (A/D) converter 108 Aspect guides 30 Aspect ratio 31 Audio level indicator 49 Audio Lens hood 21 Low-angle recording 28 M Maintenance 146 Manual (recording program 57 Manual focus 36 Master pedestal 77 Memory card 24, 150 MENU - Canon 1629B001 | XH G1 XH A1 Instruction Manual - Page 161
Still image review 119 Still image size 110 T E Tape protection 150 Temporary autofocus 36 Time code 42 Time code synchronization 44 Troubleshooting 152 Tv (recording program 55 U User bit 46 V VCR Stop 28 Video heads, cleaning 147 Videocassettes 23, 150 Viewfinder 18 W White - Canon 1629B001 | XH G1 XH A1 Instruction Manual - Page 162
Custom Keys Make a copy of this page and carry it with you as a reminder of the functions that can be assigned to each of the two custom keys in each operation mode. You can assign frequently used functions to the custom keys. The custom keys can have different functions assigned to them in each of - Canon 1629B001 | XH G1 XH A1 Instruction Manual - Page 163
in the instruction manual; ii) the use of accessories, attachments, products, supplies, parts or devices with this Canon product that do not conform to Canon specifications or that cause abnormally frequent service problems; iii) repairs or services performed by any party other than a Canon Service - Canon 1629B001 | XH G1 XH A1 Instruction Manual - Page 164
INC. NEW JERSEY OFFICE 100 Jamesburg Road, Jamesburg, NJ 08831 USA CANON U.S.A., INC. CHICAGO OFFICE 100 Park Blvd., Itasca, IL 60143 USA CANON U.S.A., INC. LOS ANGELES OFFICE 15955 Alton Parkway, Irvine, CA 92618 USA CANON U.S.A., INC. HONOLULU OFFICE 210 Ward Avenue, Suite 200, Honolulu, HI
-
 1
1 -
 2
2 -
 3
3 -
 4
4 -
 5
5 -
 6
6 -
 7
7 -
8
-
9
-
10
-
11
-
12
-
13
-
14
-
15
-
16
-
17
-
18
-
19
-
20
-
21
-
22
-
23
-
24
-
25
-
26
-
27
-
28
-
29
-
30
-
31
-
32
-
33
-
34
-
35
-
36
-
37
-
38
-
39
-
40
-
41
-
42
-
43
-
44
-
45
-
46
-
47
-
48
-
49
-
50
-
51
-
52
-
53
-
54
-
55
-
56
-
57
-
58
-
59
-
60
-
61
-
62
-
63
-
64
-
65
-
66
-
67
-
68
-
69
-
70
-
71
-
72
-
73
-
74
-
75
-
76
-
77
-
78
-
79
-
80
-
81
-
82
-
83
-
84
-
85
-
86
-
87
-
88
-
89
-
90
-
91
-
92
-
93
-
94
-
95
-
96
-
97
-
98
-
99
-
100
-
101
-
102
-
103
-
104
-
105
-
106
-
107
-
108
-
109
-
110
-
111
-
112
-
113
-
114
-
115
-
116
-
117
-
118
-
119
-
120
-
121
-
122
-
123
-
124
-
125
-
126
-
127
-
128
-
129
-
130
-
131
-
132
-
133
-
134
-
135
-
136
-
137
-
138
-
139
-
140
-
141
-
142
-
143
-
144
-
145
-
146
-
147
-
148
-
149
-
150
-
151
-
152
-
153
-
154
-
155
-
156
-
157
-
158
-
159
-
160
-
161
-
162
-
163
-
164
 |
 |
Mini
Digital
Video
Cassette
HD VIDEO CAMERA RECORDER
Instruction Manual
CAMÉSCOPE ET LECTEUR VIDÉO HD
Manuel d’instruction
VIDEOCÁMARA Y GRABADORA HD
Manual de Instrucciones
NTSC
A
PUB. DIM-776
English
Fran
ç
ais
Español