Canon 1629B001 XH G1 XH A1 Instruction Manual - Page 30
Displaying the Markers, Displaying the Aspect Ratio Guides, Displaying the Safety Zone Guide,
 |
UPC - 013803071771
View all Canon 1629B001 manuals
Add to My Manuals
Save this manual to your list of manuals |
Page 30 highlights
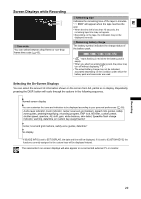
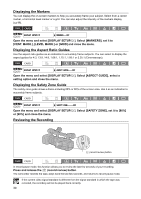
Displaying the Markers You can display the on-screen markers to help you accurately frame your subject. Select from a center marker, a horizontal level marker or a grid. You can also adjust the intensity of the markers display ( 88). MENU ( 25) DISPLAY SETUP/ MARKERS•••OFF Open the menu and select [DISPLAY SETUP/ ]. Select [MARKERS], set it to [CENT. MARK.], [LEVEL MARK.] or [GRID] and close the menu. Displaying the Aspect Ratio Guides Use the aspect ratio guides as an indication to accurately frame subjects. You can select to display the aspect guides for 4:3, 13:9, 14:9, 1.66:1, 1.75:1, 1.85:1 or 2.35:1 (Cinemascope). MENU ( 25) DISPLAY SETUP/ ASPECT GUIDE••••OFF Open the menu and select [DISPLAY SETUP/ ]. Select [ASPECT GUIDE], select a setting option and close the menu. Displaying the Safety Zone Guide The safety zone guide shows a frame including 80% or 90% of the screen area. Use it as an indication to accurately frame subjects. MENU ( 25) DISPLAY SETUP/ SAFETY ZONE OFF Open the menu and select [DISPLAY SETUP/ ]. Select [SAFETY ZONE], set it to [80%] or [90%] and close the menu. Reviewing the Recording (record review) button In record pause mode, this function allows you to review the last few seconds of your recording. Press and release the (record review) button. The camcorder rewinds the tape, plays back the last few seconds, and returns to record pause mode. If the current video signal standard is different from the signal standard in which the tape was recorded, the recording will not be played back correctly. 30
-
 1
1 -
2
-
3
-
4
-
5
-
6
-
7
-
8
-
9
-
10
-
11
-
12
-
13
-
14
-
15
-
16
-
17
-
18
-
19
-
20
-
21
-
22
-
23
-
24
-
 25
25 -
 26
26 -
 27
27 -
 28
28 -
 29
29 -
 30
30 -
 31
31 -
 32
32 -
 33
33 -
 34
34 -
 35
35 -
36
-
37
-
38
-
39
-
40
-
41
-
42
-
43
-
44
-
45
-
46
-
47
-
48
-
49
-
50
-
51
-
52
-
53
-
54
-
55
-
56
-
57
-
58
-
59
-
60
-
61
-
62
-
63
-
64
-
65
-
66
-
67
-
68
-
69
-
70
-
71
-
72
-
73
-
74
-
75
-
76
-
77
-
78
-
79
-
80
-
81
-
82
-
83
-
84
-
85
-
86
-
87
-
88
-
89
-
90
-
91
-
92
-
93
-
94
-
95
-
96
-
97
-
98
-
99
-
100
-
101
-
102
-
103
-
104
-
105
-
106
-
107
-
108
-
109
-
110
-
111
-
112
-
113
-
114
-
115
-
116
-
117
-
118
-
119
-
120
-
121
-
122
-
123
-
124
-
125
-
126
-
127
-
128
-
129
-
130
-
131
-
132
-
133
-
134
-
135
-
136
-
137
-
138
-
139
-
140
-
141
-
142
-
143
-
144
-
145
-
146
-
147
-
148
-
149
-
150
-
151
-
152
-
153
-
154
-
155
-
156
-
157
-
158
-
159
-
160
-
161
-
162
-
163
-
164
 |
 |
