Canon BJC 50 Service Manual - Page 63
Canon BJC 50 - Color Inkjet Printer Manual
 |
View all Canon BJC 50 manuals
Add to My Manuals
Save this manual to your list of manuals |
Page 63 highlights
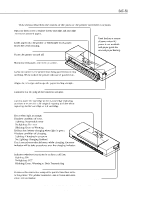
BJC-50 Part 3: Operating Instructions d) Switching on the power Make sure the lock switch is not locked and then press the POWER button to switch on the power. When the printer is powered up, it carries out the initial operation, then moves the carriage to the cartridge replacing position (center of the printer). The POWER indicator blinks to show that the printer is on standby with a BJ cartridge installed. Switch on the power for the equipment in this order: computer, other peripheral equipment, printer. e) Installing the BJ cartridge Two types of cartridges can be installed in the printer: black BJ cartridge (BC-10) and color BJ cartridge (BC-11e). The BJ cartridge BC-11 may be used however it cannot print small dots. 1) Removing the cap from the print head of the BJ cartridge Remove the BJ cartridge from the cartridge pack, then remove the orange head cap and tape protecting the nozzles as shown in the figure below. Color BJ Cartridge Black BJ Cartridge Orange Head Cap Tape Cartridge Pack Cartridge Pack Figure 3-6 Removing the Head Cap and the Tape Do not reuse a head cap and tape that have been removed once. If they are reused, the head may be clogged with foreign matter, or colors of ink may be mixed. Peel off the tape protecting the nozzles without touching the print head. Poor printing may be caused by scratches on the printhead or any foreign object adhered to it. After removing the cap and the tape, do not shake the BJ cartridge. Ink could splatter out if you do. 3-5
-
 1
1 -
2
-
3
-
4
-
5
-
6
-
7
-
8
-
9
-
10
-
11
-
12
-
13
-
14
-
15
-
16
-
17
-
18
-
19
-
20
-
21
-
22
-
23
-
24
-
25
-
26
-
27
-
28
-
29
-
30
-
31
-
32
-
33
-
34
-
35
-
36
-
37
-
38
-
39
-
40
-
41
-
42
-
43
-
44
-
45
-
46
-
47
-
48
-
49
-
50
-
51
-
52
-
53
-
54
-
55
-
56
-
57
-
 58
58 -
 59
59 -
 60
60 -
 61
61 -
 62
62 -
 63
63 -
 64
64 -
 65
65 -
 66
66 -
 67
67 -
 68
68 -
69
-
70
-
71
-
72
-
73
-
74
-
75
-
76
-
77
-
78
-
79
-
80
-
81
-
82
-
83
-
84
-
85
-
86
-
87
-
88
-
89
-
90
-
91
-
92
-
93
-
94
-
95
-
96
-
97
-
98
-
99
-
100
-
101
-
102
-
103
-
104
-
105
-
106
-
107
-
108
-
109
-
110
-
111
-
112
-
113
-
114
-
115
-
116
-
117
-
118
-
119
-
120
-
121
-
122
-
123
-
124
-
125
-
126
-
127
-
128
-
129
-
130
-
131
-
132
-
133
-
134
-
135
-
136
-
137
-
138
-
139
-
140
-
141
-
142
-
143
-
144
-
145
-
146
-
147
-
148
-
149
-
150
-
151
-
152
-
153
-
154
-
155
-
156
-
157
-
158
-
159
-
160
-
161
-
162
-
163
-
164
-
165
-
166
-
167
-
168
-
169
-
170
-
171
-
172
-
173
-
174
-
175
-
176
-
177
-
178
-
179
-
180
-
181
-
182
-
183
-
184
-
185
-
186
-
187
 |
 |
