Canon BJC 50 Service Manual - Page 81
Canon BJC 50 - Color Inkjet Printer Manual
 |
View all Canon BJC 50 manuals
Add to My Manuals
Save this manual to your list of manuals |
Page 81 highlights
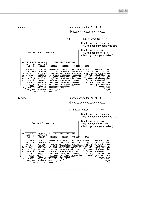
BJC-50 3.6 EEPROM Data Setting 3.6.1 EEPROM data setting mode Part 3: Operating Instructions The required EEPROM data is set in this mode when replacing the control PCB assembly or the printer base unit (including the waste ink absorber). The EEPROM (IC14) on the control PCB assembly contains machine specific data, such as waste ink amount and the remaining quantity of ink in the ink cartridge. Data must be set in the EEPROM when replacing the control PCB assembly or the printer base unit (including the waste ink absorber). a) When replacing the control PCB assembly Before installing a new control PCB assembly, visually check the waste ink amount for the waste ink absorber in the printer base unit. After replacing the control PCB assembly, set the waste ink amount in the EEPROM. b) When replacing the printer base unit (including the waste ink absorber) Set 0% (EEPROM clear) after replacing the printer base unit. 3.6.2 Setting EEPROM data 1. Remove the lithium ion battery. 2. While holding down the RESUME button, insert the DC plug of the Universal adapter into the printer. 3. While holding down the RESUME button and the CARTRIDGE button, press the POWER button. Release all the buttons when one long and short beeper sounds. Press the CARTRIDGE button to select the following number of beeper sounds. Set the waste ink amount of the waste ink absorber in the printer base unit (Roughly estimate the amount of ink absorbed on the surface of the waste ink absorber). Beeper 7 times 16 times 15 times 14 times Waste ink amount (Use the CARTRIDGE button to change) 0% used (new ink absorbed/EEPROM clear) 25% used 50% used 75% used If 25%, 50% or 75% is selected: Press the RESUME button to set data in the EEPROM. After setting is completed, press the POWER button to turn off the printer. If 0%(EEPROM clear)is selected: Press the RESUME button. Initialization starts and a beeper sounds. To clear the data in the EEPROM, press the POWER button to turn off the printer and remove the DC plug of the Universal adapter from the printer's power connector after completing initialization. Clear the data in the EEPROM. 3-23
-
 1
1 -
2
-
3
-
4
-
5
-
6
-
7
-
8
-
9
-
10
-
11
-
12
-
13
-
14
-
15
-
16
-
17
-
18
-
19
-
20
-
21
-
22
-
23
-
24
-
25
-
26
-
27
-
28
-
29
-
30
-
31
-
32
-
33
-
34
-
35
-
36
-
37
-
38
-
39
-
40
-
41
-
42
-
43
-
44
-
45
-
46
-
47
-
48
-
49
-
50
-
51
-
52
-
53
-
54
-
55
-
56
-
57
-
58
-
59
-
60
-
61
-
62
-
63
-
64
-
65
-
66
-
67
-
68
-
69
-
70
-
71
-
72
-
73
-
74
-
75
-
 76
76 -
 77
77 -
 78
78 -
 79
79 -
 80
80 -
 81
81 -
 82
82 -
 83
83 -
 84
84 -
 85
85 -
 86
86 -
87
-
88
-
89
-
90
-
91
-
92
-
93
-
94
-
95
-
96
-
97
-
98
-
99
-
100
-
101
-
102
-
103
-
104
-
105
-
106
-
107
-
108
-
109
-
110
-
111
-
112
-
113
-
114
-
115
-
116
-
117
-
118
-
119
-
120
-
121
-
122
-
123
-
124
-
125
-
126
-
127
-
128
-
129
-
130
-
131
-
132
-
133
-
134
-
135
-
136
-
137
-
138
-
139
-
140
-
141
-
142
-
143
-
144
-
145
-
146
-
147
-
148
-
149
-
150
-
151
-
152
-
153
-
154
-
155
-
156
-
157
-
158
-
159
-
160
-
161
-
162
-
163
-
164
-
165
-
166
-
167
-
168
-
169
-
170
-
171
-
172
-
173
-
174
-
175
-
176
-
177
-
178
-
179
-
180
-
181
-
182
-
183
-
184
-
185
-
186
-
187
 |
 |
