Canon BJC 50 Service Manual - Page 66
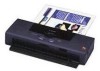
Canon BJC 50 - Color Inkjet Printer Manual
 |
View all Canon BJC 50 manuals
Add to My Manuals
Save this manual to your list of manuals |
Page 66 highlights
Part 3: Operating Instructions BJC-50 3) Installing the ink cartridge Take out the ink cartridge from its packaging, remove the protective cap for the ink inlet as shown in the figure, and install the ink cartridge in the printer with the reverse order as when removing it. After installing the ink cartridge, press the CARTRIDGE button in the same way as when installing a BJ cartridge to return the carriage to the capping position. BCI-11 Bk BCI-11 Color BCI-10 Bk Figure 3-9 Removing the Cap (Ink Cartridge) g) BJ cartridge container The printer is supplied with a BJ cartridge container to contain an BJ cartridge. If the BJ cartridge is removed from the printer, place it in the container. If the BJ cartridge is not stored in the container, nozzles may be clogged with ink, the BJ head may be scratched, or the BJ cartridge does not eject the ink onto the paper. The BJ cartridge container can contain a color or black BJ cartridge. Close Open Figure 3-10 BJ Cartridge Container Store the BJ cartridge with the ink cartridge attached. If the ink cartridge is not attached, ink may spill out or nozzles may be clogged with ink. Do not shake or drop the container. Otherwise, ink may leak. 3-8
-
 1
1 -
2
-
3
-
4
-
5
-
6
-
7
-
8
-
9
-
10
-
11
-
12
-
13
-
14
-
15
-
16
-
17
-
18
-
19
-
20
-
21
-
22
-
23
-
24
-
25
-
26
-
27
-
28
-
29
-
30
-
31
-
32
-
33
-
34
-
35
-
36
-
37
-
38
-
39
-
40
-
41
-
42
-
43
-
44
-
45
-
46
-
47
-
48
-
49
-
50
-
51
-
52
-
53
-
54
-
55
-
56
-
57
-
58
-
59
-
60
-
 61
61 -
 62
62 -
 63
63 -
 64
64 -
 65
65 -
 66
66 -
 67
67 -
 68
68 -
 69
69 -
 70
70 -
 71
71 -
72
-
73
-
74
-
75
-
76
-
77
-
78
-
79
-
80
-
81
-
82
-
83
-
84
-
85
-
86
-
87
-
88
-
89
-
90
-
91
-
92
-
93
-
94
-
95
-
96
-
97
-
98
-
99
-
100
-
101
-
102
-
103
-
104
-
105
-
106
-
107
-
108
-
109
-
110
-
111
-
112
-
113
-
114
-
115
-
116
-
117
-
118
-
119
-
120
-
121
-
122
-
123
-
124
-
125
-
126
-
127
-
128
-
129
-
130
-
131
-
132
-
133
-
134
-
135
-
136
-
137
-
138
-
139
-
140
-
141
-
142
-
143
-
144
-
145
-
146
-
147
-
148
-
149
-
150
-
151
-
152
-
153
-
154
-
155
-
156
-
157
-
158
-
159
-
160
-
161
-
162
-
163
-
164
-
165
-
166
-
167
-
168
-
169
-
170
-
171
-
172
-
173
-
174
-
175
-
176
-
177
-
178
-
179
-
180
-
181
-
182
-
183
-
184
-
185
-
186
-
187
 |
 |
