Canon CanoScan D2400UF CanoScan D1230U/D2400U Toolbox2.6 for Win Guide - Page 26
Save
 |
View all Canon CanoScan D2400UF manuals
Add to My Manuals
Save this manual to your list of manuals |
Page 26 highlights
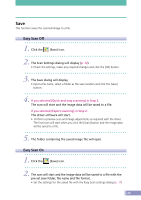
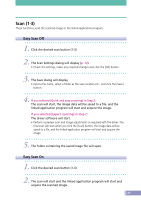
Save This function saves the scanned image to a file. Easy Scan Off 1. Click the (Save) icon. 2. The Scan Settings dialog will display (p. 12). • Check the settings, make any required changes and click the [OK] button. 3. The Save dialog will display. • Input a file name, select a folder as the save location and click the [Save] button. 4. If you selected [Quick and easy scanning] in Step 2: The scan will start and the image data will be saved to a file. If you selected [Expert scanning] in Step 2: The driver software will start. • Perform a preview scan and image adjustments as required with the driver. The final scan will start when you click the [Scan] button and the image data will be saved to a file. 5. The folder containing the saved image file will open. Easy Scan On 1. Click the (Save) icon. 2. The scan will start and the image data will be saved to a file with the pre-set save folder, file name and file format. • Set the settings for the saved file with the Easy Scan settings dialog (p. 17). 26
-
 1
1 -
2
-
3
-
4
-
5
-
6
-
7
-
8
-
9
-
10
-
11
-
12
-
13
-
14
-
15
-
16
-
17
-
18
-
19
-
20
-
 21
21 -
 22
22 -
 23
23 -
 24
24 -
 25
25 -
 26
26 -
 27
27 -
 28
28 -
 29
29 -
 30
30 -
 31
31 -
32
 |
 |