Canon Color imageCLASS MF9170c imageCLASS MF9170c/MF9150c/MF8450c Starter Guid - Page 29
Connect Telephone Cables
 |
View all Canon Color imageCLASS MF9170c manuals
Add to My Manuals
Save this manual to your list of manuals |
Page 29 highlights
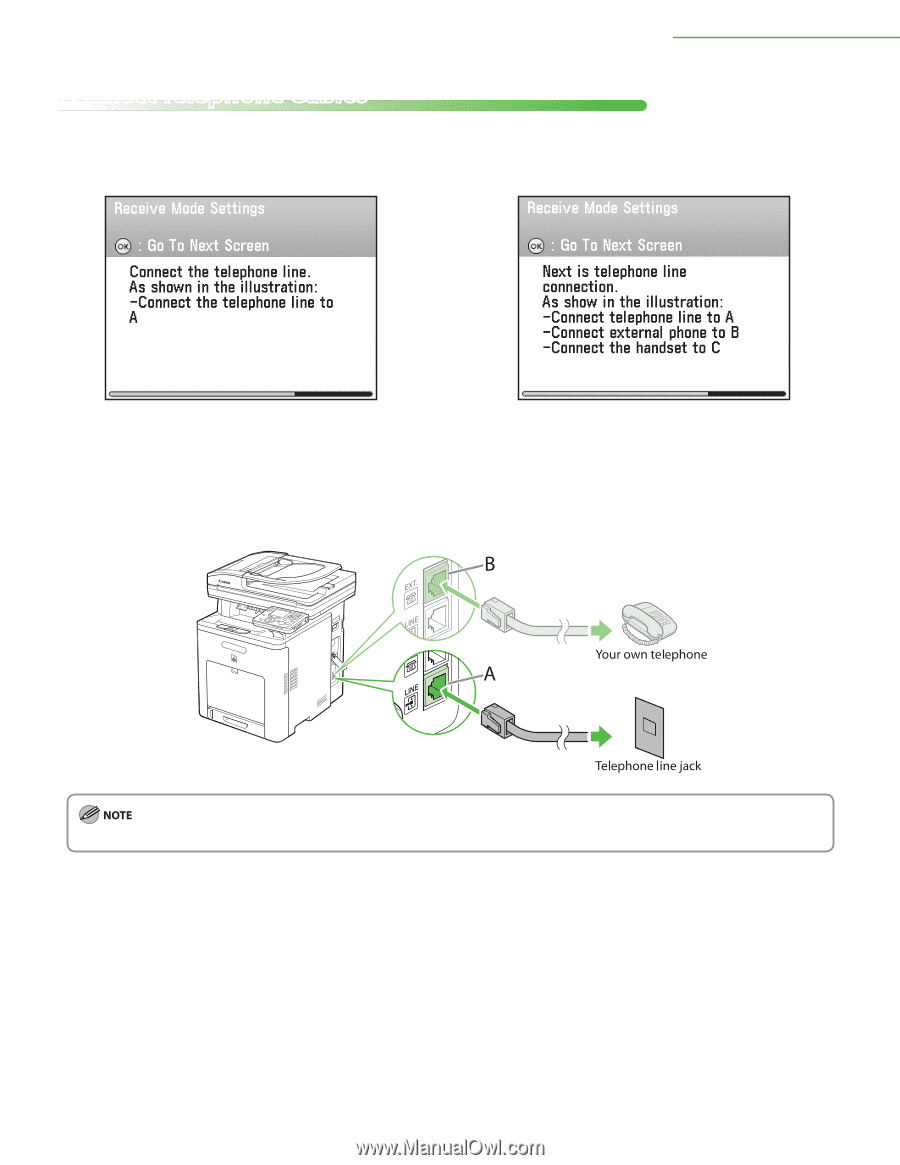
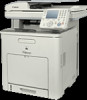
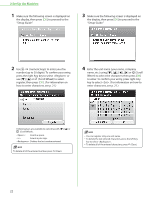
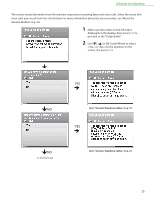
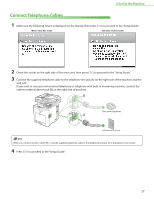
2 Set Up the Machine Connect Telephone Cables 1 Make sure the following screen is displayed on the display, then press [OK] to proceed to the "Setup Guide." When mode The other receive modes 2 Check the socket on the right side of the main unit, then press [OK] to proceed to the "Setup Guide." 3 Connect the supplied telephone cable to the telephone line jack (A) on the right side of the machine and the wall jack. If you want to use your own external telephone or telephone with built‑in answering machine, connect the cable to external device jack (B) on the right side of machine. When your receive mode is , only the supplied telephone cable to the telephone line jack (A) is displayed on the screen. 4 Press [OK] to proceed to the "Setup Guide." 27
-
 1
1 -
2
-
3
-
4
-
5
-
6
-
7
-
8
-
9
-
10
-
11
-
12
-
13
-
14
-
15
-
16
-
17
-
18
-
19
-
20
-
21
-
22
-
23
-
 24
24 -
 25
25 -
 26
26 -
 27
27 -
 28
28 -
 29
29 -
 30
30 -
 31
31 -
 32
32 -
 33
33 -
 34
34 -
35
-
36
-
37
-
38
-
39
-
40
-
41
-
42
-
43
-
44
-
45
-
46
-
47
-
48
-
49
-
50
-
51
-
52
-
53
-
54
-
55
-
56
-
57
-
58
-
59
-
60
 |
 |