Canon Color imageCLASS MF9170c imageCLASS MF9170c/MF9150c/MF8450c Starter Guid - Page 32
You selected <Do Not Perform Full Corr.> =Quick, Correction, go to Set Up, Network Connection
 |
View all Canon Color imageCLASS MF9170c manuals
Add to My Manuals
Save this manual to your list of manuals |
Page 32 highlights
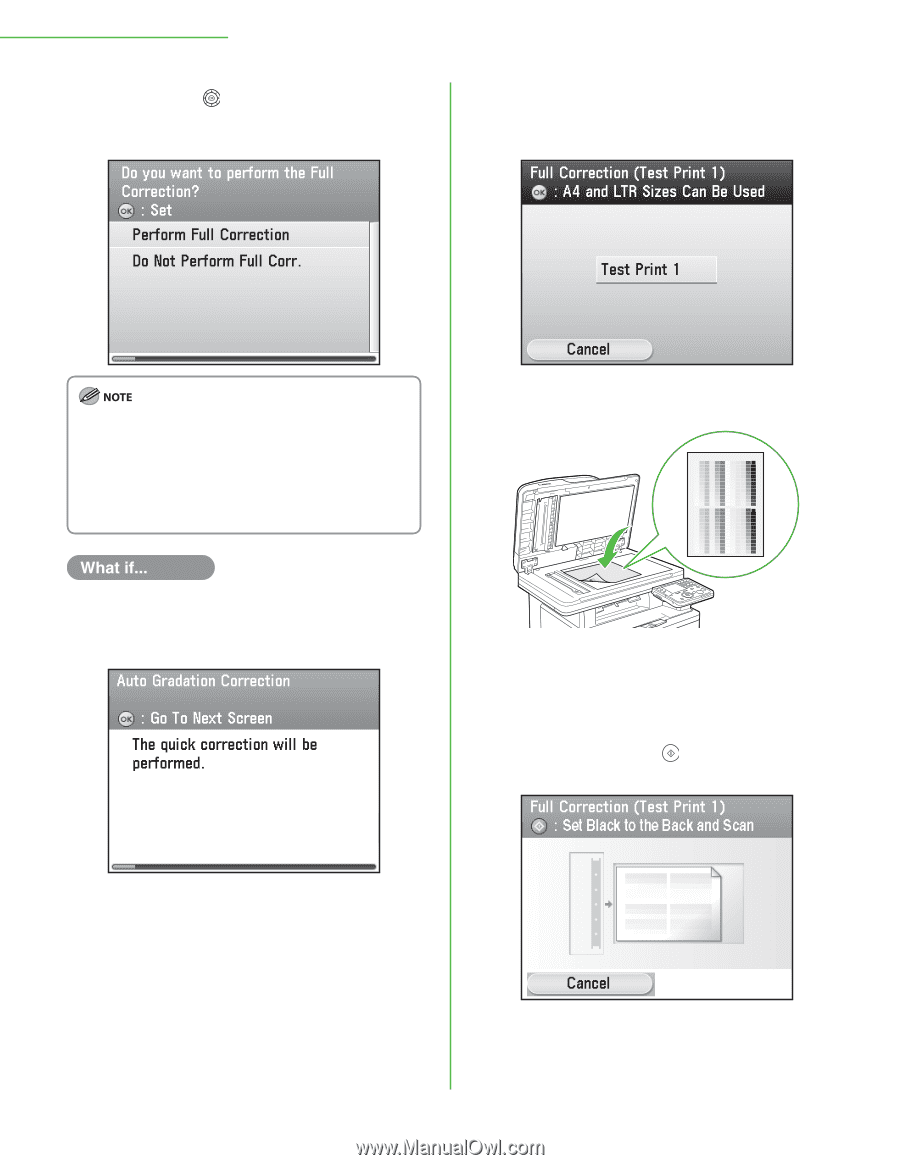
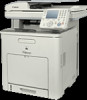
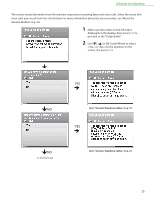
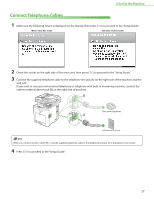
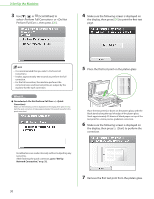
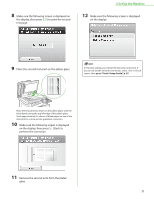
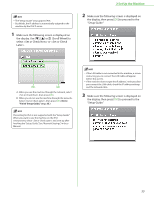
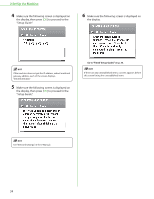
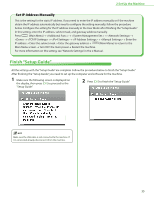
2 Set Up the Machine 3 Use or (Scroll Wheel) to select or , then press [OK]. 4 Make sure the following screen is displayed on the display, then press [OK] to print the first test page. - It is recommended that you select . - It takes approximately 300 seconds to perform the full correction. - For the full correction, the machine performs the correction twice and two test prints are output by the machine for the each correction. 5 Place the first test print on the platen glass. ● You selected (=Quick Correction) Make sure the following screen is displayed on the display, then press [OK] to start the quick correction. (It takes approximately 150 seconds to perform the quick correction.) Place the test print face down on the platen glass, with the black bands along the top left edge of the platen glass. Stack approximately 20 sheets of blank paper on top of the test print for a more precise gradation correction. 6 Make sure the following screen is displayed on the display, then press (Start) to perform the correction. Recalibrations are made internally without outputting any test prints. After finishing the quick correction, go to "Set Up Network Connection," on p. 32. 7 Remove the first test print from the platen glass. 30
-
 1
1 -
2
-
3
-
4
-
5
-
6
-
7
-
8
-
9
-
10
-
11
-
12
-
13
-
14
-
15
-
16
-
17
-
18
-
19
-
20
-
21
-
22
-
23
-
24
-
25
-
26
-
 27
27 -
 28
28 -
 29
29 -
 30
30 -
 31
31 -
 32
32 -
 33
33 -
 34
34 -
 35
35 -
 36
36 -
 37
37 -
38
-
39
-
40
-
41
-
42
-
43
-
44
-
45
-
46
-
47
-
48
-
49
-
50
-
51
-
52
-
53
-
54
-
55
-
56
-
57
-
58
-
59
-
60
 |
 |