Canon DC320 DC310/DC320 Instruction Manual - Page 40
LCD Video Light, Self Timer, Activate the self timer., Press, to close the menu., on the camcorder
 |
UPC - 013803091694
View all Canon DC320 manuals
Add to My Manuals
Save this manual to your list of manuals |
Page 40 highlights
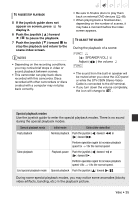
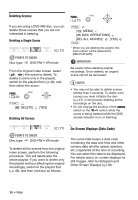
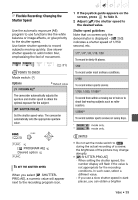
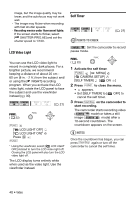
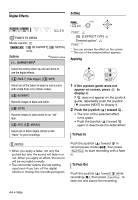
image, but the image quality may be lower, and the autofocus may not work well. - The image may flicker when recording with fast shutter speeds. - Recording movies under fluorescent lights: If the screen starts to flicker, select [ SHUTTER-PRIO.AE] and set the shutter speed to 1/100. LCD Video Light You can use the LCD video light to record in completely dark places. For a brighter picture, we recommend keeping a distance of about 20 cm 60 cm (8 in. - 2 ft.) from the subject and/ or using the [ NIGHT] recording program. When you activate the LCD video light, rotate the LCD panel to face the subject and use the viewfinder instead ( 30). ( 21) FUNC. ( 22) FUNC. [ LCD LIGHT OFF] [ LCD LIGHT ON]* Press FUNC. * Using the viewfinder, select [ LCD LIGHT OFF] instead to turn the LCD video light off. Closing the LCD panel will also turn the LCD video light off. The LCD display turns entirely white when used as the video light. Use the viewfinder instead. Self Timer ( 21) POINTS TO CHECK : Set the camcorder to record pause mode. FUNC. ( 22) 1 Activate the self timer. FUNC. [ MENU] [ CAMERA SETUP] [SELF TIMER] [ ON ] 2 Press FUNC. to close the menu. • appears. • Set [SELF TIMER] to [ cancel the self timer. OFF] to 3 Press Start/Stop on the camcorder to start recording. The camcorder starts recording video ( mode) or takes a still image ( mode) after a 10-second countdown. The countdown appears on the screen. NOTES Once the countdown has begun, you can press Start/Stop again or turn off the camcorder to cancel the self timer. 40 • Video
-
 1
1 -
2
-
3
-
4
-
5
-
6
-
7
-
8
-
9
-
10
-
11
-
12
-
13
-
14
-
15
-
16
-
17
-
18
-
19
-
20
-
21
-
22
-
23
-
24
-
25
-
26
-
27
-
28
-
29
-
30
-
31
-
32
-
33
-
34
-
 35
35 -
 36
36 -
 37
37 -
 38
38 -
 39
39 -
 40
40 -
 41
41 -
 42
42 -
 43
43 -
 44
44 -
 45
45 -
46
-
47
-
48
-
49
-
50
-
51
-
52
-
53
-
54
-
55
-
56
-
57
-
58
-
59
-
60
-
61
-
62
-
63
-
64
-
65
-
66
-
67
-
68
-
69
-
70
-
71
-
72
-
73
-
74
-
75
-
76
-
77
-
78
-
79
-
80
-
81
-
82
-
83
-
84
-
85
-
86
-
87
-
88
-
89
-
90
-
91
-
92
-
93
 |
 |
