Canon DC320 DC310/DC320 Instruction Manual - Page 47
Initializing the Disc, Disc Playback on an External Device, Changing the Disc Title
 |
UPC - 013803091694
View all Canon DC320 manuals
Add to My Manuals
Save this manual to your list of manuals |
Page 47 highlights
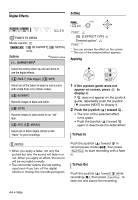
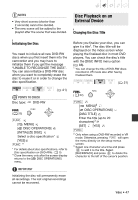
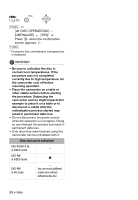
NOTES • Very short scenes (shorter than 2 seconds) cannot be divided. • The new scene will be added to the playlist after the scene that was divided. Disc Playback on an External Device Disc Playback on an External Device Changing the Disc Title Initializing the Disc You need to initialize all new DVD-RW discs when you first insert them into the camcorder and you may have to initialize them if you get the message "UNABLE TO RECOGNIZE THE DATA". You can also initialize a DVD-RW disc when you want to completely erase the disc to reuse it or in order to change the disc specification. POINTS TO CHECK Disc type: DVD-RW ( 21) FUNC. ( 22) FUNC. [ MENU] [ DISC OPERATIONS] [INITIALIZE DISC] Select a disc specification* [YES] FUNC. ** * For details about disc specifications, refer to Disc specification on DVD-RWs. ( 5) ** Close the menu only after the screen display returns to the [ DISC OPERATIONS] menu. IMPORTANT Initializing the disc will permanently erase all recordings. The lost original recordings cannot be recovered. Before you finalize your disc, you can give it a title1. The disc title will be displayed on the index screen when playing the finalized disc in most DVD players. You can check the disc's title with the [DISC INFO] menu option ( 66). 1 You can change the title of DVD-RW discs recorded in VR mode also after having finalized them. ( 21) FUNC. ( 22) FUNC. [ MENU]2 [ DISC OPERATIONS] [DISC TITLE] Enter the title (up to 20 characters)3 [SET] [YES] FUNC. 2 Only when using a DVD-RW recorded in VR mode. Otherwise, pressing FUNC. will open the menu directly on the setup menus screen. 3 Select one character at a time and press to add it to the title. Select [BACKSPACE] and press to delete the character to the left of the cursor's position. Video • 47
-
 1
1 -
2
-
3
-
4
-
5
-
6
-
7
-
8
-
9
-
10
-
11
-
12
-
13
-
14
-
15
-
16
-
17
-
18
-
19
-
20
-
21
-
22
-
23
-
24
-
25
-
26
-
27
-
28
-
29
-
30
-
31
-
32
-
33
-
34
-
35
-
36
-
37
-
38
-
39
-
40
-
41
-
 42
42 -
 43
43 -
 44
44 -
 45
45 -
 46
46 -
 47
47 -
 48
48 -
 49
49 -
 50
50 -
 51
51 -
 52
52 -
53
-
54
-
55
-
56
-
57
-
58
-
59
-
60
-
61
-
62
-
63
-
64
-
65
-
66
-
67
-
68
-
69
-
70
-
71
-
72
-
73
-
74
-
75
-
76
-
77
-
78
-
79
-
80
-
81
-
82
-
83
-
84
-
85
-
86
-
87
-
88
-
89
-
90
-
91
-
92
-
93
 |
 |