Canon PIXMA iP4300 Quick Start Guide - Page 72
Prevent paper abrasion, Custom Settings, Maintenance, Canon IJ Printer Utility, RESUME/CANCEL, POWER
 |
View all Canon PIXMA iP4300 manuals
Add to My Manuals
Save this manual to your list of manuals |
Page 72 highlights
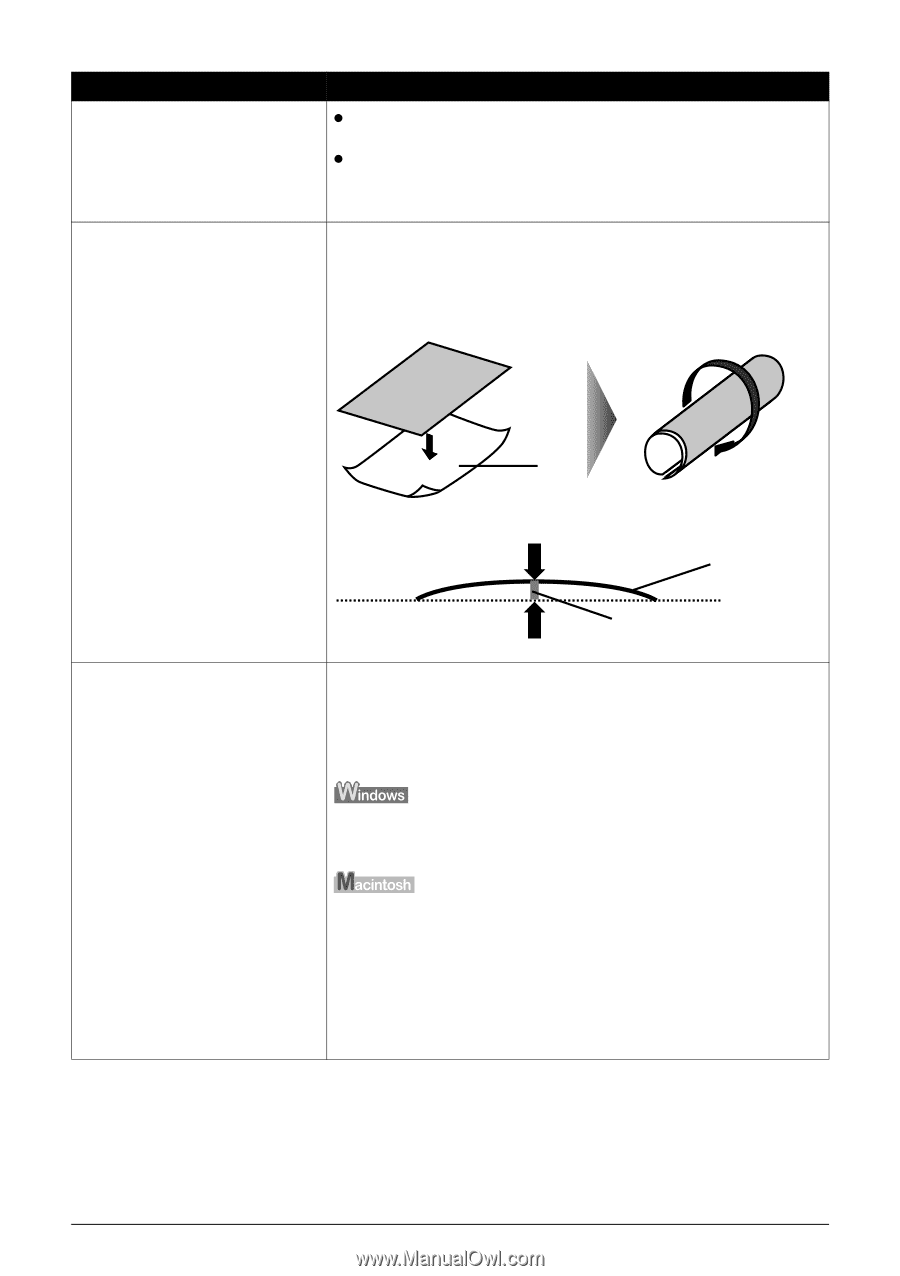
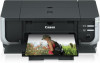
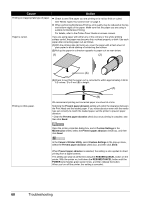
Cause Action Printing on inappropriate type of paper. z Check to see if the paper you are printing on is not too thick or curled. See "Media Types You Cannot Use" on page 5. z When performing Borderless Printing, print quality may be reduced at the top and bottom edges of the paper. Make sure that the paper you are using is suitable for Borderless Printing. For details, refer to the Printer Driver Guide on-screen manual. Paper is curled. If you are using paper with either any of the corners or the whole printing surface curled, the paper may become dirty, not feed properly, or both. Use such paper after correcting paper curl as follows. (1)With the printing side (A) facing up, cover the paper with a fresh sheet of plain paper to avoid staining or scratching the surface. (2)Roll up the paper in a direction opposite to paper curl as seen below. (1) (2) Printing on thick paper. (A) (3)Check to see that the paper curl is corrected to within approximately 0.08 to 0.2 inches / 2 to 5 mm (B) in height. (A) (B) We recommend printing curl-corrected paper one sheet at a time. Selecting the Prevent paper abrasion setting will widen the clearance between the Print Head and the loaded paper. If you notice abrasion even with the media type set correctly to match the loaded paper, set the printer to prevent paper abrasion. * Clear the Prevent paper abrasion check box once printing is complete, and then click Send. Open the printer properties dialog box, and in Custom Settings in the Maintenance sheet, select the Prevent paper abrasion check box, and then click Send. In the Canon IJ Printer Utility, select Custom Settings in the pop-up menu, select the Prevent paper abrasion check box, and then click Send. When Prevent paper abrasion is selected, the setting is also applied to direct printing from a digital camera. This setting can also be performed using the RESUME/CANCEL button on the printer. With the printer on, hold down the RESUME/CANCEL button until the POWER lamp flashes green seven times, and then release the button. When you turn off the printer, this setting is canceled. 68 Troubleshooting
-
 1
1 -
2
-
3
-
4
-
5
-
6
-
7
-
8
-
9
-
10
-
11
-
12
-
13
-
14
-
15
-
16
-
17
-
18
-
19
-
20
-
21
-
22
-
23
-
24
-
25
-
26
-
27
-
28
-
29
-
30
-
31
-
32
-
33
-
34
-
35
-
36
-
37
-
38
-
39
-
40
-
41
-
42
-
43
-
44
-
45
-
46
-
47
-
48
-
49
-
50
-
51
-
52
-
53
-
54
-
55
-
56
-
57
-
58
-
59
-
60
-
61
-
62
-
63
-
64
-
65
-
66
-
 67
67 -
 68
68 -
 69
69 -
 70
70 -
 71
71 -
 72
72 -
 73
73 -
 74
74 -
 75
75 -
 76
76 -
 77
77 -
78
-
79
-
80
-
81
-
82
-
83
-
84
-
85
-
86
-
87
-
88
-
89
-
90
-
91
-
92
-
93
-
94
-
95
-
96
-
97
-
98
-
99
-
100
-
101
-
102
 |
 |