Canon PIXMA iP4300 Quick Start Guide - Page 81
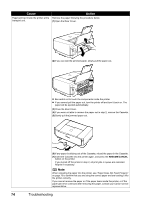
Cassette. For Automatic Print Head Alignment, always load paper in the Auto
 |
View all Canon PIXMA iP4300 manuals
Add to My Manuals
Save this manual to your list of manuals |
Page 81 highlights
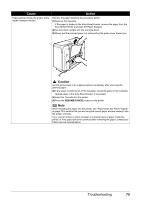
Cause Eight flashes: Ink absorber is almost full. Action The printer has a built-in ink absorber to hold the ink used during Print Head Cleaning, for example. Eight flashes indicates that the ink absorber is nearly full. Press the RESUME/CANCEL button to cancel the error so you can continue printing. Before the ink absorber becomes completely full, contact a Canon service representative. (You will need to replace a particular part of the printer.) Nine flashes: No response from connected digital camera or video camcorder. / Connected digital camera or video camcorder is not compatible with this printer. Ten Flashes: Cannot perform duplex printing. Eleven flashes: Automatic Print Head Alignment failed. Thirteen Flashes: Ink level cannot be detected. Fourteen Flashes: Ink tank cannot be recognized. Important Canon recommends that you call for service as soon as this error occurs. Once the ink absorber becomes completely full, printing cannot be performed until the ink absorber is replaced. Disconnect the cable connecting the printer and the device, and then reconnect it. Depending on the model or brand of your device, you may have to select a PictBridge-compliant print mode on the device before connecting it to the printer. You may also have to turn on the camera or select Play mode manually after connecting the device to the printer. Perform necessary operations according your device's instruction manual before reconnecting it to the printer. If the error is still not resolved, there is a possibility that you are using a digital camera or digital video camcorder that is not supported by this printer. Use a digital camera or digital video camcorder compatible with this printer. The size of paper may not be compatible with automatic duplex printing. The sizes of media suitable for auto duplex printing are A4, Letter, A5, and 5" x 7". Make sure that the size of the paper loaded in the printer is correct. Pressing the RESUME/CANCEL button will eject the paper and restart printing from the front side of the next paper. The reverse side of the ejected sheet will not be printed. Possible causes are as follows: z Paper of size other than A4 or Letter is loaded in the Auto Sheet Feeder. Press the RESUME/CANCEL button on the printer to dismiss the error, then load a sheet of A4/Letter-sized paper in the Auto Sheet Feeder. Automatic Print Head Alignment cannot be performed using paper from the Cassette. For Automatic Print Head Alignment, always load paper in the Auto Sheet Feeder. z Print Head nozzles are clogged. Press the RESUME/CANCEL button to dismiss the error, and print the nozzle check pattern to check the status of the Print Head. See "Printing the Nozzle Check Pattern" on page 36. z The Paper Output Slot is exposed to strong light. Press the RESUME/CANCEL button to dismiss the error, and then adjust your operating environment and/or the position of the printer so that the Paper Output Slot is not exposed directly to strong light. After carrying out the above measures, if the problem continues after aligning the Print Head again, press the RESUME/CANCEL button to dismiss the error, and then perform Manual Print Head Alignment. For details on Manual Print Head Alignment, see "Manual Print Head Alignment" on page 47. The remaining ink level cannot be correctly detected. Replace the ink tank and close the Top Cover. Printing with an ink tank that was once empty may damage the printer. If you want to continue printing in this condition, you need to release the function for detecting the remaining ink level. Press and hold the RESUME/CANCEL button for at least 5 seconds, and then release it. * With this operation, releasing the function for detecting the remaining ink level is memorized. Please be advised that Canon shall not be liable for any printer malfunction or damage caused by refilled ink tanks. See "Replacing an Ink Tank" on page 26. The ink tank is not compatible with this printer. (The lamp on the ink tank is off.) Install an appropriate ink tank. See "Replacing an Ink Tank" on page 26. Troubleshooting 77
-
 1
1 -
2
-
3
-
4
-
5
-
6
-
7
-
8
-
9
-
10
-
11
-
12
-
13
-
14
-
15
-
16
-
17
-
18
-
19
-
20
-
21
-
22
-
23
-
24
-
25
-
26
-
27
-
28
-
29
-
30
-
31
-
32
-
33
-
34
-
35
-
36
-
37
-
38
-
39
-
40
-
41
-
42
-
43
-
44
-
45
-
46
-
47
-
48
-
49
-
50
-
51
-
52
-
53
-
54
-
55
-
56
-
57
-
58
-
59
-
60
-
61
-
62
-
63
-
64
-
65
-
66
-
67
-
68
-
69
-
70
-
71
-
72
-
73
-
74
-
75
-
 76
76 -
 77
77 -
 78
78 -
 79
79 -
 80
80 -
 81
81 -
 82
82 -
 83
83 -
 84
84 -
 85
85 -
 86
86 -
87
-
88
-
89
-
90
-
91
-
92
-
93
-
94
-
95
-
96
-
97
-
98
-
99
-
100
-
101
-
102
 |
 |