Canon RM-25 V1.0 Network Video Recording Software RM Series Administrator s Ma - Page 99
Zoom the Viewing Area In and Out, Save Part of a Recording, From] and [To]
 |
View all Canon RM-25 V1.0 manuals
Add to My Manuals
Save this manual to your list of manuals |
Page 99 highlights
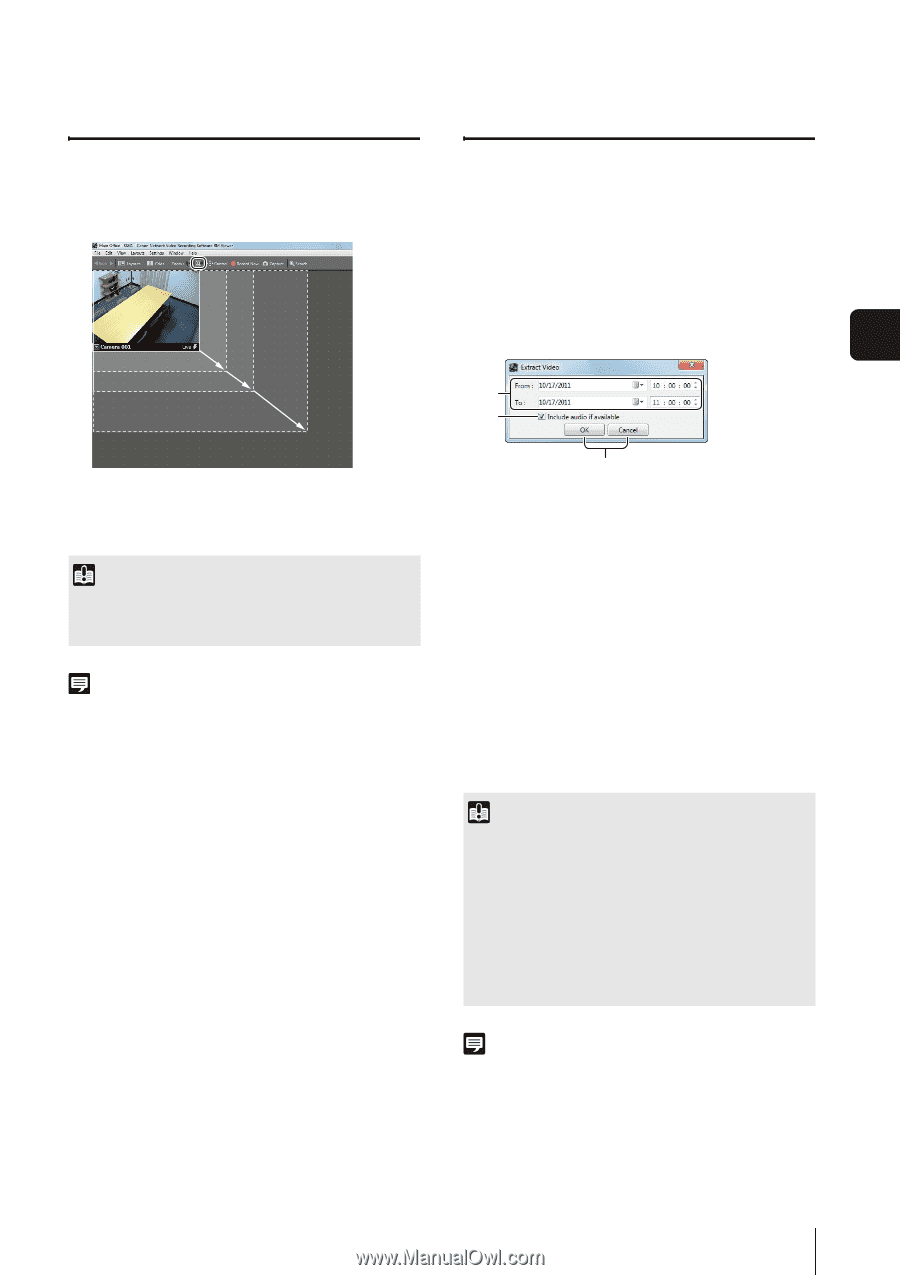
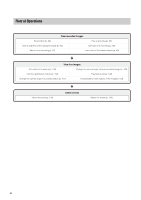
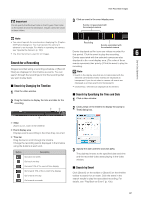
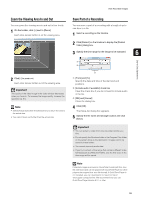
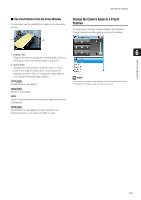
View Recorded Images Zoom the Viewing Area In and Out You can zoom the viewing area in and out in four levels. 1 On the toolbar, click [+] next to [Zoom]. Each click zooms further in on the viewing area. Save Part of a Recording You can save a part of a recording with a length of up to one hour to a file. 1 Select a recording on the timeline. 2 Click [Extract] on the timeline to display the [Extract Video] dialog box. 3 Specify the time range for the image to be extracted. 6 Day-to-Day Operations 2 Click [-] to zoom out. Each click zooms further out of the viewing area. Important The quality of the video image in the video window decreases when you zoom in. To increase the image quality, increase the resolution (p. 61). Note • Select [Actual Size] from the [View] menu to return the view to the actual size. • You cannot zoom out further than the actual size. ➀ ➁ ➂ ➀ [From] and [To] Specify the date and time of the start and end positions. ➁ [Include audio if available] check box Clear the check box if you do not want to include audio in the file. ➂ [OK] and [Cancel] Close the dialog box. 4 Click [OK]. The [Save As] dialog box appears. 5 Specify the file name and storage location and click [Save]. Important • You can extract a video from only one video window at a time. • Do not specify the Windows folder or the Program Files folder on the system drive as the destination. Images cannot be saved to these folders. • You cannot save only audio data. • If you try to extract a time range that contains different video formats (such as JPEG and H.264), only the first video in the time range will be saved. Note Extracted images are saved in QuickTime format (with the .mov file extension) and can be played with QuickTime Player (or other players that support the .mov file format). If QuickTime Player is not installed, you can download it for free from http:// www.apple.com/quicktime. We recommend that you use QuickTime Player Version 6.5.1 or later. 99
-
 1
1 -
2
-
3
-
4
-
5
-
6
-
7
-
8
-
9
-
10
-
11
-
12
-
13
-
14
-
15
-
16
-
17
-
18
-
19
-
20
-
21
-
22
-
23
-
24
-
25
-
26
-
27
-
28
-
29
-
30
-
31
-
32
-
33
-
34
-
35
-
36
-
37
-
38
-
39
-
40
-
41
-
42
-
43
-
44
-
45
-
46
-
47
-
48
-
49
-
50
-
51
-
52
-
53
-
54
-
55
-
56
-
57
-
58
-
59
-
60
-
61
-
62
-
63
-
64
-
65
-
66
-
67
-
68
-
69
-
70
-
71
-
72
-
73
-
74
-
75
-
76
-
77
-
78
-
79
-
80
-
81
-
82
-
83
-
84
-
85
-
86
-
87
-
88
-
89
-
90
-
91
-
92
-
93
-
 94
94 -
 95
95 -
 96
96 -
 97
97 -
 98
98 -
 99
99 -
 100
100 -
 101
101 -
 102
102 -
 103
103 -
 104
104 -
105
-
106
-
107
-
108
-
109
-
110
-
111
-
112
-
113
-
114
-
115
-
116
-
117
-
118
-
119
-
120
-
121
-
122
-
123
-
124
-
125
-
126
-
127
-
128
-
129
-
130
-
131
-
132
-
133
-
134
-
135
-
136
-
137
-
138
 |
 |