Compaq Armada m300 Compaq Armada M300 Series of Personal Computers Maintenance - Page 68
Slide the hard drive into the bay until the connector is seated
 |
View all Compaq Armada m300 manuals
Add to My Manuals
Save this manual to your list of manuals |
Page 68 highlights
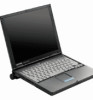
Inserting a Hard Drive 1. Shut down the computer. 2. Turn the computer upside down. 3. Pull the bottom half of the bezel down. 4. Slide the hard drive into the bay until the connector is seated – (Figure 5-8). 5. Push the front bezel down —. 6. Insert the hard drive screw ˜. Figure 5-8. Inserting a Hard Drive Removal and Replacement Procedures 5-9
-
 1
1 -
2
-
3
-
4
-
5
-
6
-
7
-
8
-
9
-
10
-
11
-
12
-
13
-
14
-
15
-
16
-
17
-
18
-
19
-
20
-
21
-
22
-
23
-
24
-
25
-
26
-
27
-
28
-
29
-
30
-
31
-
32
-
33
-
34
-
35
-
36
-
37
-
38
-
39
-
40
-
41
-
42
-
43
-
44
-
45
-
46
-
47
-
48
-
49
-
50
-
51
-
52
-
53
-
54
-
55
-
56
-
57
-
58
-
59
-
60
-
61
-
62
-
 63
63 -
 64
64 -
 65
65 -
 66
66 -
 67
67 -
 68
68 -
 69
69 -
 70
70 -
 71
71 -
 72
72 -
 73
73 -
74
-
75
-
76
-
77
-
78
-
79
-
80
-
81
-
82
-
83
-
84
-
85
-
86
-
87
-
88
-
89
-
90
-
91
-
92
-
93
-
94
-
95
-
96
-
97
-
98
-
99
-
100
-
101
-
102
 |
 |

Removal and Replacement Procedures
5-9
Inserting a Hard Drive
1.
Shut down the computer.
2.
Turn the computer upside down.
3.
Pull the bottom half of the bezel down.
4.
Slide the hard drive into the bay until the connector is seated
(Figure 5-8).
5.
Push the front bezel down
.
6.
Insert the hard drive screw
.
Figure 5-8.
Inserting a Hard Drive