Compaq Armada m300 Compaq Armada M300 Series of Personal Computers Maintenance - Page 87
PC Card Assembly, IMPORTANT
 |
View all Compaq Armada m300 manuals
Add to My Manuals
Save this manual to your list of manuals |
Page 87 highlights
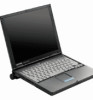
5.18 PC Card Assembly IMPORTANT: There are different-sized screws securing the PC Card assembly to the system board. Make note of the location of these screws. 1. Prepare the computer for disassembly (Section 5.5). 2. Remove the modem or modem/NIC card (Section 5.9). 3. Remove the keyboard (Section 5.11). 4. Remove the switch cover (Section 5.13). 5. Remove the display assembly (Section 5.14). 6. Remove the top cover (Section 5.15). 7. Remove the modem connector board (Section 5.17). 8. Remove the two silver screws – on the left side of the PC Card assembly (Figure 5- 26). 9. Remove the black screw — securing the front of the PC Card assembly to the base assembly. 10. Lift the left side of the PC Card assembly ˜ to disconnect it from the system board. Figure 5-26. Removing the PC Card Assembly Reverse the above procedures when installing the PC Card assembly. IMPORTANT: Be sure to route the audio and light board cables between the PC Card assembly and the base plastic. Do not route the cables near the heat sink. 5-28 Removal and Replacement Procedures
-
 1
1 -
2
-
3
-
4
-
5
-
6
-
7
-
8
-
9
-
10
-
11
-
12
-
13
-
14
-
15
-
16
-
17
-
18
-
19
-
20
-
21
-
22
-
23
-
24
-
25
-
26
-
27
-
28
-
29
-
30
-
31
-
32
-
33
-
34
-
35
-
36
-
37
-
38
-
39
-
40
-
41
-
42
-
43
-
44
-
45
-
46
-
47
-
48
-
49
-
50
-
51
-
52
-
53
-
54
-
55
-
56
-
57
-
58
-
59
-
60
-
61
-
62
-
63
-
64
-
65
-
66
-
67
-
68
-
69
-
70
-
71
-
72
-
73
-
74
-
75
-
76
-
77
-
78
-
79
-
80
-
81
-
 82
82 -
 83
83 -
 84
84 -
 85
85 -
 86
86 -
 87
87 -
 88
88 -
 89
89 -
 90
90 -
 91
91 -
 92
92 -
93
-
94
-
95
-
96
-
97
-
98
-
99
-
100
-
101
-
102
 |
 |
