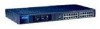
D-Link 1824i User Guide - Page 73
Power-On Self Test, still be displayed on the front panel indicators.
 |
UPC - 790069210358
View all D-Link 1824i manuals
Add to My Manuals
Save this manual to your list of manuals |
Page 73 highlights
10BASE-T Stackable Hubs B BPOWER-ON SELF TEST When the master hub is powered on, it does a Power-On Self Test (POST) to verify that all of its components are working properly. As it performs its tests, the test progress is displayed on the terminal console, provided the hub is in console mode. (If the hub is in Out-of-band management mode, the console display will be omitted; the progress of the diagnostic self-test will still be displayed on the front panel indicators.) A typical boot-up console display is shown below: INTELLIGENT STACKABLE HUB POWER-ON SELF DIAGNOSTIC PROM Checksum Test DRAM ( 01024 KByte ) LED Display Test E2PROM Integration Checksum 29F040 512 Kbytes Flash Memory Installed Network Monitor SRAM Test DL-P2517B NIC Test Expansion Module Test ..... PASSED ..... PASSED ..... PASSED ..... PASSED ..... PASSED ..... PASSED ..... PASSED ..... PASSED INTELLIGENT SYSTEM CONFIG AND RUN TIME IMAGE DOWNLOAD -> DUPLICATE IP CHECKING: (Hit CTRL-C to stop system boot/load) .. IP Address: 202.39.74.51 .. Subnet Mask: 255.255.255.0 ARP Req Send ARP Reply ARP Retry Time (Sec) ------------ ----------- ----------- 4 0 3 3 -> DOWNLOAD RUN TIME IMAGE FROM FLASH: (Hit CTRL-C to stop system boot/load ) During the initial part of the test, the Hub ID indicator will display a letter "A". As each test is done, the hub lights the amber frames around the port numbers as a progress indication. If any critical part of the test fails, the hub Power-On Self Test B-1
-
 1
1 -
2
-
3
-
4
-
5
-
6
-
7
-
8
-
9
-
10
-
11
-
12
-
13
-
14
-
15
-
16
-
17
-
18
-
19
-
20
-
21
-
22
-
23
-
24
-
25
-
26
-
27
-
28
-
29
-
30
-
31
-
32
-
33
-
34
-
35
-
36
-
37
-
38
-
39
-
40
-
41
-
42
-
43
-
44
-
45
-
46
-
47
-
48
-
49
-
50
-
51
-
52
-
53
-
54
-
55
-
56
-
57
-
58
-
59
-
60
-
61
-
62
-
63
-
64
-
65
-
66
-
67
-
 68
68 -
 69
69 -
 70
70 -
 71
71 -
 72
72 -
 73
73 -
 74
74 -
 75
75 -
 76
76 -
 77
77 -
 78
78 -
79
-
80
-
81
-
82
-
83
-
84
-
85
-
86
-
87
 |
 |
