D-Link DIR-842 User Manual - Page 65
Dynamic DNS
 |
View all D-Link DIR-842 manuals
Add to My Manuals
Save this manual to your list of manuals |
Page 65 highlights
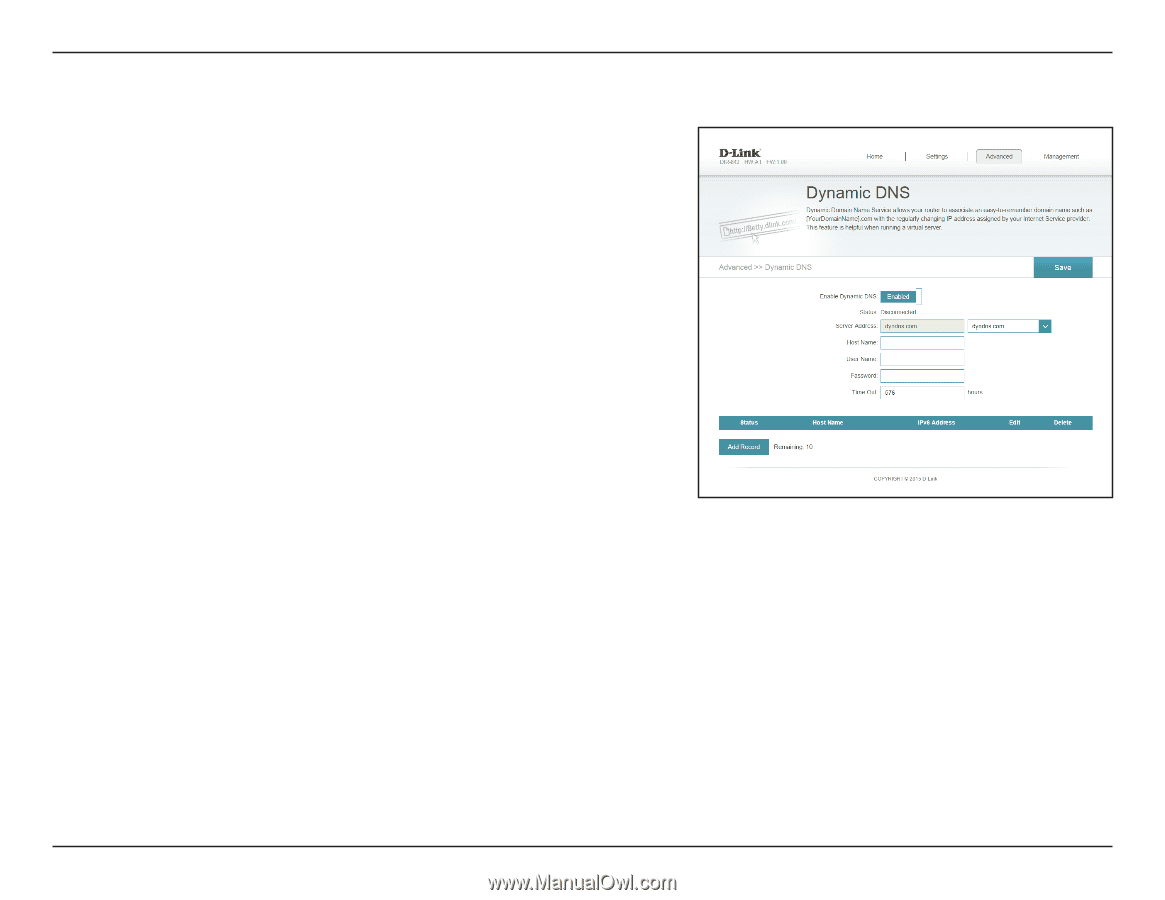
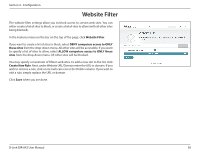
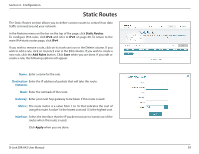
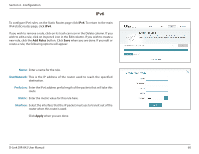
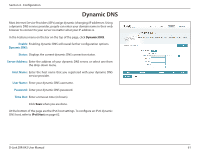
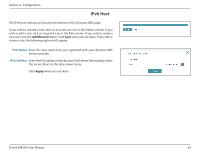
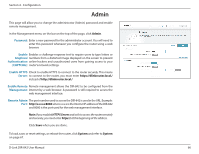
Section 4 - Configuration Dynamic DNS Most Internet Service Providers (ISPs) assign dynamic (changing) IP addresses. Using a dynamic DNS service provider, people can enter your domain name in their web browser to connect to your server no matter what your IP address is. In the Features menu on the bar on the top of the page, click Dynamic DNS. Enable Enabling dynamic DNS will reveal further configuration options. Dynamic DNS: Status: Displays the current dynamic DNS connection status. Server Address: Enter the address of your dynamic DNS server, or select one from the drop-down menu. Host Name: Enter the host name that you registered with your dynamic DNS service provider. User Name: Enter your dynamic DNS username. Password: Enter your dynamic DNS password. Time Out: Enter a timeout time (in hours). Click Save when you are done. At the bottom of the page are the IPv6 host settings. To configure an IPv6 dynamic DNS host, refer to IPv6 Host on page 62. D-Link DIR-842 User Manual 61
-
 1
1 -
2
-
3
-
4
-
5
-
6
-
7
-
8
-
9
-
10
-
11
-
12
-
13
-
14
-
15
-
16
-
17
-
18
-
19
-
20
-
21
-
22
-
23
-
24
-
25
-
26
-
27
-
28
-
29
-
30
-
31
-
32
-
33
-
34
-
35
-
36
-
37
-
38
-
39
-
40
-
41
-
42
-
43
-
44
-
45
-
46
-
47
-
48
-
49
-
50
-
51
-
52
-
53
-
54
-
55
-
56
-
57
-
58
-
59
-
 60
60 -
 61
61 -
 62
62 -
 63
63 -
 64
64 -
 65
65 -
 66
66 -
 67
67 -
 68
68 -
 69
69 -
 70
70 -
71
-
72
-
73
-
74
-
75
-
76
-
77
-
78
-
79
-
80
-
81
-
82
-
83
-
84
-
85
-
86
-
87
-
88
-
89
-
90
-
91
-
92
-
93
-
94
-
95
-
96
-
97
-
98
-
99
-
100
-
101
-
102
-
103
 |
 |