Dell 1600n Multifunction Mono Laser Printer Dell Laser Multi-Function Printer - Page 23
Run the Installation Software, Set IP Address Utility - drivers
 |
View all Dell 1600n Multifunction Mono Laser Printer manuals
Add to My Manuals
Save this manual to your list of manuals |
Page 23 highlights
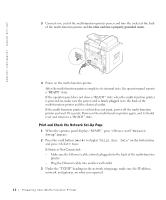
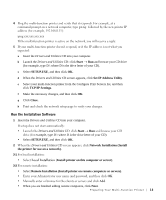
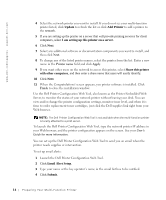
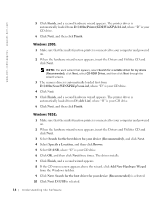
4 Ping the multi-function printer and verify that it responds. For example, at a command prompt on a network computer, type ping followed by the new printer IP address (for example, 192.168.0.11): ping xxx.xxx.xxx.xxx If the multi-function printer is active on the network, you will receive a reply. 5 If your multi-function printer doesn't respond, or if the IP address is not what you expected: a Insert the Drivers and Utilities CD into your computer. b Launch the Drivers and Utilities CD: click Start → Run and browse your CD drive (for example, type D:\ where D is the drive letter of your CD). c Select SETUP.EXE, and then click OK. d When the Drivers and Utilities CD screen appears, click Set IP Address Utility. e Select your multi-function printer from the Configure Print Servers list, and then click TCP/IP Settings. f Make the necessary changes, and then click OK. g Click Close. h Print and check the network setup page to verify your changes. Run the Installation Software 1 Insert the Drivers and Utilities CD into your computer. If setup does not start automatically: • Launch the Drivers and Utilities CD: click Start → Run and browse your CD drive (for example, type D:\ where D is the drive letter of your CD). • Select SETUP.EXE, and then click OK. 2 When the Drivers and Utilities CD screen appears, click Network Installation (Install the printer for use on a network). 3-1 For local installation: • Select Local Installation (Install printer on this computer or server). 3-2 For remote installation: • Select Remote Installation (Install printer on remote computers or servers). • Enter your Administrator user name and password, and then click OK. • Manually enter or browse for the clients or servers and click Add. • When you are finished adding remote computers, click Next. Pr eparing Yo ur Multi-Function Pr inter 1 3
-
 1
1 -
2
-
3
-
4
-
5
-
6
-
7
-
8
-
9
-
10
-
11
-
12
-
13
-
14
-
15
-
16
-
17
-
 18
18 -
 19
19 -
 20
20 -
 21
21 -
 22
22 -
 23
23 -
 24
24 -
 25
25 -
 26
26 -
 27
27 -
 28
28 -
29
-
30
-
31
-
32
-
33
-
34
-
35
-
36
-
37
-
38
-
39
-
40
-
41
-
42
-
43
-
44
-
45
-
46
-
47
-
48
-
49
-
50
-
51
-
52
-
53
-
54
-
55
-
56
-
57
-
58
-
59
-
60
-
61
-
62
-
63
-
64
-
65
-
66
-
67
-
68
-
69
-
70
-
71
-
72
-
73
-
74
-
75
-
76
-
77
-
78
-
79
-
80
-
81
-
82
-
83
-
84
-
85
-
86
-
87
-
88
-
89
-
90
-
91
-
92
-
93
-
94
-
95
-
96
-
97
-
98
-
99
-
100
-
101
-
102
-
103
-
104
-
105
-
106
-
107
-
108
-
109
-
110
-
111
-
112
-
113
-
114
-
115
-
116
-
117
-
118
-
119
-
120
-
121
-
122
-
123
-
124
-
125
-
126
-
127
-
128
-
129
-
130
-
131
-
132
-
133
-
134
 |
 |
