Dell 1600n Multifunction Mono Laser Printer Dell Laser Multi-Function Printer - Page 4

If the phone communication is serial in, your country such as, Austria, Belgium, Italy - paper
Page 4 highlights

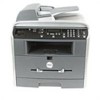
# Use the: When you want to: 13 Document Input Tray Load the document for copying, scanning and sending faxes. 14 Document Guides Ensure proper document feeding. 15 23 22 16 21 17 20 19 18 # Use the: When you want to: 15 Rear Cover Open to remove the paper jams and use the rear output slot when you print the documents from the manual feeder. 16 Rear Output Slot Hold paper as it exits at the rear of the multi-function printer. 17 Power Switch and AC Supply power to the multi-function printer. Power Cord Connector 18 Phone Connector Connect additional devices, such as a telephone or answering machine, to the multi-function printer (Optional). If the phone communication is serial in your country (such as Germany, Sweden, Denmark, Austria, Belgium, Italy, France and Switzerland), remove the plug from the Phone connector ( ) and insert the supplied terminator. 19 Wall Jack Connector Connect the telephone line to your multi-function printer. 20 Optional Tray 2 Cable Connect the optional Tray 2 to your multi-function printer. Connector 21 USB Cable Connector Insert the USB cable. 22 Network Port Connect the multi-function printer to the network port. 23 Control Board Cover Install the optional memory card. iv

  • 1
  • 2
  • 3
  • 4
  • 5
  • 6
  • 7
  • 8
  • 9
  • 10
  • 11
  • 12
  • 13
  • 14
  • 15
  • 16
  • 17
  • 18
  • 19
  • 20
  • 21
  • 22
  • 23
  • 24
  • 25
  • 26
  • 27
  • 28
  • 29
  • 30
  • 31
  • 32
  • 33
  • 34
  • 35
  • 36
  • 37
  • 38
  • 39
  • 40
  • 41
  • 42
  • 43
  • 44
  • 45
  • 46
  • 47
  • 48
  • 49
  • 50
  • 51
  • 52
  • 53
  • 54
  • 55
  • 56
  • 57
  • 58
  • 59
  • 60
  • 61
  • 62
  • 63
  • 64
  • 65
  • 66
  • 67
  • 68
  • 69
  • 70
  • 71
  • 72
  • 73
  • 74
  • 75
  • 76
  • 77
  • 78
  • 79
  • 80
  • 81
  • 82
  • 83
  • 84
  • 85
  • 86
  • 87
  • 88
  • 89
  • 90
  • 91
  • 92
  • 93
  • 94
  • 95
  • 96
  • 97
  • 98
  • 99
  • 100
  • 101
  • 102
  • 103
  • 104
  • 105
  • 106
  • 107
  • 108
  • 109
  • 110
  • 111
  • 112
  • 113
  • 114
  • 115
  • 116
  • 117
  • 118
  • 119
  • 120
  • 121
  • 122
  • 123
  • 124
  • 125
  • 126
  • 127
  • 128
  • 129
  • 130
  • 131
  • 132
  • 133
  • 134

iv
13
Document Input Tray
Load the document for copying, scanning and sending
faxes.
14
Document Guides
Ensure proper document feeding.
#
Use the:
When you want to:
15
Rear Cover
Open to remove the paper jams and use the rear output slot
when you print the documents from the manual feeder.
16
Rear Output Slot
Hold paper as it exits at the rear of the multi-function
printer.
17
Power Switch and AC
Power Cord Connector
Supply power to the multi-function printer.
18
Phone Connector
Connect additional devices, such as a telephone or
answering machine, to the multi-function printer
(Optional).
If the phone communication is serial in
your country (such as
Germany, Sweden, Denmark,
Austria, Belgium, Italy, France and Switzerland), remove the
plug from the Phone connector
(
)
and insert the
supplied terminator.
19
Wall Jack Connector
Connect the telephone line to your multi-function printer.
20
Optional Tray 2 Cable
Connector
Connect the optional Tray 2 to your multi-function printer.
21
USB Cable Connector
Insert the USB cable.
22
Network Port
Connect the multi-function printer to the network port.
23
Control Board Cover
Install the optional memory card.
#
Use the:
When you want to:
16
15
22
23
21
20
18
19
17