Dell 1720 User's Guide (HTML) - Page 68
Installing Additional Printer Software, Printers and Faxes - printer driver windows 7
 |
UPC - 884116025122
View all Dell 1720 manuals
Add to My Manuals
Save this manual to your list of manuals |
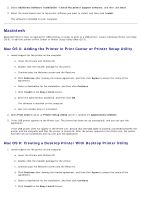
Page 68 highlights
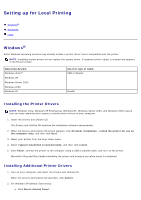
b. Double-click Printers and Other Hardware. c. Double-click Printers and Faxes. For Windows XP (Classic Start menu): Click Start® Settings® Printers and Faxes. For Windows Vista (Classic Start menu) and all other Windows versions: Click Start® Settings® Printers. For Windows Vista (default Start menu): a. Click ® Control Panel. b. Click Hardware and Sound. c. Click Printers. 3. Double-click Add Printer. The Add Printer Wizard opens. 4. Click Next. 5. Select Local printer attached to this computer, and then click Next. You are prompted to attach the printer to the computer. 6. Select the port you want your printer to use, and then click Next. 7. Select Have Disk. 8. Browse to your CD drive, and select the correct directory for your operating system. NOTE: If you installed the printer drivers from the Drivers and Utilities CD before you connected the printer to your computer, the HBP (host based printing) driver for your operating system was installed by default. Operating System Windows Vista Windows XP Windows 2003 Server Windows 2000 Windows NT Software Path D:\Drivers\Print\Win_2kXP\ D:\Drivers\Print\Win_NT.40\ NOTE: After selecting the directory containing your printer drivers, you may be prompted for additional files in order to continue installation. Insert the operating system CD, and then click OK. 9. Click Open, and then click OK. 10. Select the type of driver you want to install (HBP or PS) in the Manufacturer list, and the printer model in the Printers list, and then click Next. 11. Proceed through the rest of the Add Printer Wizard, and then click Finish to install the printer driver. Installing Additional Printer Software 1. Turn on your computer, and insert the Drivers and Utilities CD. The Drivers and Utilities CD should launch the installation software automatically.
-
 1
1 -
2
-
3
-
4
-
5
-
6
-
7
-
8
-
9
-
10
-
11
-
12
-
13
-
14
-
15
-
16
-
17
-
18
-
19
-
20
-
21
-
22
-
23
-
24
-
25
-
26
-
27
-
28
-
29
-
30
-
31
-
32
-
33
-
34
-
35
-
36
-
37
-
38
-
39
-
40
-
41
-
42
-
43
-
44
-
45
-
46
-
47
-
48
-
49
-
50
-
51
-
52
-
53
-
54
-
55
-
56
-
57
-
58
-
59
-
60
-
61
-
62
-
 63
63 -
 64
64 -
 65
65 -
 66
66 -
 67
67 -
 68
68 -
 69
69 -
 70
70 -
 71
71 -
 72
72 -
 73
73 -
74
-
75
-
76
-
77
-
78
-
79
-
80
-
81
-
82
-
83
-
84
-
85
-
86
-
87
-
88
 |
 |
