Dell 3100cn Color Laser Printer User's Guide - Page 14
Operation on SuSE 8.2/9
 |
View all Dell 3100cn Color Laser Printer manuals
Add to My Manuals
Save this manual to your list of manuals |
Page 14 highlights
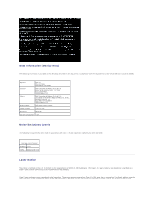
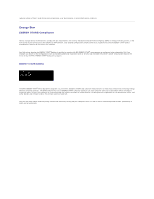
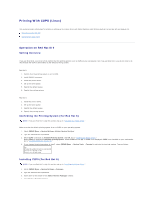
The browser is activated and the CUPS window appears. NOTE: For Red Hat 8, select GNOME Menu ® System Tools ® CUPS Printer Configuration. 2. Click Manage Printers. 3. Click Configure Printer of the queue for which you want to specify the printing options. 4. Type root as the user name, and type the administrator's password. 5. Specify the required settings, and then click Continue. The message Printer xxx has been configured successfully. appears. The setting is complete. Execute printing from the software program. Uninstalling the Printer Driver 1. Select Main Menu ® System Tools ® Terminal. 2. Type the following command in the terminal window. su (Type the administrator's password) rpm -e Dell-Laser-Printer-3100cn The printer driver is uninstalled. Operation on SuSE 8.2/9 Installing the Printer Driver 1. Double-click Dell-Laser-Printer-3100cn-x.x-x.noarch.rpm in the Drivers and Utilities CD. 2. Click Install package with YaST. 3. Type the administrator's password. Installation starts. When the installation is complete, the window is automatically closed. Setting Up the Queue To execute printing, you must set up the print queue on your workstation. Setting Up the Queue on SuSE 8.2 1. Select SuSE work menu ® Administration ® YaST2 modules ® Hardware ® Printer. or select SuSE work menu ® System ® YaST2 and then type the password, and select Hardware ® Printer. 2. Type the administrator's password. 3. Printer setup: Autodetected printers is activated. For USB connections: a. Select Dell Inc. Dell Laser Printer 3100cn on USB (//Dell/Laser%20Printer%203100cn?serial=xxxxxxxxxx) as Available are, and then click Configure. For parallel connections: a. Select Other (not detected) as Available are in Printers to configure, and then click Configure. b. Select Parallel printer as Connection for printer, and then click Next. c. Click Next. For network connections: a. Select Other (not detected) as Available are in Printers to configure, and then click Configure. b. Select Show more connection types as Connection for printer, and then click Next. c. Select LPD filtering and forwarding queue, and then click Next. d. Type the printer's IP address in Host name of the printer server, and type the name of the printer queue in Name of the remote queue (for example, lp). Click Next. 4. Select DELL in Select manufacturer. Select Laser Printer 3100cn as Select Model, and then click Next.
-
 1
1 -
2
-
3
-
4
-
5
-
6
-
7
-
8
-
 9
9 -
 10
10 -
 11
11 -
 12
12 -
 13
13 -
 14
14 -
 15
15 -
 16
16 -
 17
17 -
 18
18 -
 19
19 -
20
-
21
-
22
-
23
-
24
-
25
-
26
-
27
-
28
-
29
-
30
-
31
-
32
-
33
-
34
-
35
-
36
-
37
-
38
-
39
-
40
-
41
-
42
-
43
-
44
-
45
-
46
-
47
-
48
-
49
-
50
-
51
-
52
-
53
-
54
-
55
-
56
-
57
-
58
-
59
-
60
-
61
-
62
-
63
-
64
-
65
-
66
-
67
-
68
-
69
-
70
-
71
-
72
-
73
-
74
-
75
-
76
-
77
-
78
-
79
-
80
-
81
-
82
-
83
-
84
-
85
-
86
-
87
-
88
-
89
-
90
-
91
-
92
-
93
-
94
-
95
-
96
-
97
-
98
-
99
-
100
-
101
-
102
-
103
-
104
-
105
-
106
-
107
-
108
-
109
-
110
-
111
-
112
-
113
-
114
-
115
-
116
-
117
-
118
-
119
-
120
-
121
-
122
-
123
-
124
-
125
-
126
-
127
-
128
-
129
-
130
-
131
-
132
-
133
-
134
-
135
-
136
-
137
-
138
-
139
-
140
-
141
-
142
-
143
-
144
-
145
-
146
-
147
-
148
-
149
-
150
-
151
-
152
-
153
-
154
-
155
-
156
-
157
-
158
-
159
-
160
-
161
-
162
-
163
-
164
-
165
-
166
-
167
-
168
-
169
-
170
-
171
-
172
-
173
-
174
-
175
-
176
-
177
-
178
-
179
-
180
-
181
-
182
-
183
-
184
-
185
-
186
-
187
-
188
-
189
-
190
-
191
-
192
-
193
-
194
-
195
-
196
-
197
-
198
-
199
-
200
-
201
-
202
-
203
-
204
-
205
-
206
-
207
-
208
-
209
-
210
-
211
-
212
-
213
-
214
-
215
-
216
-
217
-
218
-
219
 |
 |
