Dell Force10 S25N-S50N Installing S25N and S25V Systems - Page 24
are installing two S-Series units side-by-side
 |
View all Dell Force10 S25N-S50N manuals
Add to My Manuals
Save this manual to your list of manuals |
Page 24 highlights
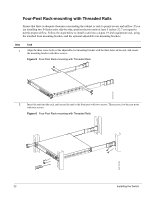
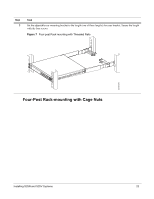
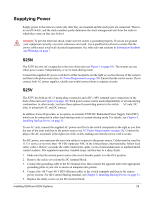
Ensure that there is adequate clearance surrounding the cabinet or rack to permit access and airflow. If you are installing two S-Series units side-by-side, position them at least 5 inches (12.7 cm) apart. Follow the steps below to install the unit into a four-post rack mounting with cage nuts. Step 1 Task Attach the two rear brackets to the side panels. Align the three holes in the bracket with the three holes on the unit, and secure the brackets to the unit using the screws. Figure 8 Four-Post Rack-mounting with Cage Nuts Top View of Brackets AC STACK ID XFP25 XFP26 Alarm DC 27 P28 S50-01-GE-24V Align brackets fn00147f_s25N 2 Align and secure the adjustable bracket onto the rear bracket. 3 Insert the unit into the rear of the rack. Position and secure the unit with two screws into each front bracket flange and into the rack post. Figure 9 Four-Post Rack-mounting with Cage Nuts AC STACK ID XFP25 XFP26 Alarm DC 27 P28 S50-01-GE-24V fn00147a_s25N 24 Installing the Switch
-
 1
1 -
2
-
3
-
4
-
5
-
6
-
7
-
8
-
9
-
10
-
11
-
12
-
13
-
14
-
15
-
16
-
17
-
18
-
 19
19 -
 20
20 -
 21
21 -
 22
22 -
 23
23 -
 24
24 -
 25
25 -
 26
26 -
 27
27 -
 28
28 -
 29
29 -
30
-
31
-
32
-
33
-
34
-
35
-
36
-
37
-
38
-
39
-
40
-
41
-
42
-
43
-
44
-
45
-
46
-
47
-
48
-
49
-
50
-
51
-
52
-
53
-
54
 |
 |
