Dell Latitude 3190 Owners Manual - Page 27
Installing keyboard
 |
View all Dell Latitude 3190 manuals
Add to My Manuals
Save this manual to your list of manuals |
Page 27 highlights
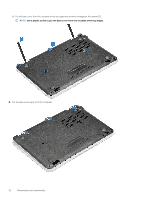
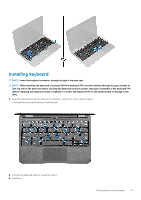
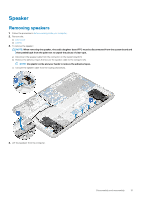
Installing keyboard NOTE: Insert the keyboard connector through the gap in the palm rest. NOTE: When installing the keyboard of Latitude 3190 the keyboard FPC must be inserted through the gap carefully at the top side of the palm rest before securing the keyboard onto the system. Improper reassembly of the keyboard FPC before replacing the keyboard results in inability to connect the keyboard FPC to the system board or damage to the FPC. 1. Align the keyboard trim with the tabs on the computer, and press it until it clicks into place. The image shows the press points on the keyboard. 2. Connect the keyboard cable on the system board. 3. Install the: Disassembly and reassembly 27
-
 1
1 -
2
-
3
-
4
-
5
-
6
-
7
-
8
-
9
-
10
-
11
-
12
-
13
-
14
-
15
-
16
-
17
-
18
-
19
-
20
-
21
-
 22
22 -
 23
23 -
 24
24 -
 25
25 -
 26
26 -
 27
27 -
 28
28 -
 29
29 -
 30
30 -
 31
31 -
 32
32 -
33
-
34
-
35
-
36
-
37
-
38
-
39
-
40
-
41
-
42
-
43
-
44
-
45
-
46
-
47
-
48
-
49
-
50
-
51
-
52
-
53
-
54
-
55
-
56
-
57
-
58
-
59
-
60
-
61
-
62
-
63
-
64
-
65
 |
 |
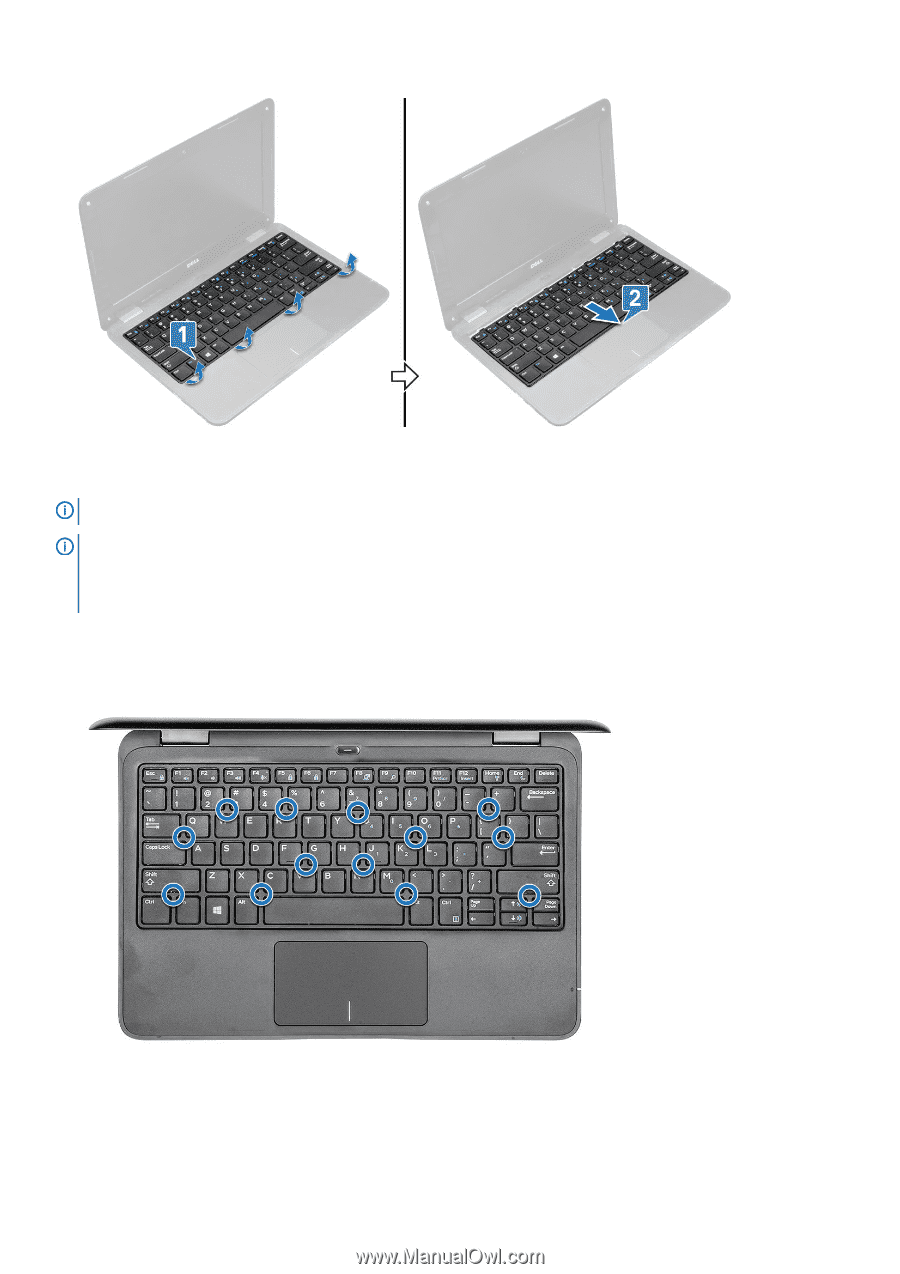
Installing keyboard
NOTE:
Insert the keyboard connector through the gap in the palm rest.
NOTE:
When installing the keyboard of Latitude 3190 the keyboard FPC must be inserted through the gap carefully at
the top side of the palm rest before securing the keyboard onto the system. Improper reassembly of the keyboard FPC
before replacing the keyboard results in inability to connect the keyboard FPC to the system board or damage to the
FPC.
1.
Align the keyboard trim with the tabs on the computer, and press it until it clicks into place.
The image shows the press points on the keyboard.
2.
Connect the keyboard cable on the system board.
3.
Install the:
Disassembly and reassembly
27