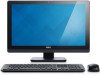
Dell OptiPlex 3011 AIO Owner's Manual
Dell OptiPlex 3011 AIO Manual
 |
View all Dell OptiPlex 3011 AIO manuals
Add to My Manuals
Save this manual to your list of manuals |
Dell OptiPlex 3011 AIO manual content summary:
- Dell OptiPlex 3011 AIO | Owner's Manual - Page 1
Dell OptiPlex 3011 AIO Owner's Manual Regulatory Model: W07B Regulatory Type: W07B001 - Dell OptiPlex 3011 AIO | Owner's Manual - Page 2
problem. WARNING: A WARNING indicates a potential for property damage, personal injury, or death. © 2013 Dell Inc. Trademarks used in this text: Dell™, the DELL logo, Dell Precision™, Precision ON™,ExpressCharge™, Latitude™, Latitude ON™, OptiPlex the Windows Vista start button, and Office Outlook® - Dell OptiPlex 3011 AIO | Owner's Manual - Page 3
...13 Removing the Optical Disk Drive...13 Installing the Optical Disk Drive...14 Removing the Control Board...14 Installing the Control Board...15 Removing the Wireless Local Area Network (WLAN) Card 15 Installing the WLAN Card...16 Removing the Memory...16 Installing the Memory...17 Removing the - Dell OptiPlex 3011 AIO | Owner's Manual - Page 4
Installing the Power Switch...24 Removing the Hard Drive...24 Installing the Hard Drive...26 Removing the System Board...26 System Board Components...30 Installing the System Board...31 Removing the Display Bracket...31 Installing the Display Bracket...34 Removing the Camera...35 Installing the - Dell OptiPlex 3011 AIO | Owner's Manual - Page 5
only perform troubleshooting and simple repairs as authorized in your product documentation, or as directed by the online or telephone service and support team. Damage due to servicing that is not authorized by Dell is not covered by your warranty. Read and follow the safety instructions that came - Dell OptiPlex 3011 AIO | Owner's Manual - Page 6
programs before you turn off your computer. 1. Shut down the operating system: - In Windows 8: * Using a touch-enabled device: a. Swipe in from the right edge of the screen, opening the Charms menu and select Settings. b. Select the * Using a mouse: and then select Shut down a. Point to upper - Dell OptiPlex 3011 AIO | Owner's Manual - Page 7
devices, cards, and cables before turning on your computer. 1. Replace the cover. CAUTION: To connect a network cable, first plug the cable into the network device and then plug it into the computer. 2. Connect any telephone or network cables to your computer. 3. Connect your computer and all - Dell OptiPlex 3011 AIO | Owner's Manual - Page 8
8 - Dell OptiPlex 3011 AIO | Owner's Manual - Page 9
or install the components from your computer. System Overview The following figure displays the inside view of the computer after the back cover has been removed. The call outs show the names and the layout of the components inside the computer. Inside view 1. optical disk drive 2. control board - Dell OptiPlex 3011 AIO | Owner's Manual - Page 10
5. heat sink 6. memory 7. system board 8. coin-cell battery 9. speaker 10. WLAN card slot 11. hard drive 12. communication port 13. power switch 14. chassis Removing the Stand Cover 1. Follow the procedures in Before Working Inside Your Computer. 2. Place the computer on a flat surface, display side - Dell OptiPlex 3011 AIO | Owner's Manual - Page 11
the screws to secure the VESA stand to the computer. 3. Install: a) stand cover 4. Follow the procedures in After Working Inside Your Computer. Removing the Back Cover 1. Follow the procedures in Before Working Inside Your Computer. 2. Remove: a) stand cover b) VESA stand 3. Using a plastic scribe - Dell OptiPlex 3011 AIO | Owner's Manual - Page 12
4. Remove the back cover from the computer. 12 - Dell OptiPlex 3011 AIO | Owner's Manual - Page 13
it to the computer. 3. Install: a) VESA stand b) stand cover 4. Follow the procedures in After Working Inside Your Computer. Removing the Optical Disk Drive 1. Follow the procedures in Before Working Inside Your Computer. 2. Remove: a) stand cover b) VESA stand c) back cover 3. Remove the screw that - Dell OptiPlex 3011 AIO | Owner's Manual - Page 14
secure it. 2. Slide the optical disk drive to the computer and tighten the screw to secure it. 3. Connect the cables to the control board. 4. Install: a) back cover b) VESA stand c) stand cover 5. Follow the procedures in After Working Inside Your Computer. Removing the Control Board 1. Follow the - Dell OptiPlex 3011 AIO | Owner's Manual - Page 15
to the computer. 3. Connect the cables to the control board. 4. Install: a) back cover b) VESA stand c) stand cover 5. Follow the procedures in After Working Inside Your Computer. Removing the Wireless Local Area Network (WLAN) Card 1. Follow the procedures in Before Working Inside Your Computer - Dell OptiPlex 3011 AIO | Owner's Manual - Page 16
it to the system board. 2. Connect the antenna cables to the WLAN card. 3. Install: a) system board cover b) back cover c) VESA stand d) stand cover 4. Follow the procedures in After Working Inside Your Computer. Removing the Memory 1. Follow the procedures in Before Working Inside Your Computer - Dell OptiPlex 3011 AIO | Owner's Manual - Page 17
back to secure them in place. 3. Place the memory cover back into its place and tighten the screw to secure it. 4. Install: a) back cover b) VESA stand c) stand cover 5. Follow the procedures in After Working Inside Your Computer. Removing the System Board Cover 1. Follow the procedures in Before - Dell OptiPlex 3011 AIO | Owner's Manual - Page 18
the computer. 2. Tighten the screws to secure the system board cover to the computer. 3. Install: a) back cover b) VESA stand c) stand cover 4. Follow the procedures in After Working Inside Your Computer. Removing the Coin-Cell Battery 1. Follow the procedures in Before Working Inside Your Computer - Dell OptiPlex 3011 AIO | Owner's Manual - Page 19
downward until the release latch springs back into place and secures it. 3. Install: a) system board cover b) back cover c) VESA stand d) stand cover 4. Follow the procedures in After Working Inside Your Computer. Removing the Heat Sink 1. Follow the procedures in Before Working Inside Your Computer - Dell OptiPlex 3011 AIO | Owner's Manual - Page 20
to the computer and remove it from the computer. Installing the System Fan 1. Place the system fan on the computer. 2. Guide the system-fan cable through its tab on the computer and connect the cable to the system board. 3. Install: a) system board cover b) back cover c) VESA stand d) stand cover 20 - Dell OptiPlex 3011 AIO | Owner's Manual - Page 21
and then move it inward to secure it with the retention hook. 3. Install: a) heat sink b) system board cover c) back cover d) VESA stand e) stand cover 4. Follow the procedures in After Working Inside Your Computer. Removing the Intrusion Switch 1. Follow the procedures in Before Working Inside Your - Dell OptiPlex 3011 AIO | Owner's Manual - Page 22
computer. 2. Guide the intrusion-switch cables through the tabs on the computer and connect the cable to the system board. 3. Install: a) system fan b) system board cover c) back cover d) VESA stand e) stand cover 4. Follow the procedures in After Working Inside Your Computer. Removing the Speakers - Dell OptiPlex 3011 AIO | Owner's Manual - Page 23
the computer. 2. Guide the speaker cables through the tabs on the computer and connect the cable to the system board. 3. Install: a) system board cover b) back cover c) VESA stand d) stand cover 4. Follow the procedures in After Working Inside Your Computer. Removing the Power Switch 1. Follow the - Dell OptiPlex 3011 AIO | Owner's Manual - Page 24
. 2. Guide the power-switch cable through the tabs on the computer and connect the power-switch cable to the system board. 3. Install: a) system board cover b) back cover c) VESA stand d) stand cover 4. Follow the procedures in After Working Inside Your Computer. Removing the Hard Drive 1. Follow - Dell OptiPlex 3011 AIO | Owner's Manual - Page 25
4. Turn and place the hard drive on the hard-drive bracket to access the hard-drive cable. Disconnect the hard-drive cable from the hard drive. 5. Remove the screws that secure the hard-drive bracket to the hard drive and remove the hard drive from the harddrive bracket. 25 - Dell OptiPlex 3011 AIO | Owner's Manual - Page 26
the hard-drive cable to the hard drive and place the hard drive into its slot on the computer. 3. Tighten the screws to secure the hard-drive bracket to the computer. 4. Install: a) back cover b) VESA stand c) stand cover 5. Follow the procedures in After Working Inside Your Computer. Removing the - Dell OptiPlex 3011 AIO | Owner's Manual - Page 27
4. Remove the screws that secure the system board to the chassis of the computer and slide the system board to release it from the chassis. 27 - Dell OptiPlex 3011 AIO | Owner's Manual - Page 28
5. Lift the system board from one side to remove it from the computer. 28 - Dell OptiPlex 3011 AIO | Owner's Manual - Page 29
29 - Dell OptiPlex 3011 AIO | Owner's Manual - Page 30
board connector 4. SATA connectors 5. intrusion switch connector 6. hard drive/optical drive power connector 7. converter board connector 8. camera connector 9. system fan connector 10. CPU Socket 11. coin-cell battery 12. SO-DIMM memory slots (2) 13. headphone connector 14. microphone connector 15 - Dell OptiPlex 3011 AIO | Owner's Manual - Page 31
the cables to the system board. 4. Install: a) optical disk drive b) hard drive c) heat sink d) WLAN card e) memory f) system board cover g) back cover h) VESA stand i) stand cover 5. Follow the procedures in After Working Inside Your Computer. Removing the Display Bracket 1. Follow the procedures - Dell OptiPlex 3011 AIO | Owner's Manual - Page 32
4. Remove the screws that secure the display bracket to the computer. NOTE: The number of screws to be removed in touch display is 8 only. 32 - Dell OptiPlex 3011 AIO | Owner's Manual - Page 33
5. Release the display bracket from its tab on the chassis and remove it from the computer. 33 - Dell OptiPlex 3011 AIO | Owner's Manual - Page 34
secure the display bracket to the computer. 3. Guide the camera cable and the display cable through their tabs. 4. Install: a) system board b) power switch c) intrusion switch d) system fan e) control board f) optical disk drive g) hard drive h) heat sink i) memory j) WLAN card k) system board cover - Dell OptiPlex 3011 AIO | Owner's Manual - Page 35
cover e) WLAN card f) memory g) heat sink h) hard drive i) optical drive j) control board k) system fan l) intrusion switch m) power switch n) system board o) display bracket 3. Remove the screws that secure the camera to the computer and remove it from the computer. Installing the Camera 1. Place - Dell OptiPlex 3011 AIO | Owner's Manual - Page 36
c) power switch d) intrusion switch e) system fan f) control board g) optical disk drive h) hard drive i) heat sink j) memory k) WLAN card l) system board cover m) back cover n) VESA stand o) stand cover 4. Follow the procedures in After Working Inside Your Computer. Removing the Serial Port 1. - Dell OptiPlex 3011 AIO | Owner's Manual - Page 37
Port 1. Tighten the screws to secure the serial port to the computer. 2. Guide the serial-port cable through its tabs on the computer and connect it to the system board. 3. Install: a) system board cover b) back cover c) VESA stand d) stand cover 4. Follow the procedures in After Working Inside Your - Dell OptiPlex 3011 AIO | Owner's Manual - Page 38
38 - Dell OptiPlex 3011 AIO | Owner's Manual - Page 39
defined boot device order and boot directly to a specific device (for example: optical drive or hard drive). During the Power-on Self Test (POST), when the Dell logo appears, you can: • Access System Setup by pressing key • Bring up the one-time boot menu by pressing key The one-time boot - Dell OptiPlex 3011 AIO | Owner's Manual - Page 40
, Ownership Tag, Ownership Date, Manufacture Date, and Express Service Code. • Memory Information - Displays Memory Installed, Memory Available, Memory Speed, Memory Channels Mode, Memory Technology, DIMM 1 Size, DIMM 2 Size. • Processor Information - Displays Processor Type, Core Count, Processor - Dell OptiPlex 3011 AIO | Owner's Manual - Page 41
default) • Enabled w/ImageServer • Enable UEFI Network Stack NOTE: Depending on the computer and its installed devices, the items listed in this section may . Allows you to configure the operating mode of the integrated SATA hard drive controller. • Disabled - The SATA controllers are hidden. • ATA - Dell OptiPlex 3011 AIO | Owner's Manual - Page 42
Option SMART Reporting USB Configuration OSD Button Management Audio Miscellaneous Devices Table 4. Security Option Admin Password Description This field controls if the hard drive errors for the integrated drives are reported during system startup. This technology is part of the SMART (Self - Dell OptiPlex 3011 AIO | Owner's Manual - Page 43
's internal hard disk drive (HDD). Successful changes to this password take effect immediately. The drive does not always prompt for the system and internal HDD passwords when powered on from the off state (a cold boot). Also, Service from Absolute Software. • Deactivate - This option is enabled by - Dell OptiPlex 3011 AIO | Owner's Manual - Page 44
or disable the execute disable mode of the processor. • Enable CPU XD Support - This option is enabled by default. Allows you to enable or disable : • Save to File- Saves the key to a user-selected file • Replace from File- Replaces the current key with a key from a user-selected file • Append from - Dell OptiPlex 3011 AIO | Owner's Manual - Page 45
Option Table 6. Performance Option Multi Core Support Intel® SpeedStep™ C States Control Hyper-Thread Control Rapid Start Technology Table 7. Power Management Option AC Recovery Auto On Time Description • Delete All Keys- Deletes all the keys NOTE: If you disable the Custom Mode, all the changes - Dell OptiPlex 3011 AIO | Owner's Manual - Page 46
USB Wake Support - This option is enabled by default. This option allows the computer to power up from the power supply. The options differ based on the form factor. • Disabled - Does not allow the system to power on by special LAN signals when it receives a wake-up signal from the LAN or wireless - Dell OptiPlex 3011 AIO | Owner's Manual - Page 47
the sign-on screen displays a message, that displays the keystroke sequence required to enter the BIOS Boot Option Menu. • Enable F12 Boot Option menu - This option . Wireless Option Wireless Device Enable Table 11. Maintenance Option Service Tag Asset Tag SERR Messages Table 12. Cloud Desktop Option - Dell OptiPlex 3011 AIO | Owner's Manual - Page 48
only when the Integrated NIC control in the System Configuration group is set to Enable with Cloud Desktop. This option specifies the primary IP port of the Cloud Desktop with which the client software communicates. The default Server Port value is 06910. NOTE: This option is relevant only when the - Dell OptiPlex 3011 AIO | Owner's Manual - Page 49
. 2. Go to dell.com/support. 3. If you have your computer's Service Tag or Express Service Code: NOTE: To locate the Service Tag, click Where is my Service Tag? NOTE: If you cannot find your Service Tag, click Detect Service Tag. Proceed with the instructions on screen. 4. Enter the Service Tag or - Dell OptiPlex 3011 AIO | Owner's Manual - Page 50
To enter a system setup, press immediately after a power-on or reboot. 1. In the System BIOS or System Setup screen, select System Security and press . The System Security screen appears. 2. In the System Security screen, verify that Password Status is Unlocked. 3. Select System Password - Dell OptiPlex 3011 AIO | Owner's Manual - Page 51
data loss. If you are unable to fix the problem yourself, service and support personnel can use the diagnostics results to help you solve the problem. NOTE: Before proceeding download and install the latest BIOS version from support.dell.com Enhanced Pre-Boot System Assessment (ePSA) Diagnostics The - Dell OptiPlex 3011 AIO | Owner's Manual - Page 52
52 - Dell OptiPlex 3011 AIO | Owner's Manual - Page 53
Problem Description The motherboard may be faulty. The motherboard, power supply or power supply cabling may be faulty. The motherboard, memory or processor may be faulty. The coin-cell battery may be faulty. The system may be in recovery mode. Download and install the latest BIOS from support.dell - Dell OptiPlex 3011 AIO | Owner's Manual - Page 54
Dell Technical Support. The computer failed to complete the boot routine three consecutive times for the same error. Contact Dell and report the checkpoint code (nnnn) to the support technician. System fan failure Possible fan failure CPU fan failure Possible CPU fan failure Hard-disk drive - Dell OptiPlex 3011 AIO | Owner's Manual - Page 55
Dell and report the issue to a Drive SELF support technician. MONITORING SYSTEM has reported that a parameter has exceeded its normal operating range. Dell recommends that you back up your data regularly. A parameter out of range may or may not indicate a potential hard drive problem - Dell OptiPlex 3011 AIO | Owner's Manual - Page 56
56 - Dell OptiPlex 3011 AIO | Owner's Manual - Page 57
External Display Support Specification up to 1600 MHz, unbuffered non-ECC, dual‑channel DDR3 configuration two internally-accessible DDR3 SODIMM sockets 2 GB and 4 GB 2 GB 8 GB Specification Integrated Intel® HD Graphics 2500 shared memory Wi-Fi display NOTE: Wi-Fi display requires a wireless card - Dell OptiPlex 3011 AIO | Owner's Manual - Page 58
support Volume controls Table 19. Communications Feature Network adapter Wireless Table 20. Cards Feature Mini PCI Express Table 21. Displays Feature Type Maximum resolution Refresh rate Operating angle Pixel pitch Controls Dimensions: Height Width Diagonal Table 22. Drives Feature Hard drive - Dell OptiPlex 3011 AIO | Owner's Manual - Page 59
and Connectors Feature Audio: Network adapter USB 2.0 USB 3.0 Serial Media card reader Table 24. Power Feature AC Adapter: Type C compatible one 8-in-1 slot Specification 180 W 50 Hz - 60 Hz 100 VAC - 240 VAC 19.50 VDC 2.34 A Maximum 9.23 A 30.00 mm (1.18 inches) 76.20 mm (3.00 inches) 155.00 mm - Dell OptiPlex 3011 AIO | Owner's Manual - Page 60
28. Controls and Lights Feature Power button light Hard Drive activity light Camera LED Back panel: Link integrity light on integrated network adapter : Network activity light on integrated network adapter Specification White light - Solid white light indicates power-on state; blinking white light - Dell OptiPlex 3011 AIO | Owner's Manual - Page 61
: Operating Storage Maximum shock: Operating Storage Altitude: Operating Storage Airborne contaminant level Specification Green light - The power supply is turned on and is functional. The power cable must be connected to the power connector (at the back of the computer) and the electrical outlet - Dell OptiPlex 3011 AIO | Owner's Manual - Page 62
62 - Dell OptiPlex 3011 AIO | Owner's Manual - Page 63
product catalog. Availability varies by country and product, and some services may not be available in your area. To contact Dell for sales, technical support, or customer-service issues: 1. Go to dell.com/contactdell. 2. Select your country or region from the interactive world map. When you select
-
 1
1 -
 2
2 -
 3
3 -
 4
4 -
 5
5 -
 6
6 -
 7
7 -
8
-
9
-
10
-
11
-
12
-
13
-
14
-
15
-
16
-
17
-
18
-
19
-
20
-
21
-
22
-
23
-
24
-
25
-
26
-
27
-
28
-
29
-
30
-
31
-
32
-
33
-
34
-
35
-
36
-
37
-
38
-
39
-
40
-
41
-
42
-
43
-
44
-
45
-
46
-
47
-
48
-
49
-
50
-
51
-
52
-
53
-
54
-
55
-
56
-
57
-
58
-
59
-
60
-
61
-
62
-
63
 |
 |

Dell OptiPlex 3011 AIO
Owner's Manual
Regulatory Model: W07B
Regulatory Type: W07B001