Dell OptiPlex 960 Setup and Quick Reference Guide - Page 22
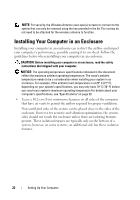
Installing Your Computer in an Enclosure
 |
View all Dell OptiPlex 960 manuals
Add to My Manuals
Save this manual to your list of manuals |
Page 22 highlights
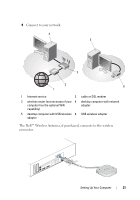
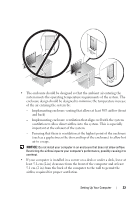
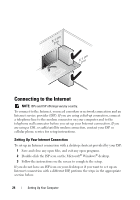
NOTE: For security, the Wireless Antenna uses special screws to connect to the system that can only be removed using the key provided in the kit. The screws do not need to be attached for the wireless antenna to function. Installing Your Computer in an Enclosure Installing your computer in an enclosure can restrict the airflow and impact your computer's performance, possibly causing it to overheat. Follow the guidelines below when installing your computer in an enclosure. CAUTION: Before installing your computer in an enclosure, read the safety instructions that shipped with your computer. NOTICE: The operating temperature specifications indicated in this document reflect the maximum ambient operating temperature. The room's ambient temperature needs to be a consideration when installing your system in an enclosure. For example, if the ambient room temperature is at 25° C (77° F), depending on your system's specifications, you may only have 10° C (18° F) before you reach your system's maximum operating temperature For details about your computer's specifications, see "Specifications" on page 29. • Leave a 10.2-cm (4-in) minimum clearance on all sides of the computer that have air vents to permit the airflow required for proper ventilation. Non-ventilated sides of the system can be placed close to the sides of the enclosure. However, for acoustic and vibration optimization, the system sides should not touch the enclosure unless there are isolating features present. These isolation features are typically only on the bottom of a system, however, on some systems, an additional side has these isolation features. 22 Setting Up Your Computer
-
 1
1 -
2
-
3
-
4
-
5
-
6
-
7
-
8
-
9
-
10
-
11
-
12
-
13
-
14
-
15
-
16
-
 17
17 -
 18
18 -
 19
19 -
 20
20 -
 21
21 -
 22
22 -
 23
23 -
 24
24 -
 25
25 -
 26
26 -
 27
27 -
28
-
29
-
30
-
31
-
32
-
33
-
34
-
35
-
36
-
37
-
38
-
39
-
40
-
41
-
42
-
43
-
44
-
45
-
46
-
47
-
48
-
49
-
50
-
51
-
52
-
53
-
54
-
55
-
56
-
57
-
58
-
59
-
60
-
61
-
62
-
63
-
64
-
65
-
66
-
67
-
68
-
69
-
70
 |
 |