Dell PowerEdge R740xd2 EMC Installation and Service Manual - Page 58
Installing PERC card into the internal PERC riser
 |
View all Dell PowerEdge R740xd2 manuals
Add to My Manuals
Save this manual to your list of manuals |
Page 58 highlights
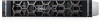
Figure 31. Removing the PERC card from the internal PERC riser Next steps Replace the PERC card into the PERC riser. Installing PERC card into the internal PERC riser Prerequisites 1. Follow the safety guidelines listed in Safety instructions. 2. Power off the system and all attached peripherals. 3. Disconnect the system from the electrical outlet, and disconnect the peripherals. 4. Ensure that all internal cables are routed correctly and connected, and no tools or extra parts are left inside the system. 5. Open the drive bays, remove all drives, and then close the drive bays. 6. Remove the power supply units. 7. Remove the system from the rack and place it on an ESD work bench. For more information, see the Rail Installation Guide available at www.dell.com/poweredgemanuals. 8. Remove the system cover. 9. Remove the air shroud. 10. If installed, remove the rear drive cage. 11. Remove the internal PERC riser. Steps 1. Align the PERC card to the guiding pins on the internal PERC riser and push the card in. 2. Route the battery cable around the riser and connect to the PERC card. 58 Installing and removing system components
-
 1
1 -
2
-
3
-
4
-
5
-
6
-
7
-
8
-
9
-
10
-
11
-
12
-
13
-
14
-
15
-
16
-
17
-
18
-
19
-
20
-
21
-
22
-
23
-
24
-
25
-
26
-
27
-
28
-
29
-
30
-
31
-
32
-
33
-
34
-
35
-
36
-
37
-
38
-
39
-
40
-
41
-
42
-
43
-
44
-
45
-
46
-
47
-
48
-
49
-
50
-
51
-
52
-
 53
53 -
 54
54 -
 55
55 -
 56
56 -
 57
57 -
 58
58 -
 59
59 -
 60
60 -
 61
61 -
 62
62 -
 63
63 -
64
-
65
-
66
-
67
-
68
-
69
-
70
-
71
-
72
-
73
-
74
-
75
-
76
-
77
-
78
-
79
-
80
-
81
-
82
-
83
-
84
-
85
-
86
-
87
-
88
-
89
-
90
-
91
-
92
-
93
-
94
-
95
-
96
-
97
-
98
-
99
-
100
-
101
-
102
-
103
-
104
-
105
-
106
-
107
-
108
-
109
-
110
-
111
-
112
-
113
-
114
-
115
-
116
-
117
-
118
-
119
-
120
-
121
-
122
-
123
-
124
-
125
-
126
-
127
-
128
-
129
-
130
-
131
-
132
-
133
-
134
-
135
-
136
-
137
-
138
-
139
-
140
-
141
-
142
-
143
-
144
-
145
-
146
-
147
-
148
-
149
-
150
-
151
-
152
-
153
-
154
-
155
-
156
-
157
-
158
-
159
-
160
-
161
-
162
-
163
-
164
-
165
-
166
-
167
-
168
-
169
-
170
-
171
-
172
-
173
-
174
-
175
-
176
-
177
-
178
-
179
-
180
-
181
-
182
 |
 |
