Dell PowerEdge R740xd2 EMC Installation and Service Manual - Page 75
Drive backplane bracket, Removing the drive bay 1 backplane bracket
 |
View all Dell PowerEdge R740xd2 manuals
Add to My Manuals
Save this manual to your list of manuals |
Page 75 highlights
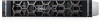
Figure 50. Installing a 3.5-inch drive adapter into the 3.5-inch drive carrier Next steps 1. Install the 3.5-inch drive carrier into the system. 2. If removed, install the front bezel. Drive backplane bracket Removing the drive bay 1 backplane bracket Prerequisites NOTE: Ensure that the drive bay 1 and 2 is in open position to access the backplane bracket. 1. Follow the safety guidelines listed in Safety instructions. 2. Follow the procedure listed in Before working inside your system. 3. If installed, remove the front bezel. 4. Remove all the drives from drive bay 1. 5. Open the drive bays. Steps 1. Using a Phillips #1 screwdriver, remove the screws on top of the drive bay 1. 2. Slide the bracket to the right to disengage it from the slots at the bay base in drive bay 1. 3. Lift the bracket away from the system. Installing and removing system components 75
-
 1
1 -
2
-
3
-
4
-
5
-
6
-
7
-
8
-
9
-
10
-
11
-
12
-
13
-
14
-
15
-
16
-
17
-
18
-
19
-
20
-
21
-
22
-
23
-
24
-
25
-
26
-
27
-
28
-
29
-
30
-
31
-
32
-
33
-
34
-
35
-
36
-
37
-
38
-
39
-
40
-
41
-
42
-
43
-
44
-
45
-
46
-
47
-
48
-
49
-
50
-
51
-
52
-
53
-
54
-
55
-
56
-
57
-
58
-
59
-
60
-
61
-
62
-
63
-
64
-
65
-
66
-
67
-
68
-
69
-
 70
70 -
 71
71 -
 72
72 -
 73
73 -
 74
74 -
 75
75 -
 76
76 -
 77
77 -
 78
78 -
 79
79 -
 80
80 -
81
-
82
-
83
-
84
-
85
-
86
-
87
-
88
-
89
-
90
-
91
-
92
-
93
-
94
-
95
-
96
-
97
-
98
-
99
-
100
-
101
-
102
-
103
-
104
-
105
-
106
-
107
-
108
-
109
-
110
-
111
-
112
-
113
-
114
-
115
-
116
-
117
-
118
-
119
-
120
-
121
-
122
-
123
-
124
-
125
-
126
-
127
-
128
-
129
-
130
-
131
-
132
-
133
-
134
-
135
-
136
-
137
-
138
-
139
-
140
-
141
-
142
-
143
-
144
-
145
-
146
-
147
-
148
-
149
-
150
-
151
-
152
-
153
-
154
-
155
-
156
-
157
-
158
-
159
-
160
-
161
-
162
-
163
-
164
-
165
-
166
-
167
-
168
-
169
-
170
-
171
-
172
-
173
-
174
-
175
-
176
-
177
-
178
-
179
-
180
-
181
-
182
 |
 |
