Dell PowerEdge T620 Owner's Manual - Page 102
Installing The System Left Side Cover, Control Panel
 |
View all Dell PowerEdge T620 manuals
Add to My Manuals
Save this manual to your list of manuals |
Page 102 highlights
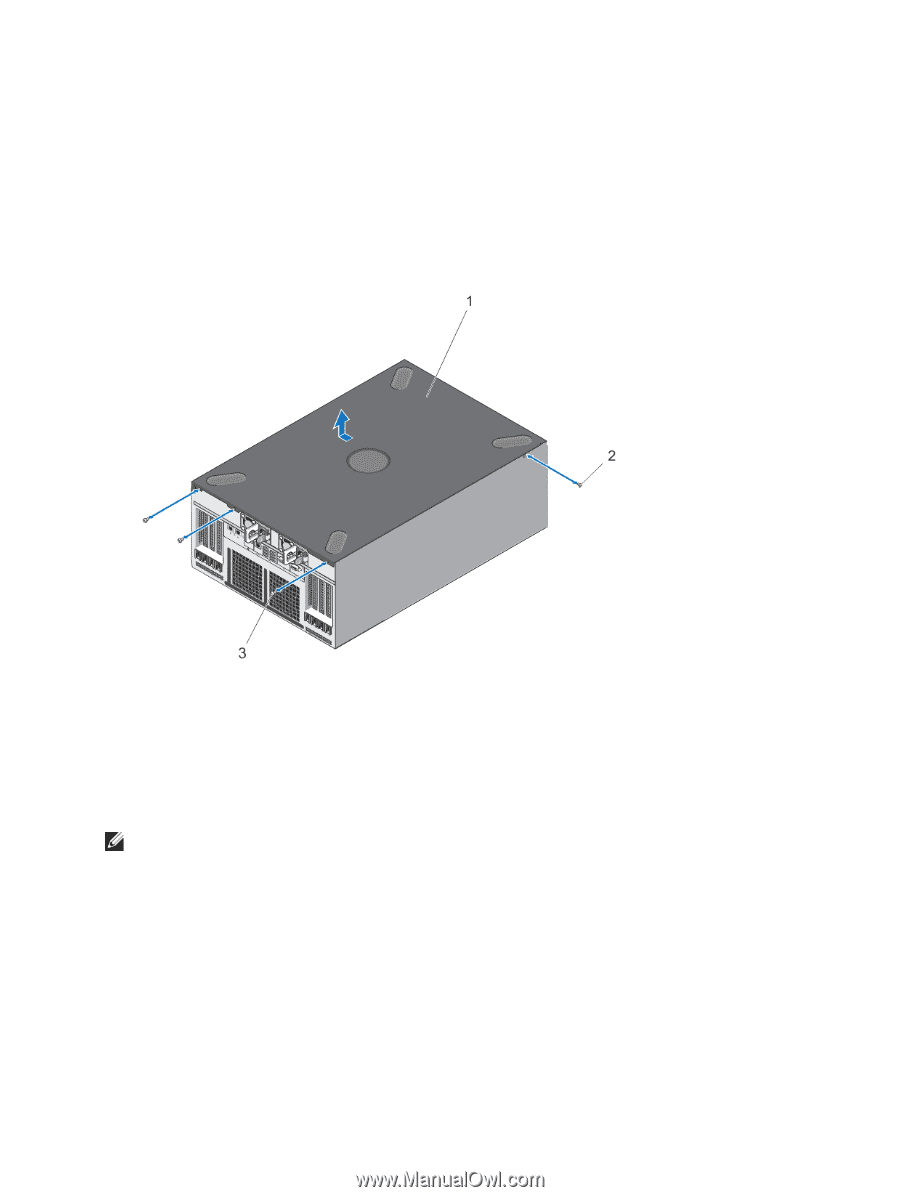
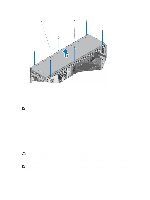
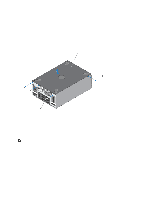
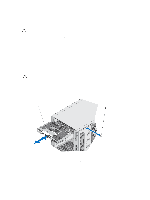
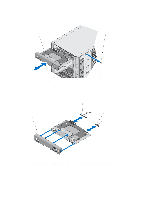
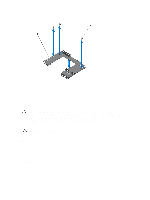
1. Turn off the system, including any attached peripherals, and disconnect the system from the electrical outlet and peripherals. 2. Lay the system on its side. 3. Remove the screw securing the left side cover at the left front bottom of the chassis. 4. Remove the three screws securing the left side cover at the back end of the chassis. 5. Gently dislocate the cover by pushing up the cover from the bottom. 6. Remove the cover away from the system. Figure 54. Removing and Installing the System Left Side Cover 1. left side cover 2. bottom screw 3. screws (3) Installing The System Left Side Cover NOTE: It is recommended that you always use a static mat and static strap while working on components in the interior of the system. 1. Replace the system top cover. See Installing The System Top Cover. 2. Slightly offset the left side cover toward the top of the system so that the tabs on the side cover align with the slots on the bottom of the chassis. 3. Secure the left side cover onto the chassis using the screws. Control Panel 102
-
 1
1 -
2
-
3
-
4
-
5
-
6
-
7
-
8
-
9
-
10
-
11
-
12
-
13
-
14
-
15
-
16
-
17
-
18
-
19
-
20
-
21
-
22
-
23
-
24
-
25
-
26
-
27
-
28
-
29
-
30
-
31
-
32
-
33
-
34
-
35
-
36
-
37
-
38
-
39
-
40
-
41
-
42
-
43
-
44
-
45
-
46
-
47
-
48
-
49
-
50
-
51
-
52
-
53
-
54
-
55
-
56
-
57
-
58
-
59
-
60
-
61
-
62
-
63
-
64
-
65
-
66
-
67
-
68
-
69
-
70
-
71
-
72
-
73
-
74
-
75
-
76
-
77
-
78
-
79
-
80
-
81
-
82
-
83
-
84
-
85
-
86
-
87
-
88
-
89
-
90
-
91
-
92
-
93
-
94
-
95
-
96
-
 97
97 -
 98
98 -
 99
99 -
 100
100 -
 101
101 -
 102
102 -
 103
103 -
 104
104 -
 105
105 -
 106
106 -
 107
107 -
108
-
109
-
110
-
111
-
112
-
113
-
114
-
115
-
116
-
117
-
118
-
119
-
120
-
121
-
122
-
123
-
124
-
125
-
126
-
127
-
128
-
129
-
130
-
131
-
132
-
133
-
134
-
135
-
136
-
137
-
138
-
139
-
140
-
141
-
142
-
143
-
144
-
145
-
146
-
147
-
148
-
149
 |
 |