Dell PowerEdge T640 EMC PowerEdge T640 Installation and Service Manual - Page 101
Optical drives and tape drives, Optical drives and tape drives specifications
 |
View all Dell PowerEdge T640 manuals
Add to My Manuals
Save this manual to your list of manuals |
Page 101 highlights
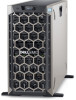
Figure 58. Installing a NVMe drive bay or flex bay Next steps 1. Install the backplane to the NVMe drive bay or flex bay. 2. Connect the slim optical drive and the back plane cables. 3. Follow the procedure listed in After working inside your system on page 66. Optical drives and tape drives Optical drives and tape drives specifications Your system supports one of the following configurations: Table 35. System configurations System Eight 3.5 inch drives or sixteen 2.5 inch drives Sixteen 2.5 inch drives and eight NVMe drives Systems with up to eighteen 3.5 inch drives Systems with up to thirty-two 2.5 inch drives Configurations Up to two SATA slim optical drives and one SAS tape drive One SATA slim optical drive One SATA slim optical drive or one SAS tape drive One SATA slim optical drive Removing the optical or tape drive blank Prerequisites 1. Follow the safety guidelines listed in Safety instructions on page 65. 2. Follow the procedure listed in Before working inside your system on page 66. 3. If installed, remove the front bezel. Installing and removing system components 101
-
 1
1 -
2
-
3
-
4
-
5
-
6
-
7
-
8
-
9
-
10
-
11
-
12
-
13
-
14
-
15
-
16
-
17
-
18
-
19
-
20
-
21
-
22
-
23
-
24
-
25
-
26
-
27
-
28
-
29
-
30
-
31
-
32
-
33
-
34
-
35
-
36
-
37
-
38
-
39
-
40
-
41
-
42
-
43
-
44
-
45
-
46
-
47
-
48
-
49
-
50
-
51
-
52
-
53
-
54
-
55
-
56
-
57
-
58
-
59
-
60
-
61
-
62
-
63
-
64
-
65
-
66
-
67
-
68
-
69
-
70
-
71
-
72
-
73
-
74
-
75
-
76
-
77
-
78
-
79
-
80
-
81
-
82
-
83
-
84
-
85
-
86
-
87
-
88
-
89
-
90
-
91
-
92
-
93
-
94
-
95
-
 96
96 -
 97
97 -
 98
98 -
 99
99 -
 100
100 -
 101
101 -
 102
102 -
 103
103 -
 104
104 -
 105
105 -
 106
106 -
107
-
108
-
109
-
110
-
111
-
112
-
113
-
114
-
115
-
116
-
117
-
118
-
119
-
120
-
121
-
122
-
123
-
124
-
125
-
126
-
127
-
128
-
129
-
130
-
131
-
132
-
133
-
134
-
135
-
136
-
137
-
138
-
139
-
140
-
141
-
142
-
143
-
144
-
145
-
146
-
147
-
148
-
149
-
150
-
151
-
152
-
153
-
154
-
155
-
156
-
157
-
158
-
159
-
160
-
161
-
162
-
163
-
164
-
165
 |
 |
