Dell PowerVault 775N Configuring Windows® Firewall to Work With Dell - Page 42
Moving Files to a Windows Storage Server Computer - troubleshooting
 |
View all Dell PowerVault 775N manuals
Add to My Manuals
Save this manual to your list of manuals |
Page 42 highlights
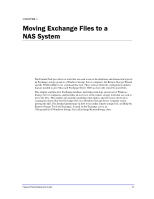
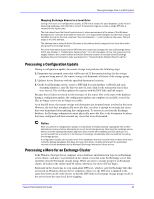
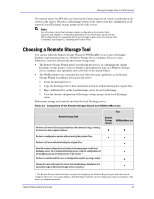
Moving Exchange Files to a NAS System Moving Files to a Windows Storage Server Computer The remote storage tools for Exchange are used to move the databases and transaction logs for an existing Exchange storage group to existing shared folders on the destination Windows Storage Server computer. For this reason, moving Exchange files to a Windows Storage Server computer involves two steps: 1. On the Windows Storage Server computer, create shared folders to store the Exchange databases and transaction logs. 2. Use the Remote Storage Wizard or WSSExchMove.exe to move the Exchange transaction logs and databases to the destination folders. After completing a move, you can view the configuration of the storage groups on the local Exchange server by displaying a Detailed Report. Creating Shares to Host the Exchange Files Before using a remote storage tool to move Exchange databases and transaction logs, you must create and share the folders that will store them on the Windows Storage Server computer. Guidelines for Creating Shares When creating shares to host Exchange databases and transaction logs, the following guidelines apply: With the Feature Pack installed, a Windows Storage Server computer supports as many as four storage groups; the storage groups can come from as many as two Exchange servers. If the Exchange servers are clustered, the Windows Storage Server computer supports storage groups from two virtual Exchange servers. For information about the Exchange cluster configurations that the Feature Pack supports, see Chapter 1, "Planning a Deployment." On the Windows Storage Server computer, the database files for any Exchange store will always be moved to the same designated share. These include the database (.edb) file and the streaming database (.stm) file. To optimize performance and allow for complete restore operations with minimal mail loss, it is recommended that you store database files on a separate volume from the transaction logs. For guidance in deciding where to locate the shared folders that host the databases and transaction logs on the Windows Storage Server computer, see Chapter 1, "Planning a Deployment." You can create a share either by using the New Share for Exchange Files task in the Microsoft Windows Server Administration Web user interface (Web UI) or by using Windows Explorer in Windows Storage Server 2003 to share a folder. Note For help in troubleshooting problems with creating shares for Exchange files, see Chapter 5, "Troubleshooting." Feature Pack Deployment Guide 42
-
 1
1 -
2
-
3
-
4
-
5
-
6
-
7
-
8
-
9
-
10
-
11
-
12
-
13
-
14
-
15
-
16
-
17
-
18
-
19
-
20
-
21
-
22
-
23
-
24
-
25
-
26
-
27
-
28
-
29
-
30
-
31
-
32
-
33
-
34
-
35
-
36
-
 37
37 -
 38
38 -
 39
39 -
 40
40 -
 41
41 -
 42
42 -
 43
43 -
 44
44 -
 45
45 -
 46
46 -
 47
47 -
48
-
49
-
50
-
51
-
52
-
53
-
54
-
55
-
56
-
57
-
58
-
59
-
60
-
61
-
62
-
63
-
64
-
65
-
66
-
67
-
68
-
69
-
70
-
71
-
72
-
73
 |
 |
