Dell Studio 1735 Quick Reference Guide - Page 36
Booting Dell, Diagnostics Utility Partition. Press any key to, continue
 |
View all Dell Studio 1735 manuals
Add to My Manuals
Save this manual to your list of manuals |
Page 36 highlights
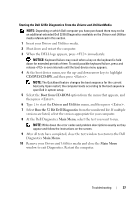
Starting PSA Diagnostics From Your Computer NOTE: If your computer does not display a screen image, contact Dell (see "Contacting Dell" on page 58). NOTE: Troubleshooting using Dell 32 Bit Diagnostics through the Utility Partition, referenced in this section, may or may not be available in your computer. 1 Ensure that the computer is connected to an electrical outlet. 2 Turn on (or restart) your computer. 3 Start PSA Diagnostics in one of the following two ways: a When the DELL™ logo appears, press immediately. Select Diagnostics from the boot menu, and then press . NOTE: If you wait too long and the operating system logo appears, continue to wait until you see the Microsoft® Windows® desktop, then shut down your computer and try again. NOTE: Before attempting option B, the computer must be turned off. b Press and hold the key while powering the computer on. Follow the prompts on the screen, select Diagnostics to start the PSA suite of tests. The computer then runs the Pre-boot Self Assessment, a series of initial tests of your system board, keyboard, hard drive, and display. • During the assessment, provide inputs when prompted. • If a failure is detected, the computer stops and beeps. To stop the assessment and restart the computer, press ; to continue to the next test, press ; to retest the component that failed, press . • If failures are detected during the Pre-boot System Assessment, write down the error code(s) and contact Dell. If the Pre-boot System Assessment completes successfully and your system has 32 Bit Diagnostics, you receive the message Booting Dell Diagnostics Utility Partition. Press any key to continue. 4 Press any key to start the Dell 32 Bit Diagnostics. 36 Troubleshooting
-
 1
1 -
2
-
3
-
4
-
5
-
6
-
7
-
8
-
9
-
10
-
11
-
12
-
13
-
14
-
15
-
16
-
17
-
18
-
19
-
20
-
21
-
22
-
23
-
24
-
25
-
26
-
27
-
28
-
29
-
30
-
 31
31 -
 32
32 -
 33
33 -
 34
34 -
 35
35 -
 36
36 -
 37
37 -
 38
38 -
 39
39 -
 40
40 -
 41
41 -
42
-
43
-
44
-
45
-
46
-
47
-
48
-
49
-
50
-
51
-
52
-
53
-
54
-
55
-
56
-
57
-
58
-
59
-
60
-
61
-
62
-
63
-
64
 |
 |