Epson 755c Product Information Guide - Page 15
Projecting Wirelessly
 |
UPC - 010343855366
View all Epson 755c manuals
Add to My Manuals
Save this manual to your list of manuals |
Page 15 highlights
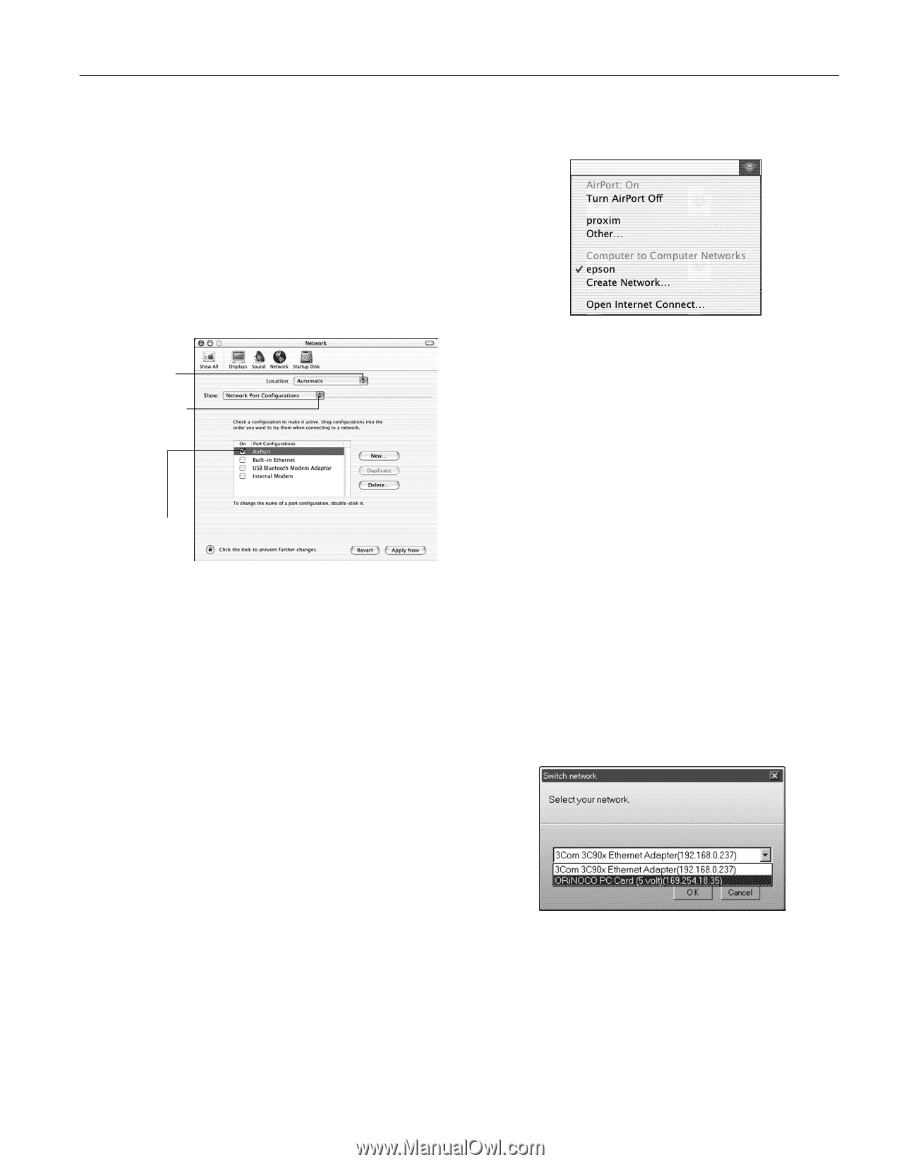
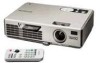
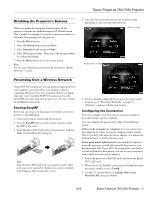
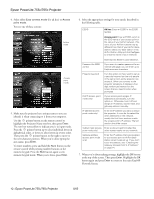
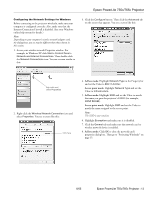
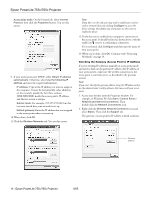
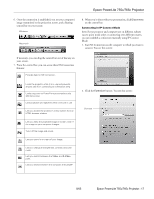
Epson PowerLite 755c/765c Projector Configuring the Network Settings for Macintosh Your AirPort software is automatically configured to allow your Macintosh to detect both computer-to-computer (ad hoc) and access point networks. Typically you only need to select your projector's ESSID (ad hoc) or your AirPort network name (access point) on the Macintosh menu bar. If you're having problems connecting to the projector, follow these steps: 1. From the Apple pull-down menu, select System Preferences and click the Network icon. You see the Network settings menu. Select Automatic Select Network Port Configurations then select AirPort 2. Make sure Location is set to Automatic and select Network Port Configurations in the Show pull-down menu. 3. Under Port Configurations, select AirPort. 4. Click Apply Now and close the window. 5. Ad hoc mode: Go to step 8. Access point mode: Start the AirPort Admin utility. Select your base station, then click Configure. 6. On the AirPort tab, make sure your AirPort network name matches your projector's ESSID. If not, enter the projector's ESSID in the AirPort Network text box and click Update. 7. If you turned DHCP in your projector's Advanced menu, click the Network tab and make sure the Distribute IP addresses checkbox is selected. If you need to select it, click Update. 8. Click the AirPort icon on the menu bar at the top of the Macintosh desktop. You see the AirPort status menu: Check to make sure AirPort is turned on. 9. Select your projector's ESSID (ad hoc) or the name of your AirPort network (access point). Projecting Wirelessly Once you've started EasyMP and set up your projector and computer in either ad hoc mode or access point mode, follow the steps below to start NS Connection and project wirelessly. Note: You must have installed EMP NS Connection from your projector CD-ROM. See the User's Guide for installation instructions. 1. Make sure you've inserted the Epson 802.11g/b card in the projector's card slot (see page 11). 2. Windows: Select EMP NS Connection from the Windows Start menu. Macintosh OS X: Double-click the EMP NS Connection icon in your Applications folder. The first time you start NS Connection, you see a dialog box asking you to select your network. Select the name for your computer's wireless network adapter card and click OK. 8/05 Epson PowerLite 755c/765c Projector - 15
-
 1
1 -
2
-
3
-
4
-
5
-
6
-
7
-
8
-
9
-
 10
10 -
 11
11 -
 12
12 -
 13
13 -
 14
14 -
 15
15 -
 16
16 -
 17
17 -
 18
18 -
 19
19 -
 20
20 -
21
-
22
-
23
-
24
-
25
 |
 |