Epson 755c Product Information Guide - Page 18
Removing the Wireless 802.11G/B Card, Caution
 |
UPC - 010343855366
View all Epson 755c manuals
Add to My Manuals
Save this manual to your list of manuals |
Page 18 highlights
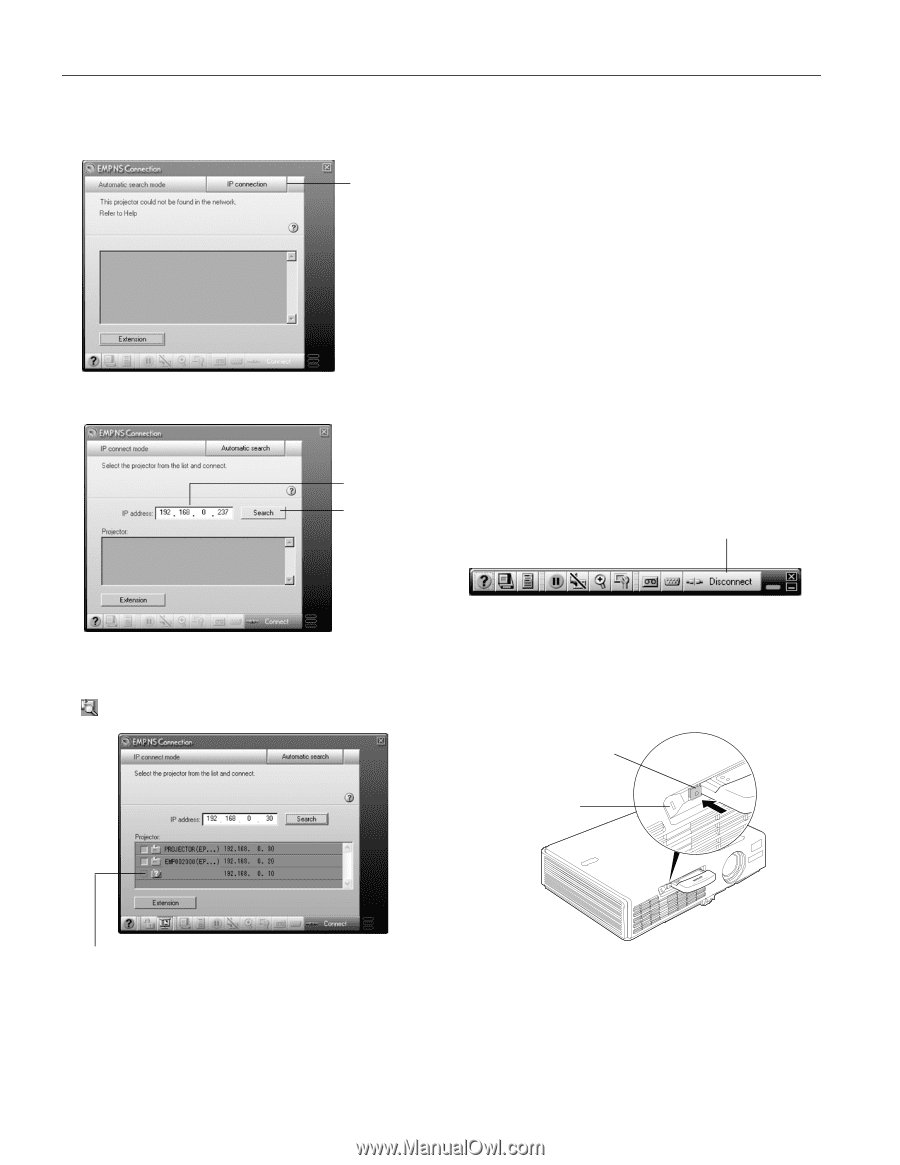
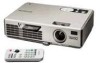
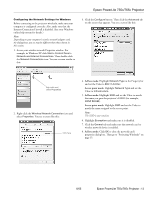
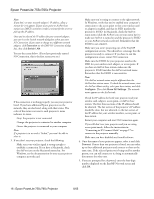
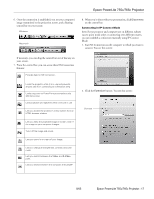
Epson PowerLite 755c/765c Projector 3. Click Use IP connect mode, then click OK. You see this screen: Click here 4. Click IP connection. You see this screen: Enter the IP address and click Search If the search fails to find a projector with the specified IP address, the searching icon turns into a question mark. If this happens, run EasyMP to check the projector's IP address, then repeat this step. Note: If you still don't see the projector, make sure the Internet connection firewall is disabled. 6. Click the projector you want to connect to, then click the Connect button. If more than one projector is listed, you can select additional projectors and connect to them at the same time. 7. If you are prompted for a keyword, enter the four-digit number displayed on the EasyMP Network screen and click OK. The computer's image is transmitted to the projector and appears on the screen. Removing the Wireless 802.11G/B Card Follow these steps to remove the card from your projector: 1. If you're running NS Connection, click Disconnect on the control bar. Click here 5. Enter the projector's IP address and click Search. The IP address is shown in the Projector list and a searching icon appears. 2. Check the card access light to make sure it isn't flashing. Caution: Never remove the card while the card access light is green or flashing. You may damage the card or lose data. 3. Press the eject button. The button pops out. Eject button Access light This icon appears if the search fails to find the projector 18 - Epson PowerLite 755c/765c Projector 4. Press the eject button again. The wireless card partially ejects. 5. Pull the card straight out. Then press the eject button back in to prevent it from being damaged. 8/05
-
 1
1 -
2
-
3
-
4
-
5
-
6
-
7
-
8
-
9
-
10
-
11
-
12
-
 13
13 -
 14
14 -
 15
15 -
 16
16 -
 17
17 -
 18
18 -
 19
19 -
 20
20 -
 21
21 -
 22
22 -
 23
23 -
24
-
25
 |
 |