Epson 7880 Network Guide - Page 42
Checking the LAN, Setting and checking the new IP address
 |
UPC - 010343866874
View all Epson 7880 manuals
Add to My Manuals
Save this manual to your list of manuals |
Page 42 highlights
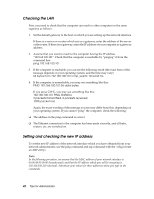
Checking the LAN First, you need to check that the computer can reach to other computers in the same segment, as follows: 1. Set the default gateway to the host on which you are setting up the network interface. If there is a server or a router which acts as a gateway, enter the address of the server or the router. If there is no gateway, enter the IP address of your computer as a gateway address. 2. Assume that you want to reach to the computer having the IP address "192.168.100.101". Check that the computer is reachable by "pinging" it from the command line: ping 192.168.100.101 3. If the computer is reachable, you can see the following result (the exact form of the message depends on your operating system, and the time may vary): 64 bytes from 192:168:100:101:icmp_seq=0. Time=34.ms 4. If the computer is unreachable, you may see something like this: PING 192:168:100:101:56 data bytes If you press Ctrl-C, you may see something like this: 192:168:100:101 PING Statistics 3 packets transmitted, 0 packets received, 100% packet loss Again, the exact wording of the message you see may differ from this, depending on your operating system. If you cannot "ping" the computer, check the following: ❏ The address in the ping command is correct. ❏ The Ethernet connection to the computer has been made correctly, and all hubs, routers, etc. are switched on. Setting and checking the new IP address To set the new IP address of the network interface which you have obtained from your network administrator, use the ping command and arp command with the -s flag (create an ARP entry). Note: In the following procedure, we assume that the MAC address of your network interface is 00:00:48:93:00:00 (hexadecimal), and that the IP address which you will be assigning is 192.168.100.201 (decimal). Substitute your values for these addresses when you type in the commands. 42 Tips for Administrator
-
 1
1 -
2
-
3
-
4
-
5
-
6
-
7
-
8
-
9
-
10
-
11
-
12
-
13
-
14
-
15
-
16
-
17
-
18
-
19
-
20
-
21
-
22
-
23
-
24
-
25
-
26
-
27
-
28
-
29
-
30
-
31
-
32
-
33
-
34
-
35
-
36
-
 37
37 -
 38
38 -
 39
39 -
 40
40 -
 41
41 -
 42
42 -
 43
43 -
 44
44 -
 45
45 -
 46
46
 |
 |
