Epson ActionPrinter 3000 User Manual - Page 26
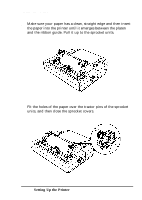
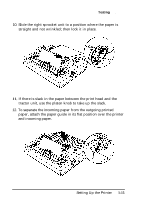
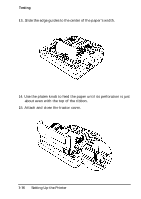
paper, attach the paper guide in its flat position over the printer, and incoming paper.
 |
View all Epson ActionPrinter 3000 manuals
Add to My Manuals
Save this manual to your list of manuals |
Page 26 highlights
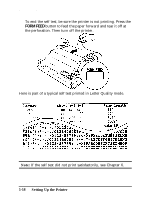
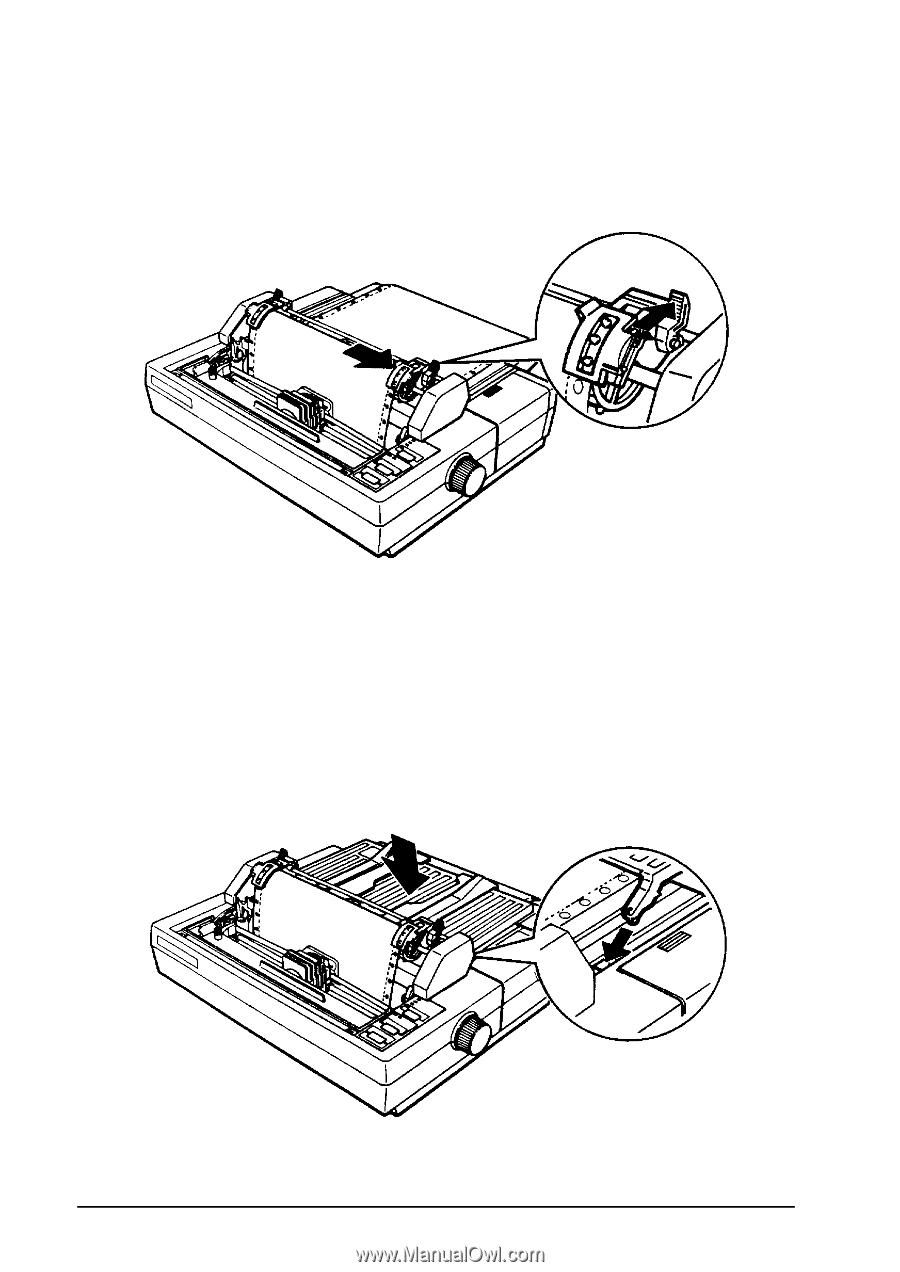
Testing the Printer 10. Slide the right sprocket unit to a position where the paper is straight and not wrinkled; then lock it in place. 11. If there is slack in the paper between the print head and the tractor unit, use the platen knob to take up the slack. 12. To separate the incoming paper from the outgoing printed paper, attach the paper guide in its flat position over the printer and incoming paper. Setting Up the Printer 1-15
-
 1
1 -
2
-
3
-
4
-
5
-
6
-
7
-
8
-
9
-
10
-
11
-
12
-
13
-
14
-
15
-
16
-
17
-
18
-
19
-
20
-
 21
21 -
 22
22 -
 23
23 -
 24
24 -
 25
25 -
 26
26 -
 27
27 -
 28
28 -
 29
29 -
 30
30 -
 31
31 -
32
-
33
-
34
-
35
-
36
-
37
-
38
-
39
-
40
-
41
-
42
-
43
-
44
-
45
-
46
-
47
-
48
-
49
-
50
-
51
-
52
-
53
-
54
-
55
-
56
-
57
-
58
-
59
-
60
-
61
-
62
-
63
-
64
-
65
-
66
-
67
-
68
-
69
-
70
-
71
-
72
-
73
-
74
-
75
-
76
-
77
-
78
-
79
-
80
-
81
-
82
-
83
-
84
-
85
-
86
-
87
-
88
-
89
-
90
-
91
-
92
-
93
-
94
-
95
-
96
-
97
-
98
-
99
-
100
-
101
-
102
-
103
-
104
-
105
-
106
-
107
-
108
-
109
-
110
-
111
-
112
-
113
-
114
-
115
-
116
-
117
-
118
-
119
-
120
-
121
-
122
-
123
-
124
-
125
 |
 |
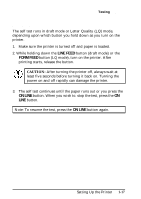
Testing
the Printer
10. Slide the right sprocket unit to a position where the paper is
straight and not wrinkled; then lock it in place.
11.
If there is slack in the paper between the print head and the
tractor unit, use the platen knob to take up the slack.
12. To separate the incoming paper from the outgoing printed
paper, attach the paper guide in its flat position over the printer
and incoming paper.
Setting Up the Printer
1-15