Epson Artisan 837 Quick Guide - Page 3
Using the Touch Panel - cd printing
 |
View all Epson Artisan 837 manuals
Add to My Manuals
Save this manual to your list of manuals |
Page 3 highlights
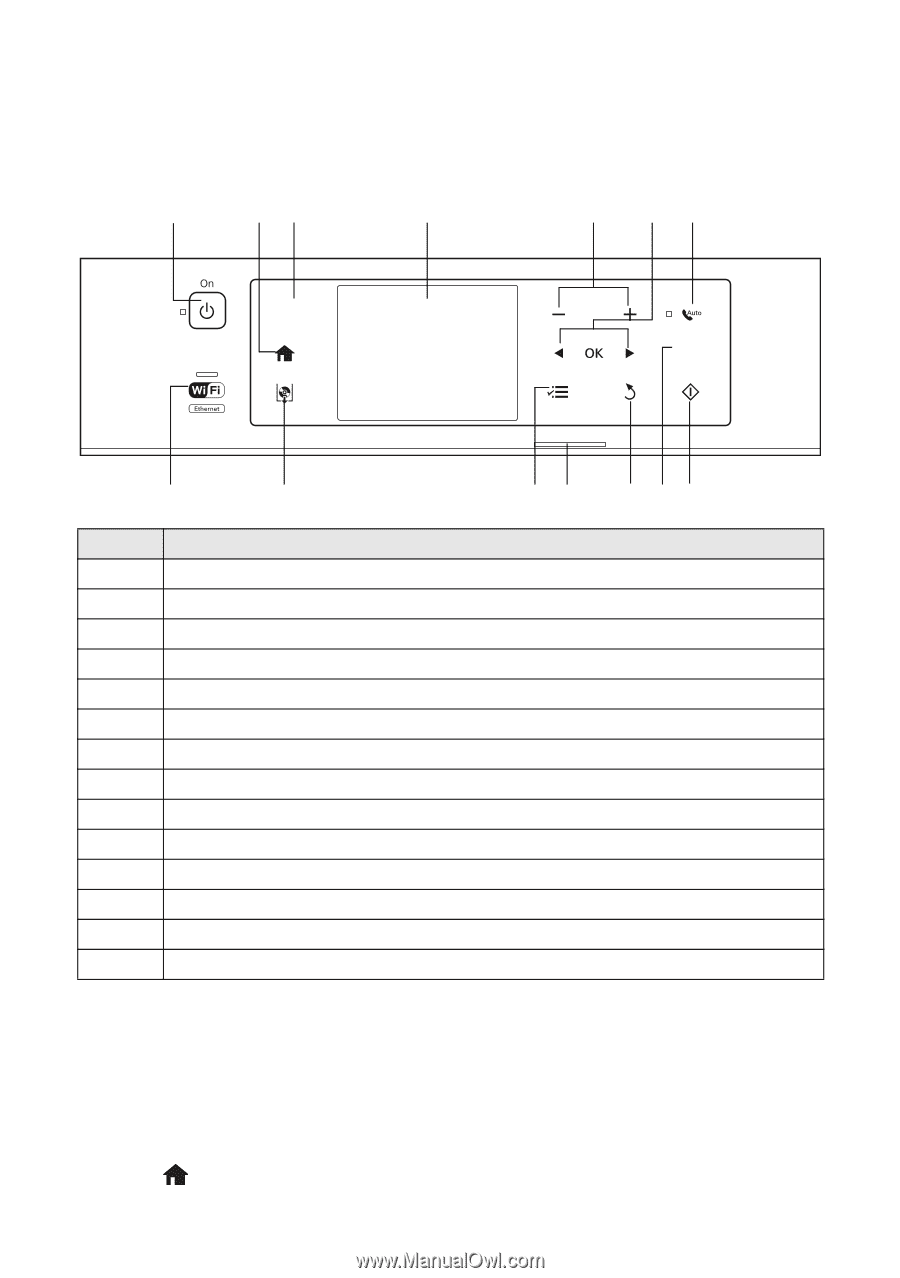
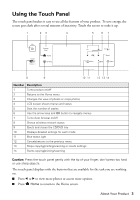
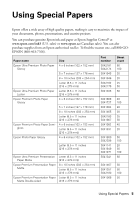
Using the Touch Panel The touch panel makes it easy to use all the features of your product. To save energy, the screen goes dark after several minutes of inactivity. Touch the screen to wake it up. 1 23 4 5 67 Display Crop Home CD Tray Menu Reset Back Start 8 9 10 11 Number Description 1 Turns product on/off 2 Returns to the Home menu 3 Changes the view of photos or crops photos 4 LCD screen shows menus and status 5 Sets the number of copies 6 Use the arrow keys and OK button to navigate menus 7 Turns Auto Answer on/off 8 Shows wireless network status 9 Ejects and closes the CD/DVD tray 10 Displays detailed settings for each mode 11 Blue status light 12 Cancels/returns to the previous menu 13 Stops copying/printing/scanning or resets settings 14 Starts copying/printing/scanning 12 13 14 Caution: Press the touch panel gently with the tip of your finger; don't press too hard or use sharp objects. The touch panel displays only the buttons that are available for the task you are working on. ■ Press l or r to view more photos or access more options. ■ Press Home to return to the Home screen. About Your Product 3
-
 1
1 -
 2
2 -
 3
3 -
 4
4 -
 5
5 -
 6
6 -
 7
7 -
 8
8 -
 9
9 -
10
-
11
-
12
-
13
-
14
-
15
-
16
-
17
-
18
-
19
-
20
-
21
-
22
-
23
-
24
-
25
-
26
-
27
-
28
-
29
-
30
-
31
-
32
-
33
-
34
-
35
-
36
-
37
-
38
-
39
-
40
-
41
-
42
-
43
-
44
 |
 |