Epson CX5400 Quick Reference Guide - Page 25
Aligning the Print Head - stylus error
 |
UPC - 010343848412
View all Epson CX5400 manuals
Add to My Manuals
Save this manual to your list of manuals |
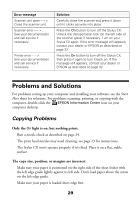
Page 25 highlights
Aligning the Print Head If your printouts look grainy or vertical lines appear jagged, you may need to align the print head. 1. Make sure the Stylus CX is turned on and not printing, and the Error light is off. 2. Load plain, letter-size paper in the sheet feeder. 3. Press the left Menu button until you see Head Alignment, then press the x Color Copy button to print an alignment page. 4. On the test page, select the pattern with the two vertical lines most precisely printed on top of each other. You may need to use a magnifying glass or loupe. Select one pattern each for rows 1, 2, 3, 4, and 5. (In this example, the best pattern in each row has been circled.) 25
-
 1
1 -
2
-
3
-
4
-
5
-
6
-
7
-
8
-
9
-
10
-
11
-
12
-
13
-
14
-
15
-
16
-
17
-
18
-
19
-
 20
20 -
 21
21 -
 22
22 -
 23
23 -
 24
24 -
 25
25 -
 26
26 -
 27
27 -
 28
28 -
 29
29 -
 30
30 -
31
-
32
-
33
-
34
-
35
-
36
-
37
-
38
-
39
-
40
 |
 |

25
Aligning the Print Head
If your printouts look grainy or vertical lines appear jagged, you may need to align
the print head.
1.
Make sure the Stylus CX is turned on and not printing, and the
Error
light
is off.
2.
Load plain, letter-size paper in the sheet feeder.
3.
Press the left
Menu
button until you see
Head Alignment
, then press
the
x
Color Copy
button to print an alignment page.
4.
On the test page, select the pattern with the two vertical lines most precisely
printed on top of each other. You may need to use a magnifying glass or loupe.
Select one pattern each for rows 1, 2, 3, 4, and 5. (In this example, the best
pattern in each row has been circled.)